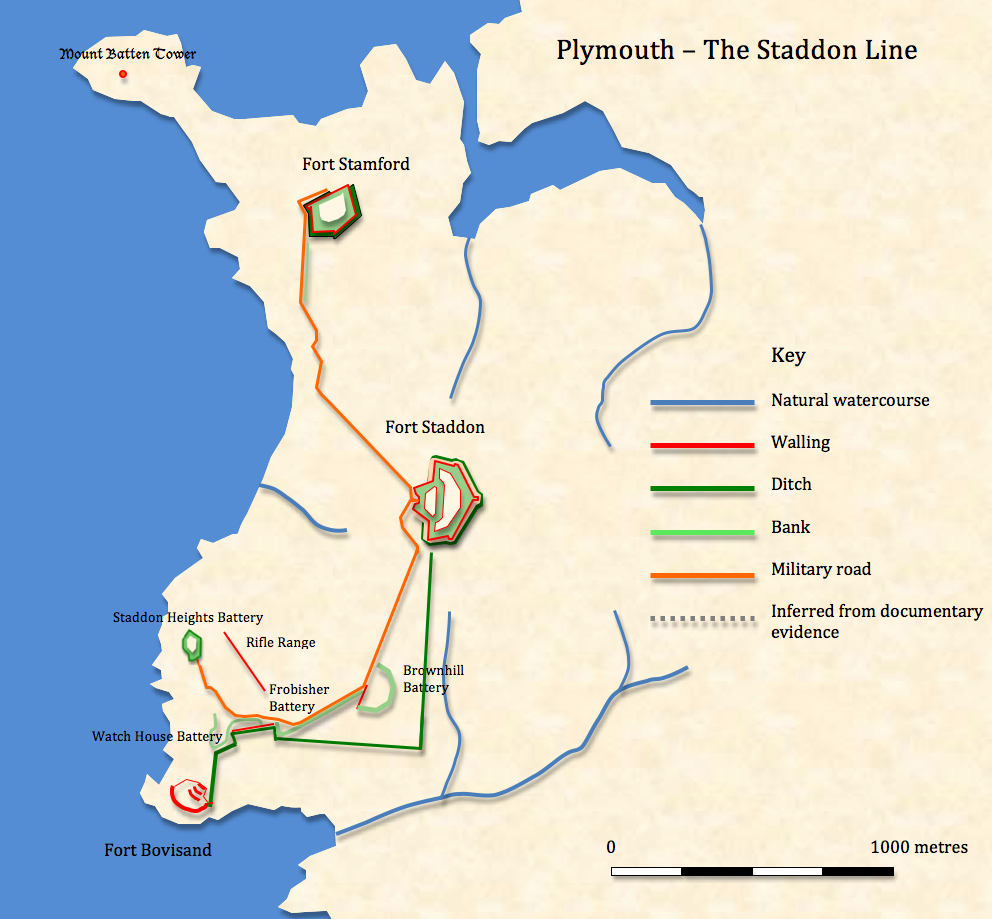
Covering both the sea
approaches to Plymouth harbour from the south west and land approaches
from the south east the defences were originally planned as a series of
forts
and batteries linked by a continuous rampart and ditch running from
West
Hooe to Bovisand Bay. This approach was abandoned although the southern
portion of the trace was completed between Bovisand and Brownhill
Battery. Fort Staddon was relocated nearer the coast and provision made
for two outlying batteries further to the east.
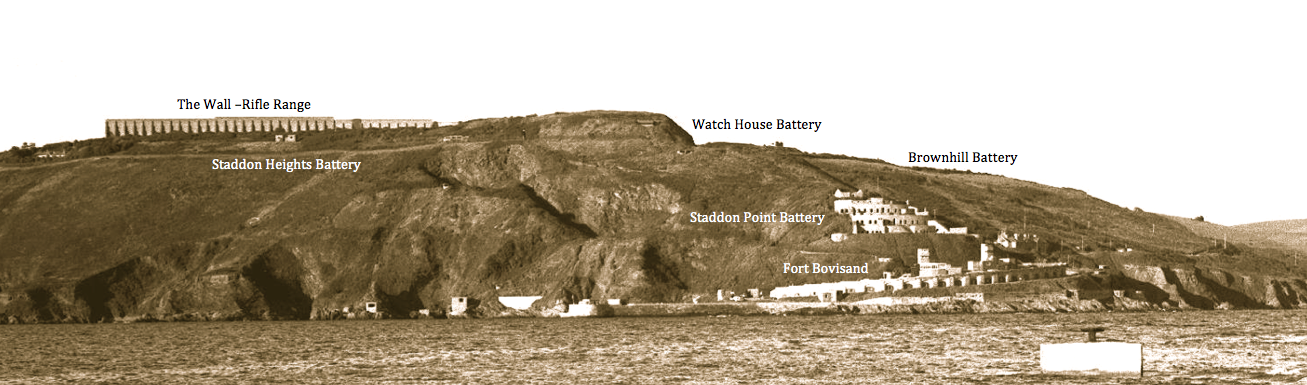
The
southern limit of
the Staddon Line is marked by the complex of fortifications overlooking
Bovisand Bay. This extraordinary group of monuments represents one of
the most interesting collections of defensive works in the country yet
major questions hang over their use, preservation and accessibility.
Staddon Point Battery SX488507
Some interior photographs from 2008 are posted on the UK UE Urbex Urban Exploration Forum site with more to be seen here from 2010. Palmerston Fort Society Log Page
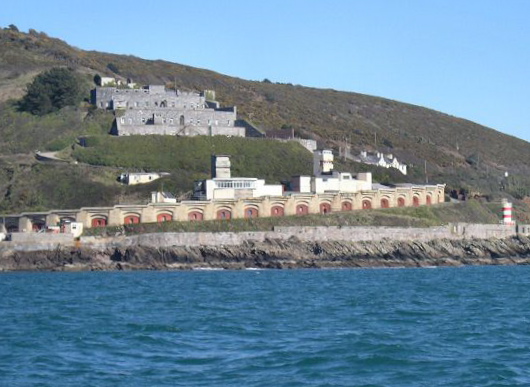
Fort Bovisand and Staddon Point Battery from E
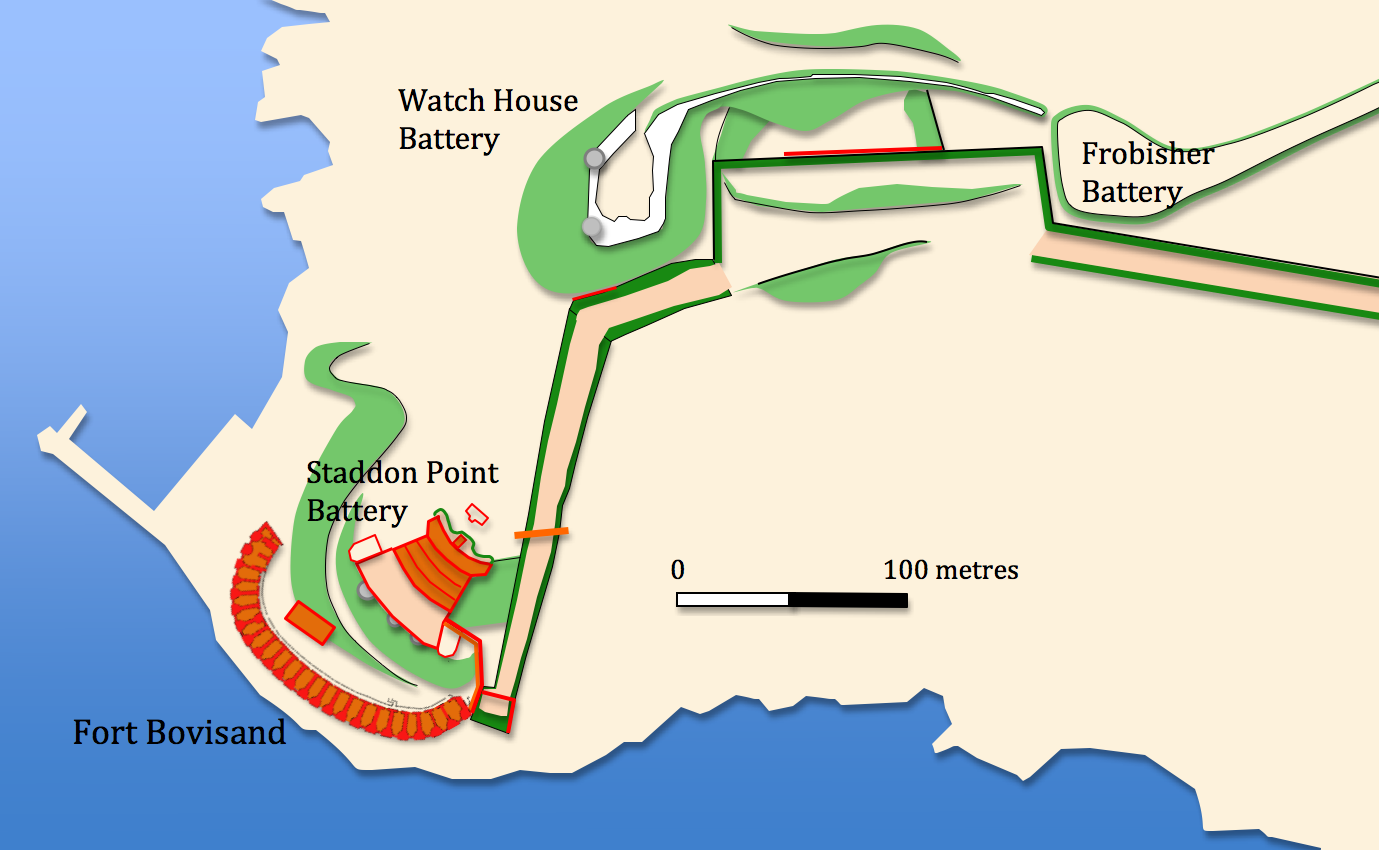
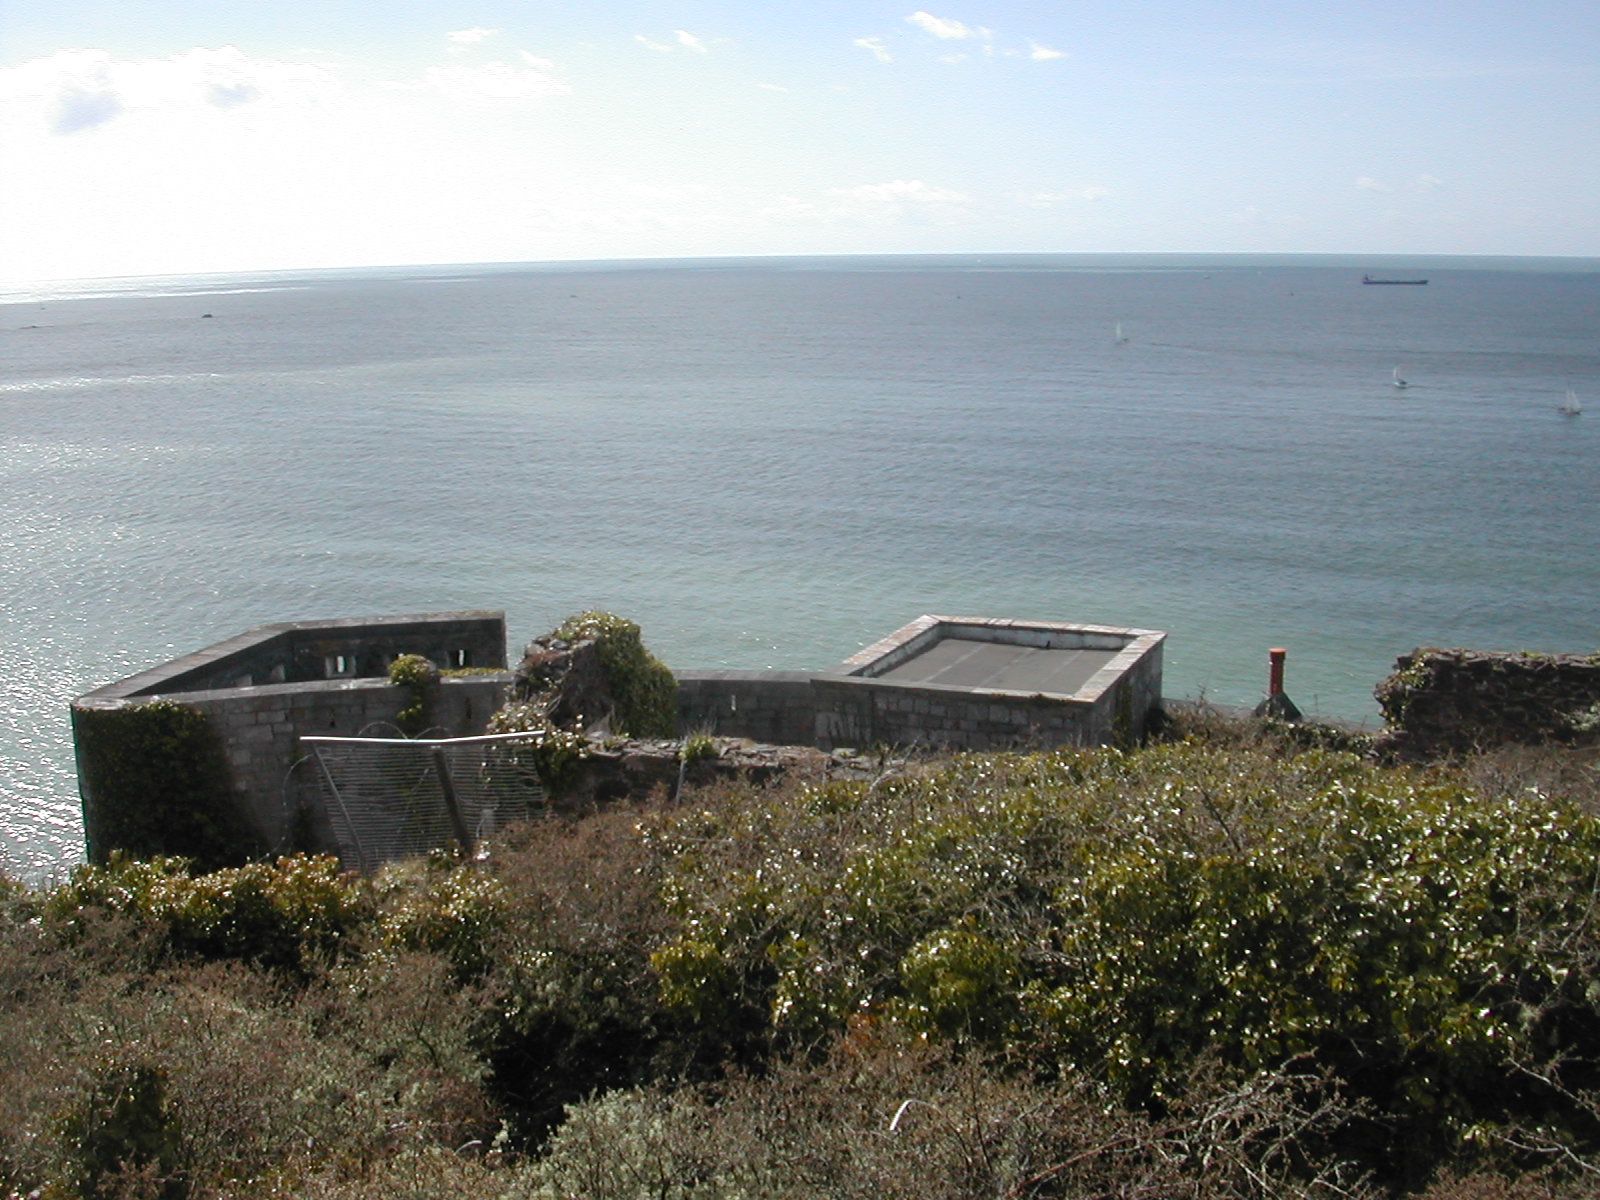
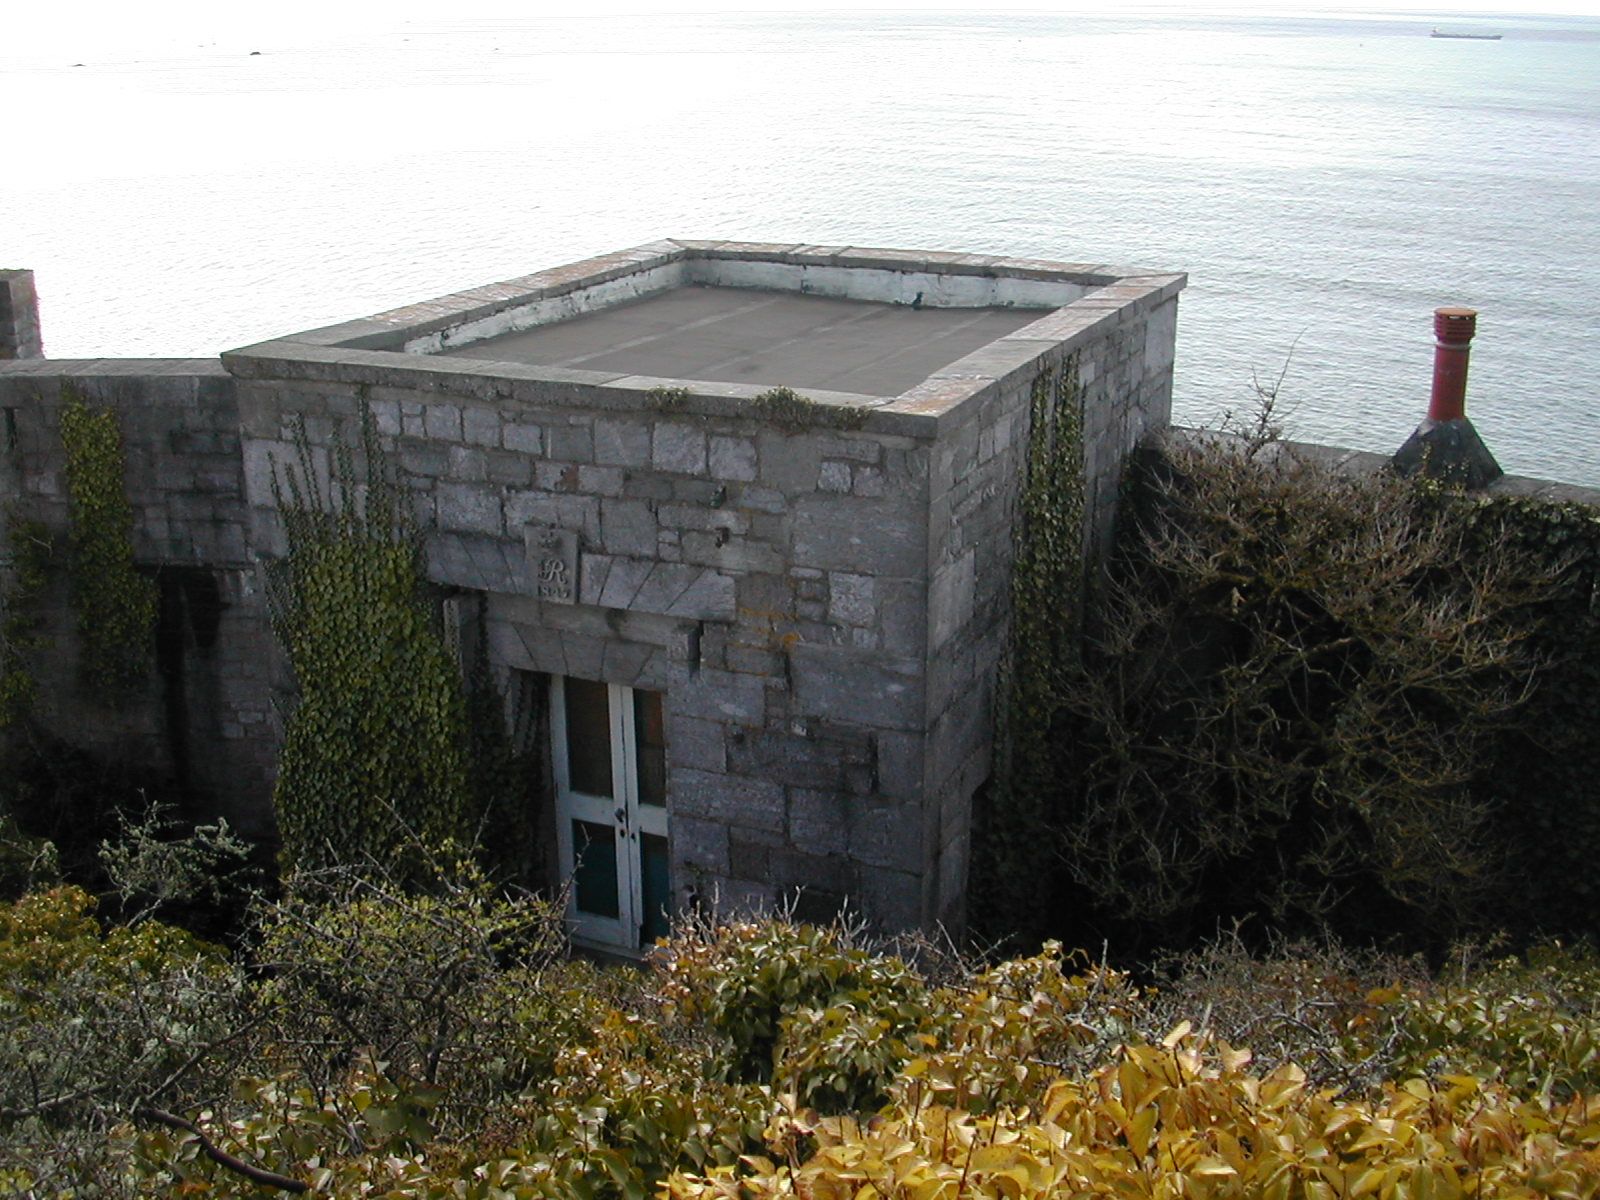
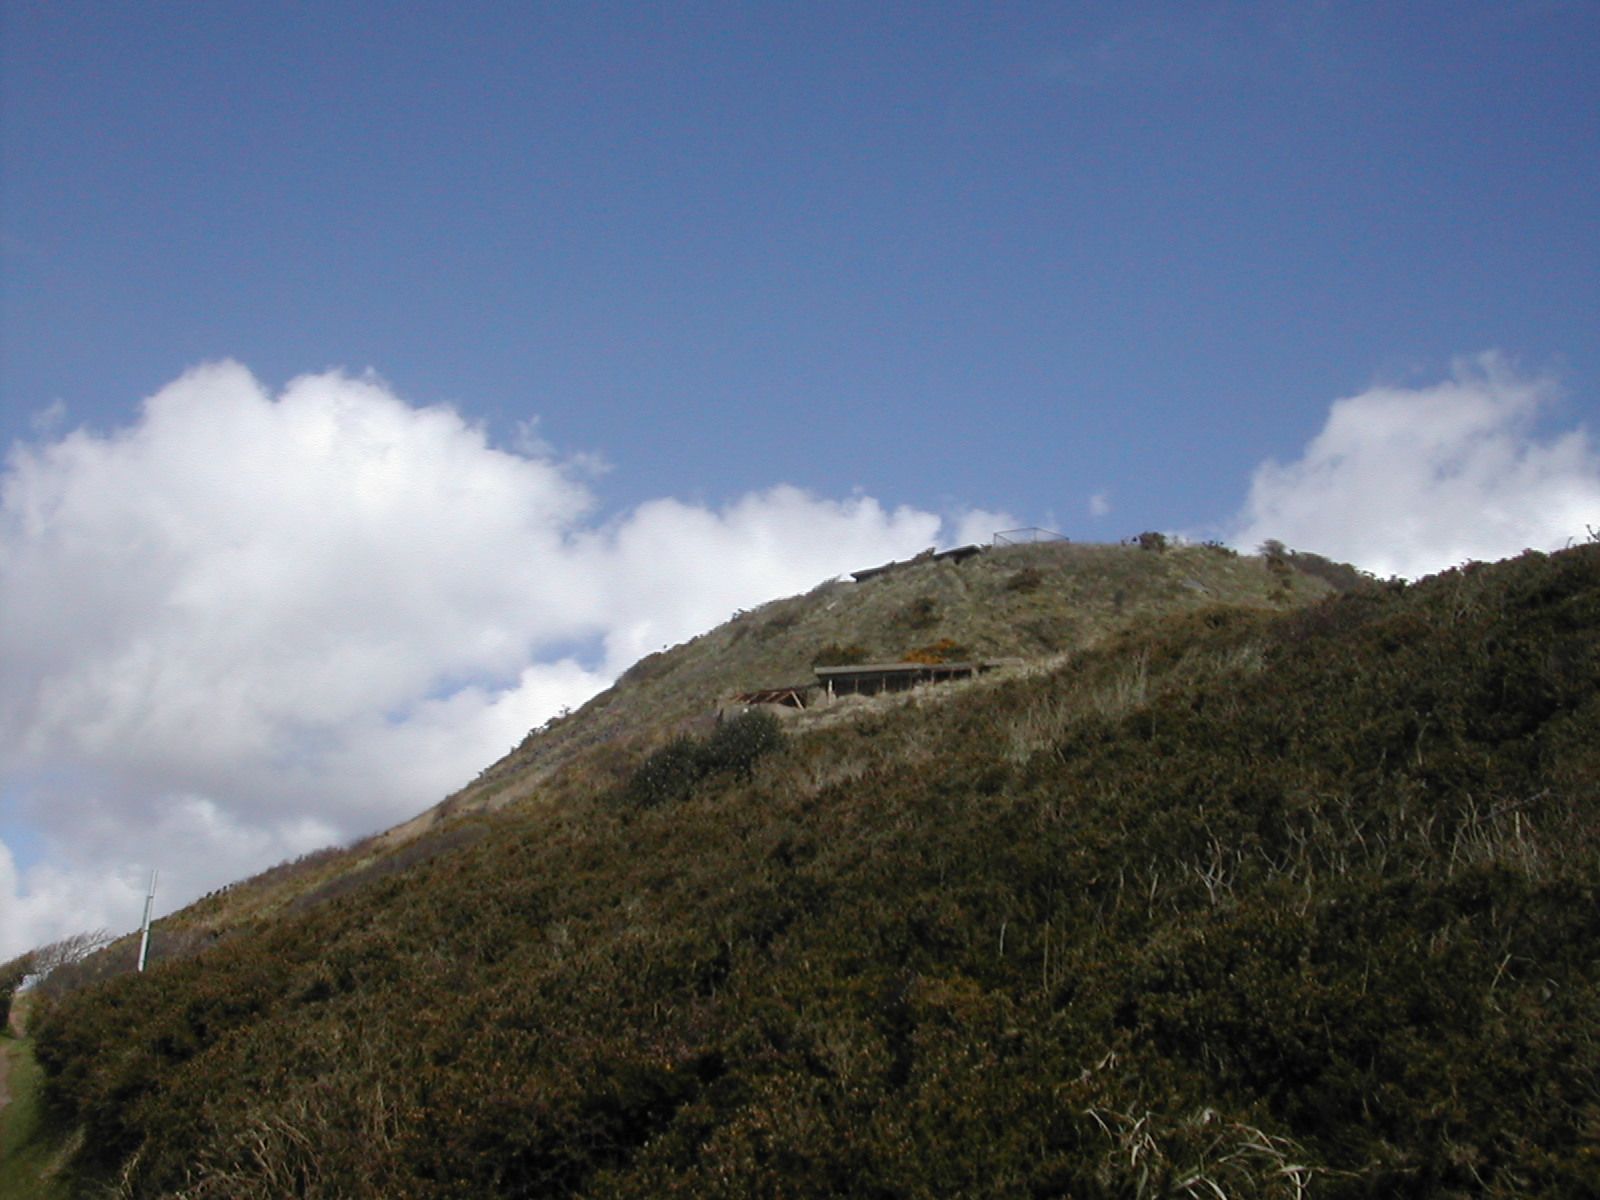
Watch House Battery SX489509
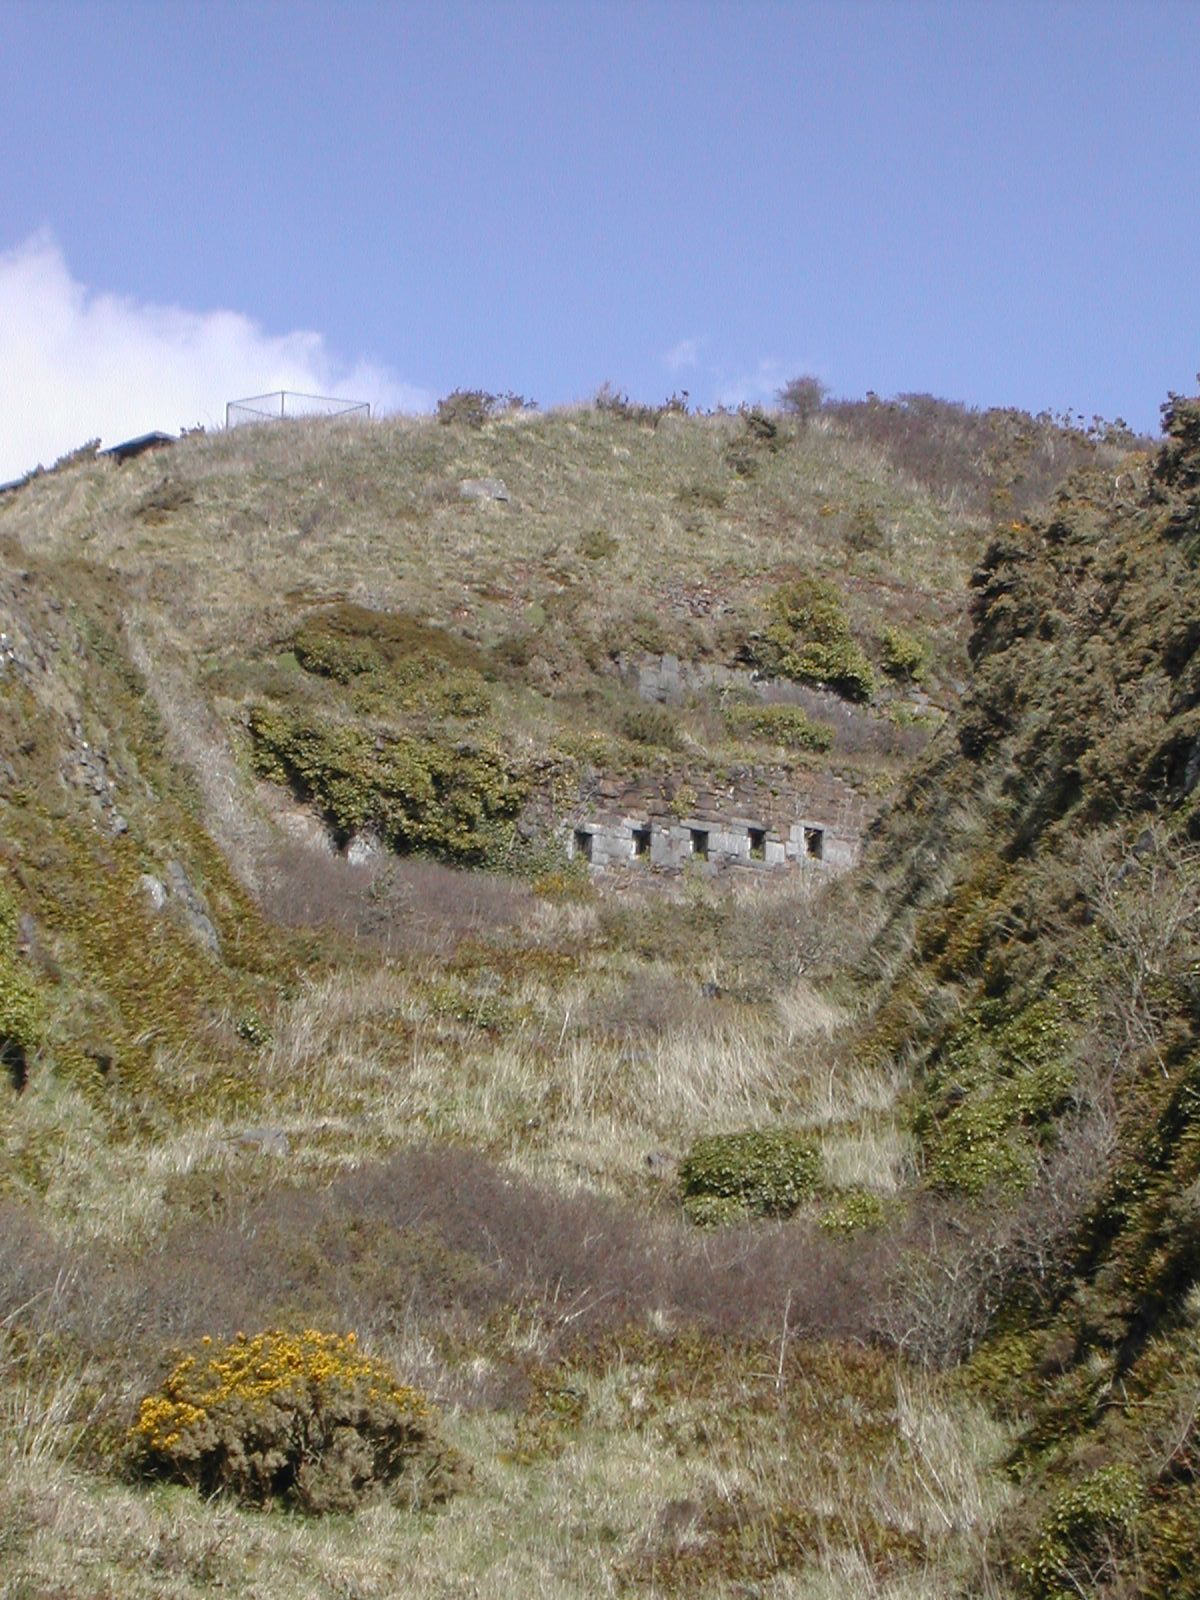
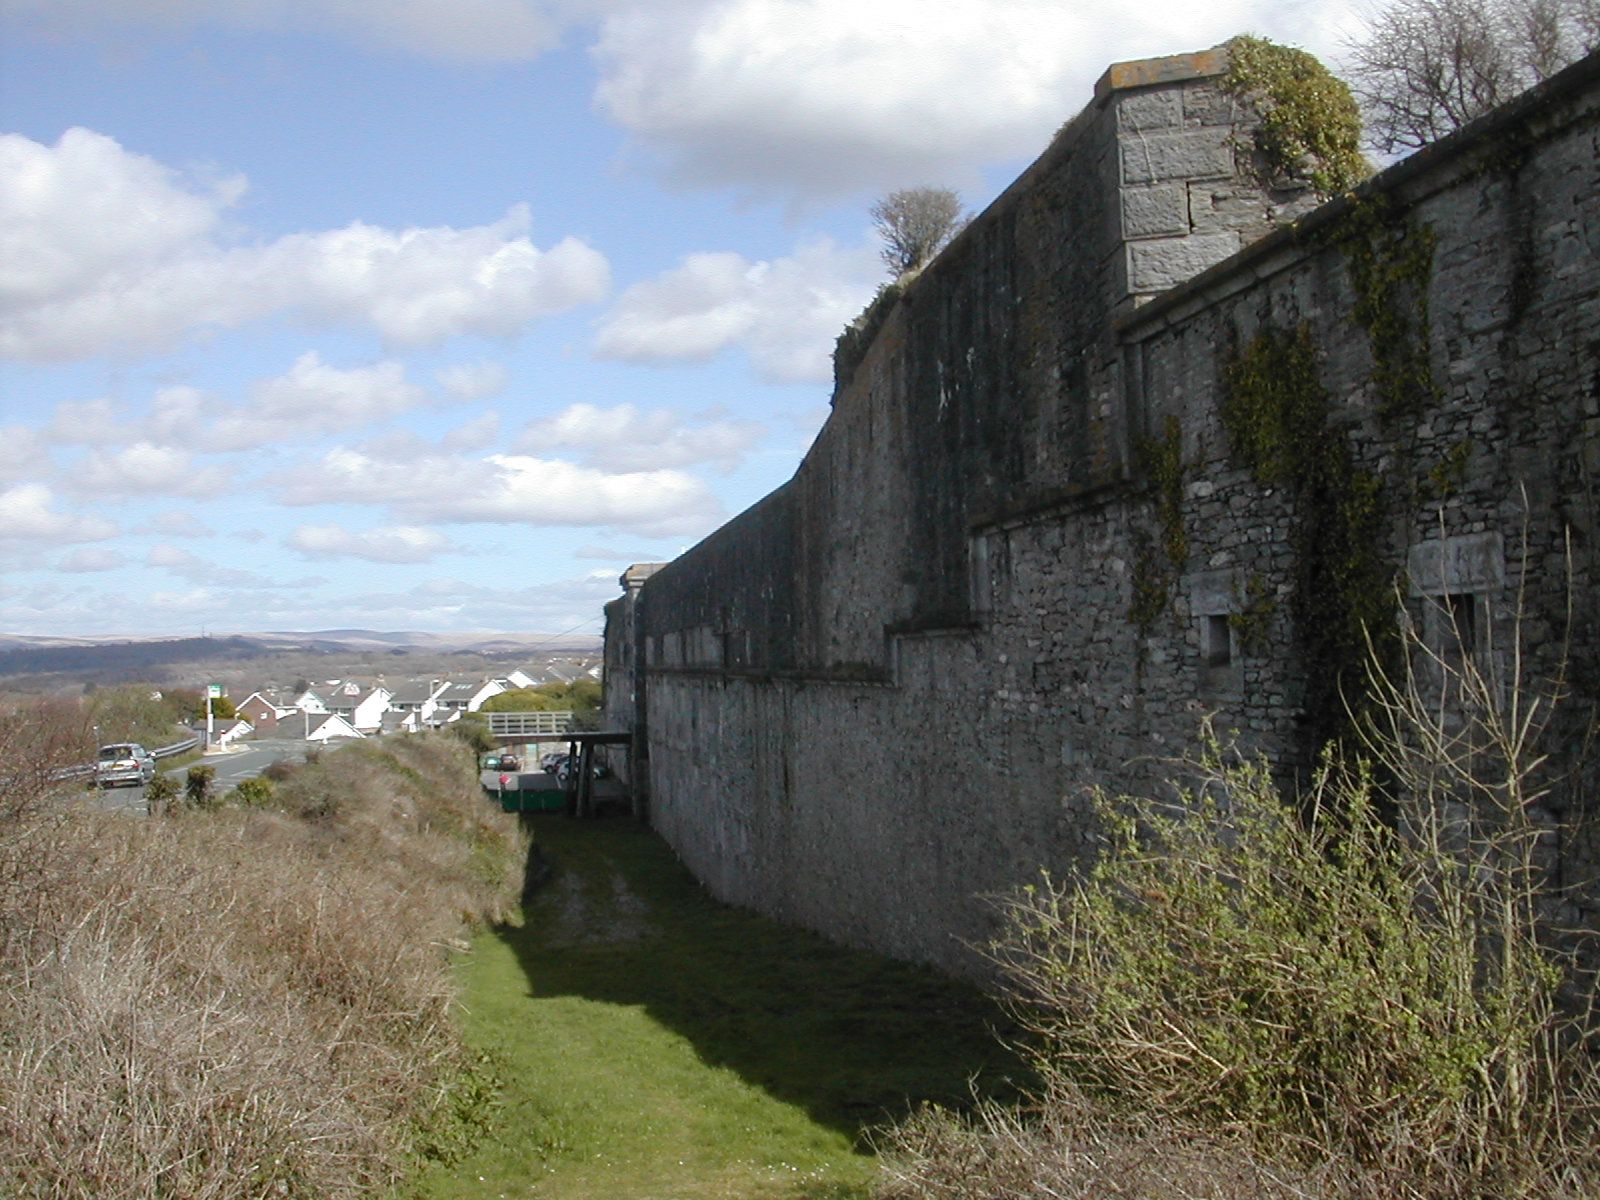
This concrete battery with two emplacements for 6 inch BL guns was built on top of Staddon Point in 1895 on the site of a earlier pentagonal earthwork, the rock cut ditch making its way up the hill from Bovisand begins next to the east end of the fort where it is protected by a loopholed cross wall and a loop holed galler on the west face. At its lower end the ditch is around 6 metres deep and 10 metres wide but as it climbs the hill it broadens and deepens. At the point where it is crossed by a footbridge it is 8 metres deep and 12 metres wide and by the time it approaches the crest of the hill it is nearly 18 metres wide and up to 9 metres deep in places is around turns to the east through an oblique angle at this point there is a loop holed gallery on the north side of the ditch facing down along its length. After about 50 metres the northern scarp face of the ditch turns again to the north giving the effect of a demi-bastion built against the south east side of the battery. The area is fenced off and under military control.
There is a comprehensive account of the battery including many photographs, interviews with ex-servicemen and an account of the local flora on a 'Local Heritage Initiative' web site. Palmerston Fort Society Log Page
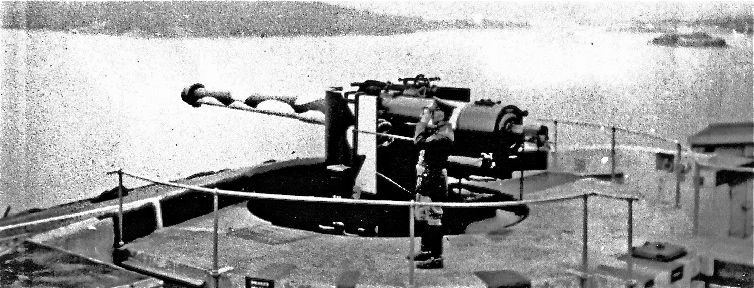
Armament of Watch House Battery during World War II
Staddon Heights Battery SX488513
This lies around 300 metres north of Watch House Battery and was constructed in 1782 as a simple crescentic bank. It was abandoned by 1847. Today the area is fenced and wooded
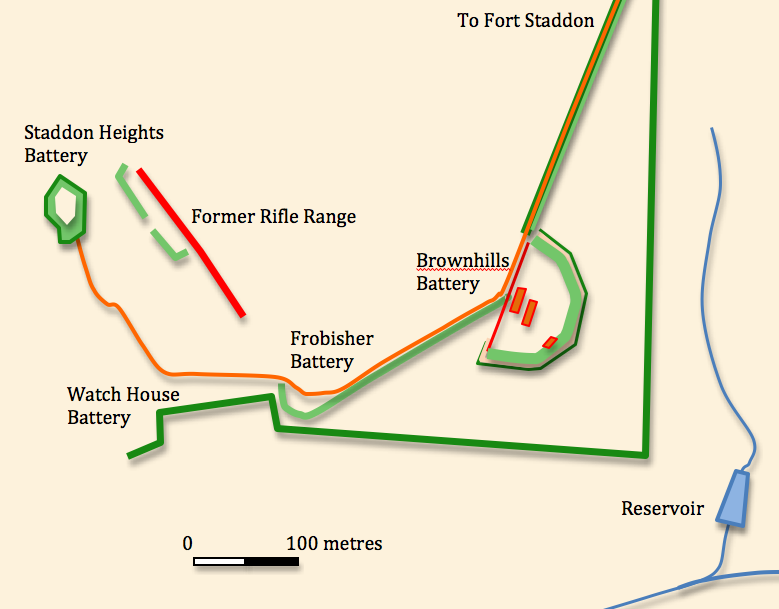
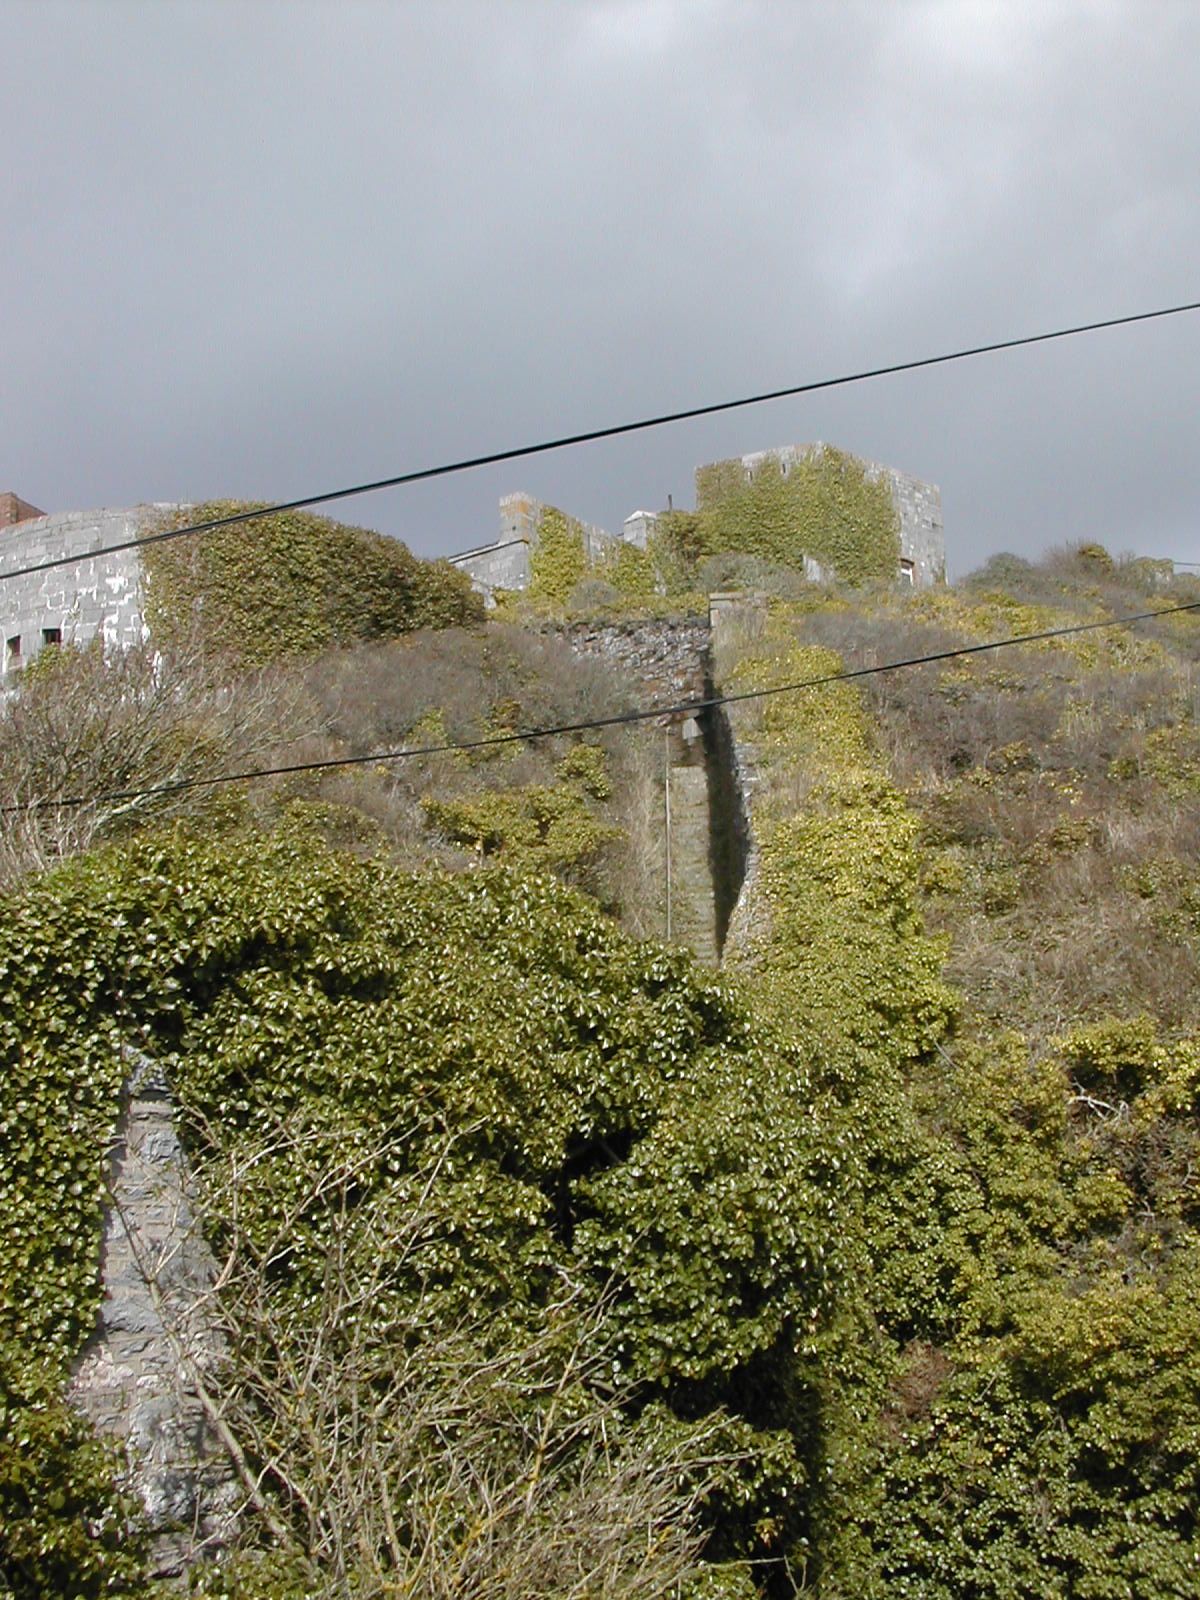
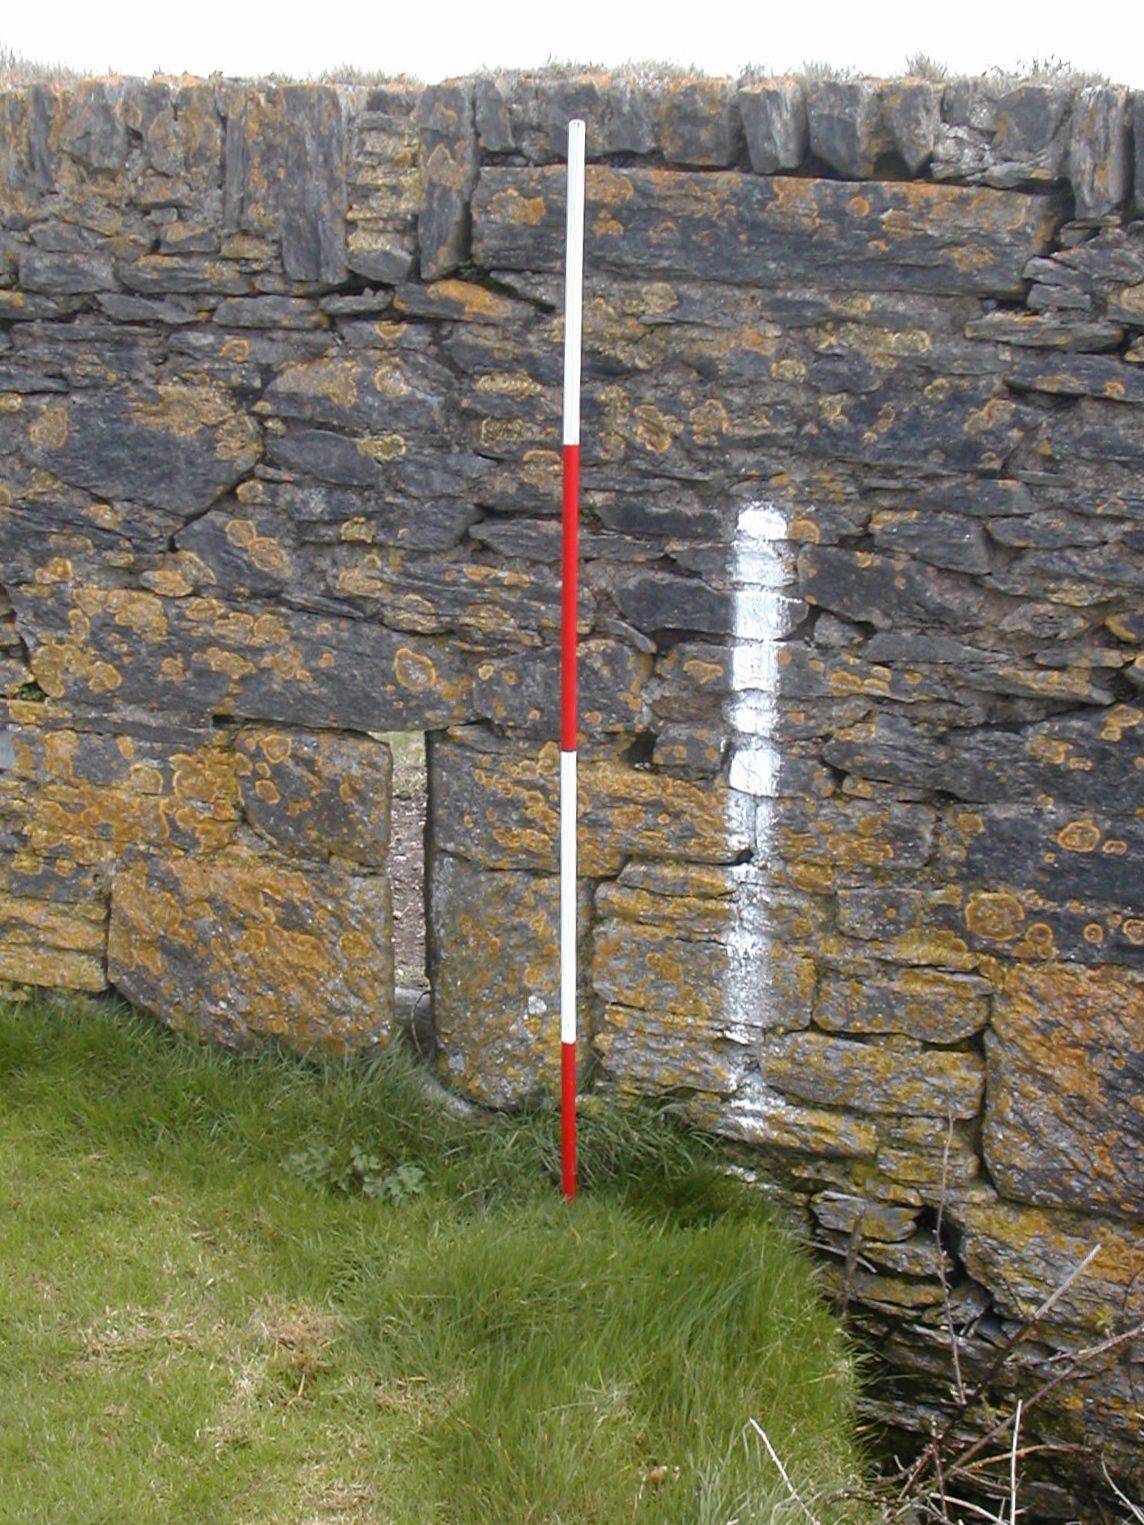
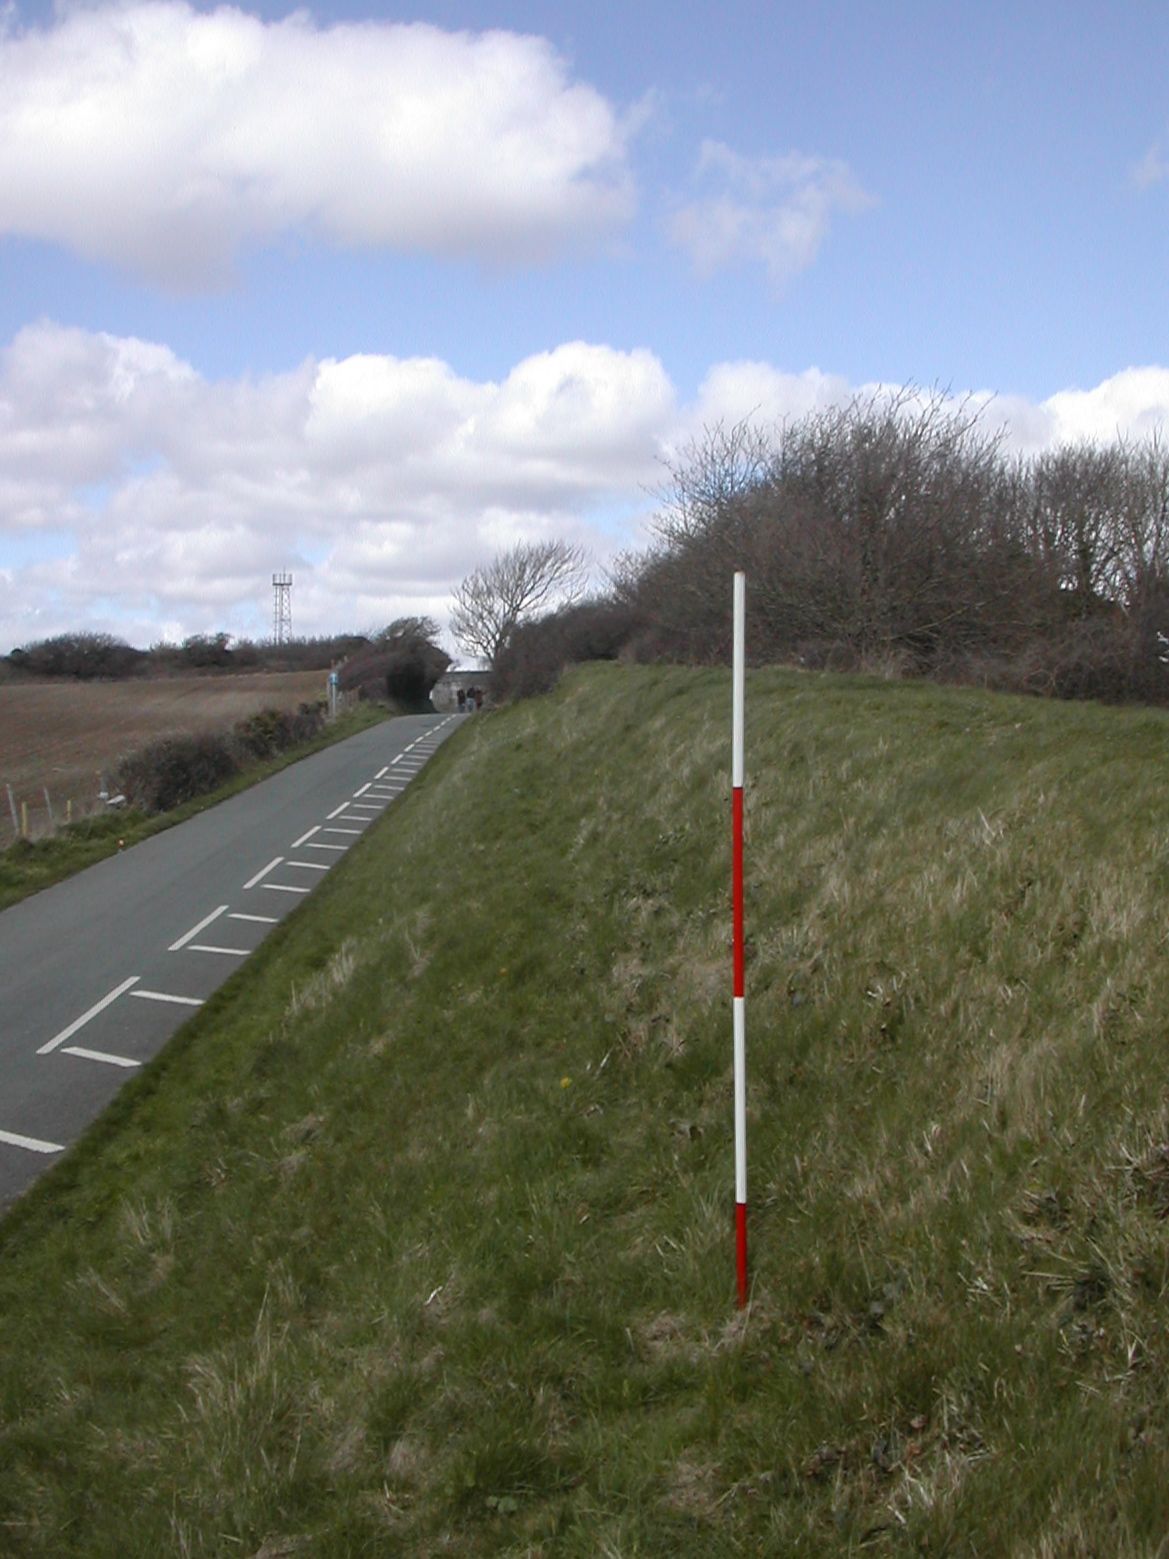
The next section of the line presents some problems of interpretation. The northern face of the ditch runs east for around 120 metres before cutting south and then south east to give the impression of a second large demi-bastion. This eastern section of ditch flanked by the two demi-bastions presents a number of curious features. The southern scarp of the ditch is by no means obvious and the ground south of the line seems oddly disturbed. Furthermore a massive wall occupies some of this central length with a large declivity behind it. these arrangements are largely as shown by the 1894 OS map. The wall itself resembles the massive length of stonewalling on the headland above which was erected in the nineteenth century as a screen for a military rifle range. The wall is heavily buttressed on its southern face which has a pronounced outward slope, the inner face appears on oblique aerial views as vertical. The exact function of this construction will remain a mystery until it can be examined first hand, heavy thorny undergrowth makes access difficult even during winter months. Beyond this section the story becomes significantly simpler: a single massive ditch runs along the top of the slope down to Bovisand Bay before, after around 500 metres, bending through a right angle to head north for a further 700 metres to the perimeter of Fort Staddon. For much of its length the ditch is shadowed by the modern road which curves down to Bovisand Bay. The eastern scarp has been lost but a near vertical rock face up to 8 metres high testifies to its size. Back at the eastern most of the 'demi- bastions' a flat topped bank some 15 metres wide heads in a direction somewhat south of north east for around 300 metres to the gorge of Brownhill Battery. Aerial photographs suggest by the profiling of this bank that it represents, towards its western end the location of Frobisher Battery, which was armed with one 12.5" RML in the 1890s, whilst at the same time providing cover for the military road linking Staddon Heights with Fort Staddon.
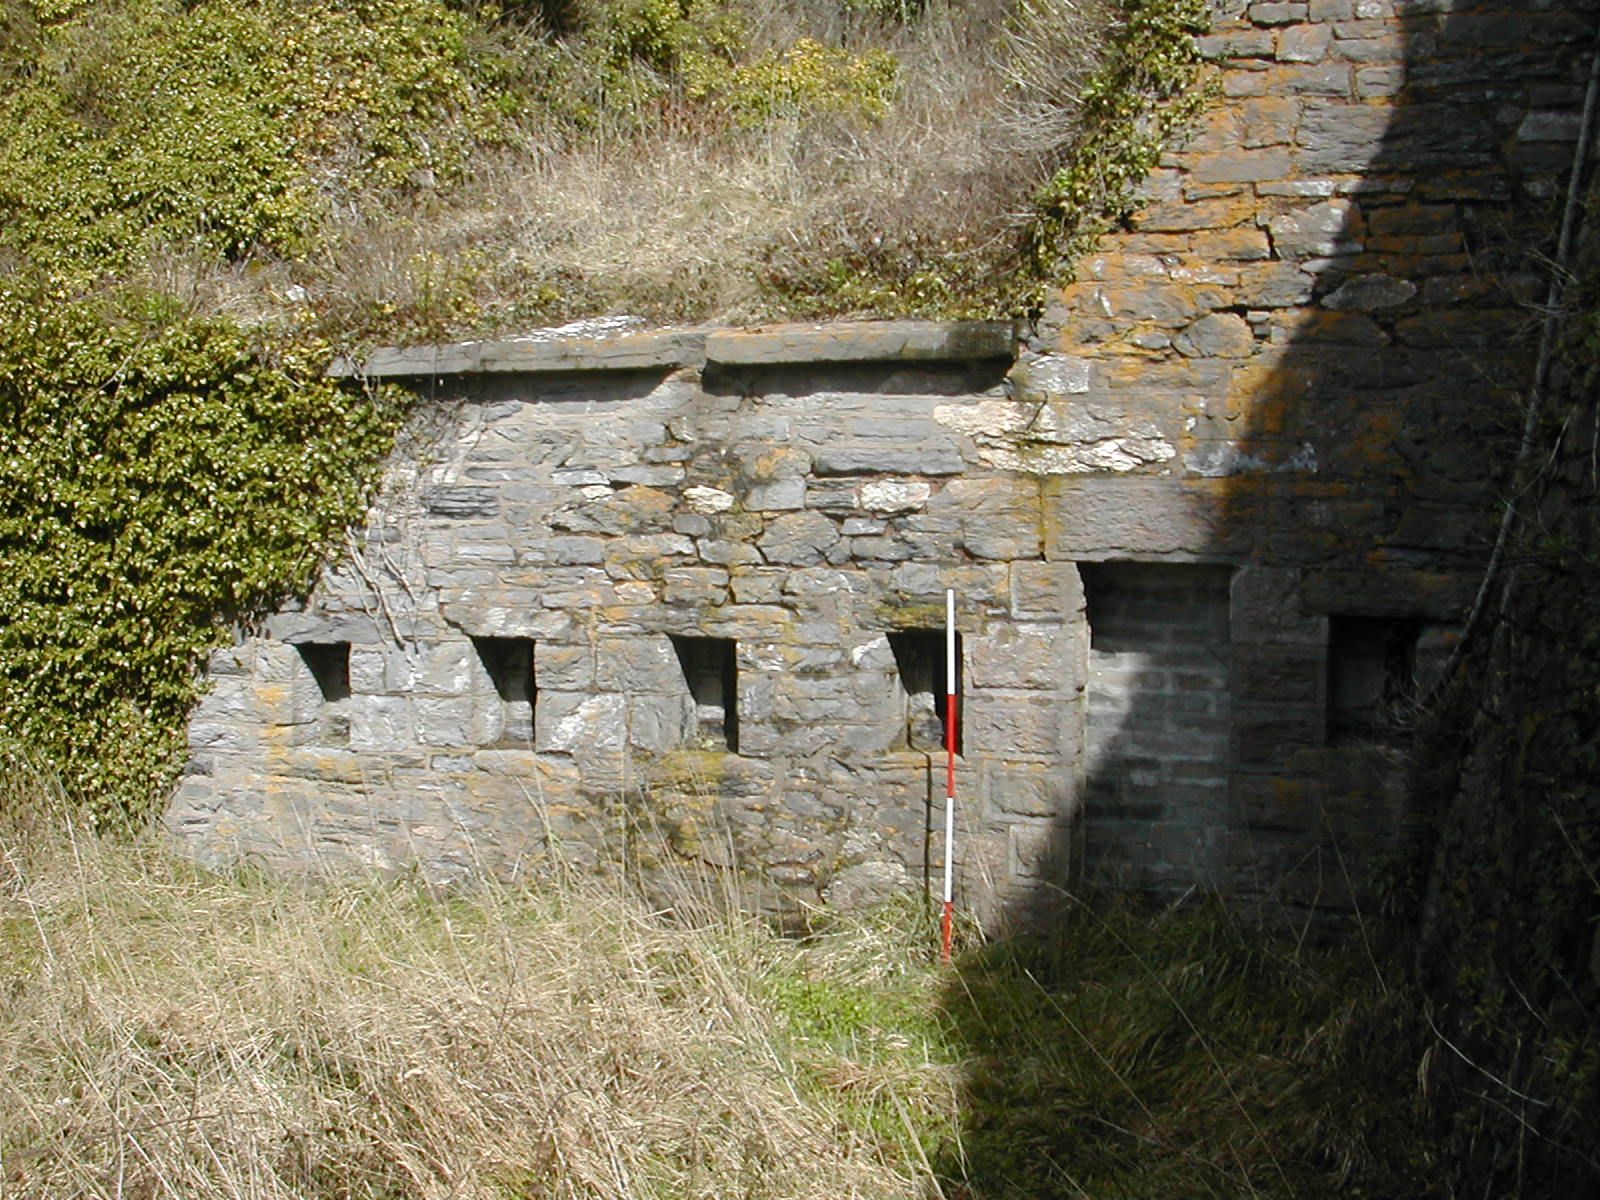
Brownhill Battery SX494511
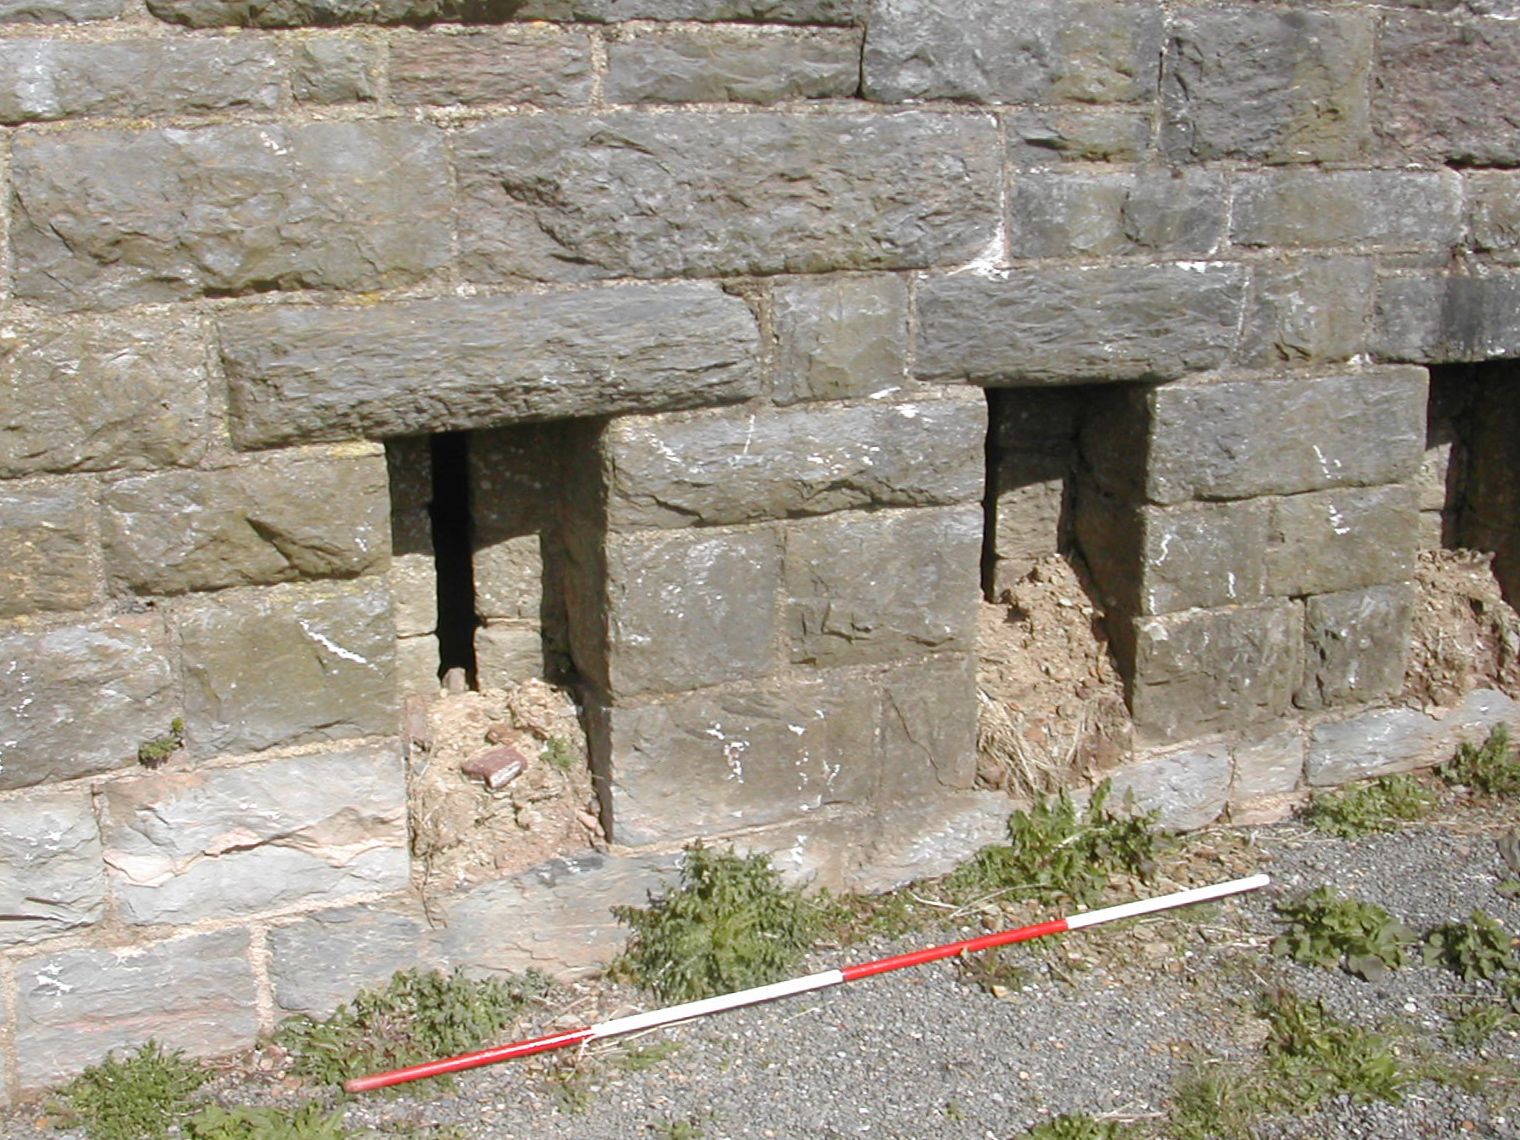
Built around In 1875 as a simple open earthwork battery with a curving earth rampart backed by a loopholed wall and guardhouse with magazines 'tunneled' into the bank, it had an armament of eight 64 pounder RMLs on carriages stored at Fort Staddon but by 1893 these were replaced with six 8 inch RML howitzers, in 1903 two 40 pounder RMLs were added but the site was effectively disused after World War I. It says something about the way in which these forts hug the landscape that looking around in the early seventies Ian Hogg could find no trace of it! There is a detailed photographic record by a team from 'Derelict Places'. Today the site is open and easily accessible from the lane leading south from Fort Staddon adjacent to Staddon Heights golf course. The wall is in good condition but the interior is churned up the buildings falling down and the rampart overgrown.
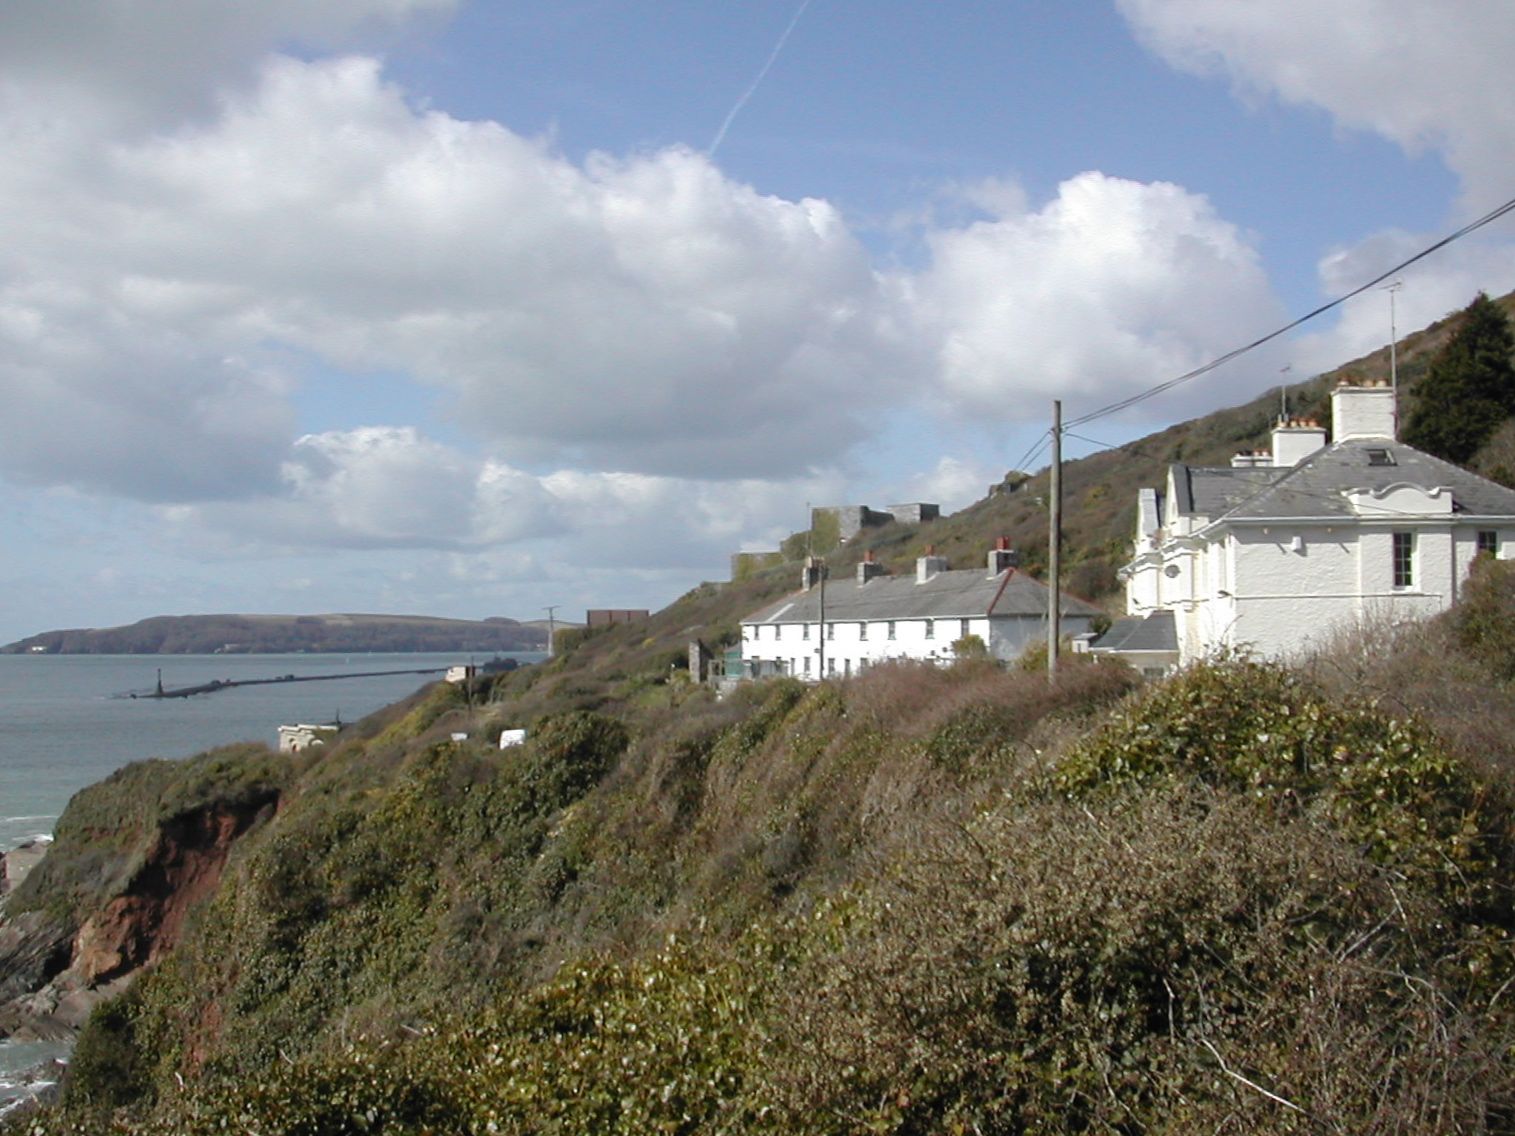
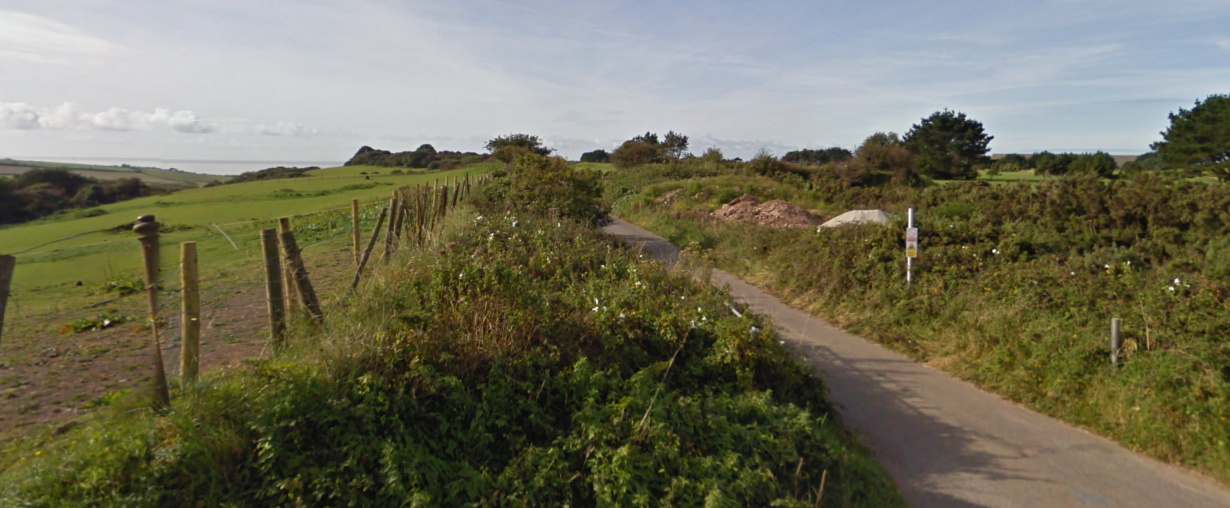
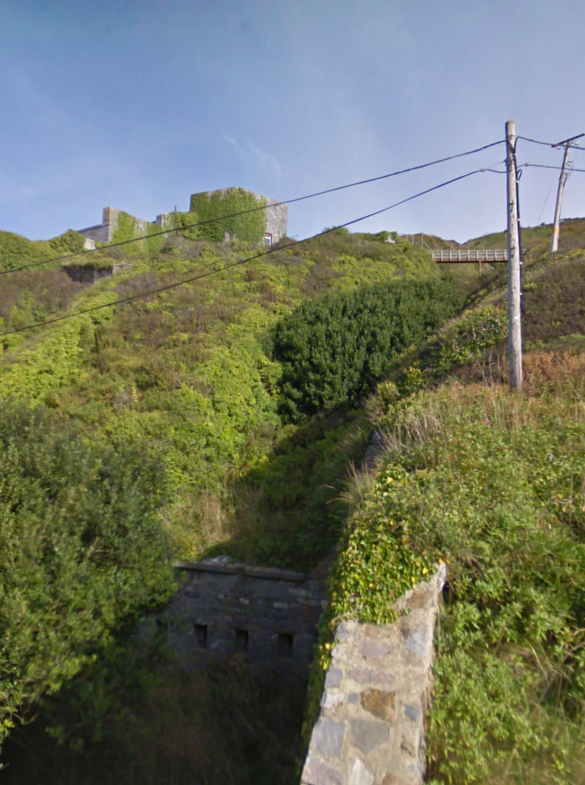
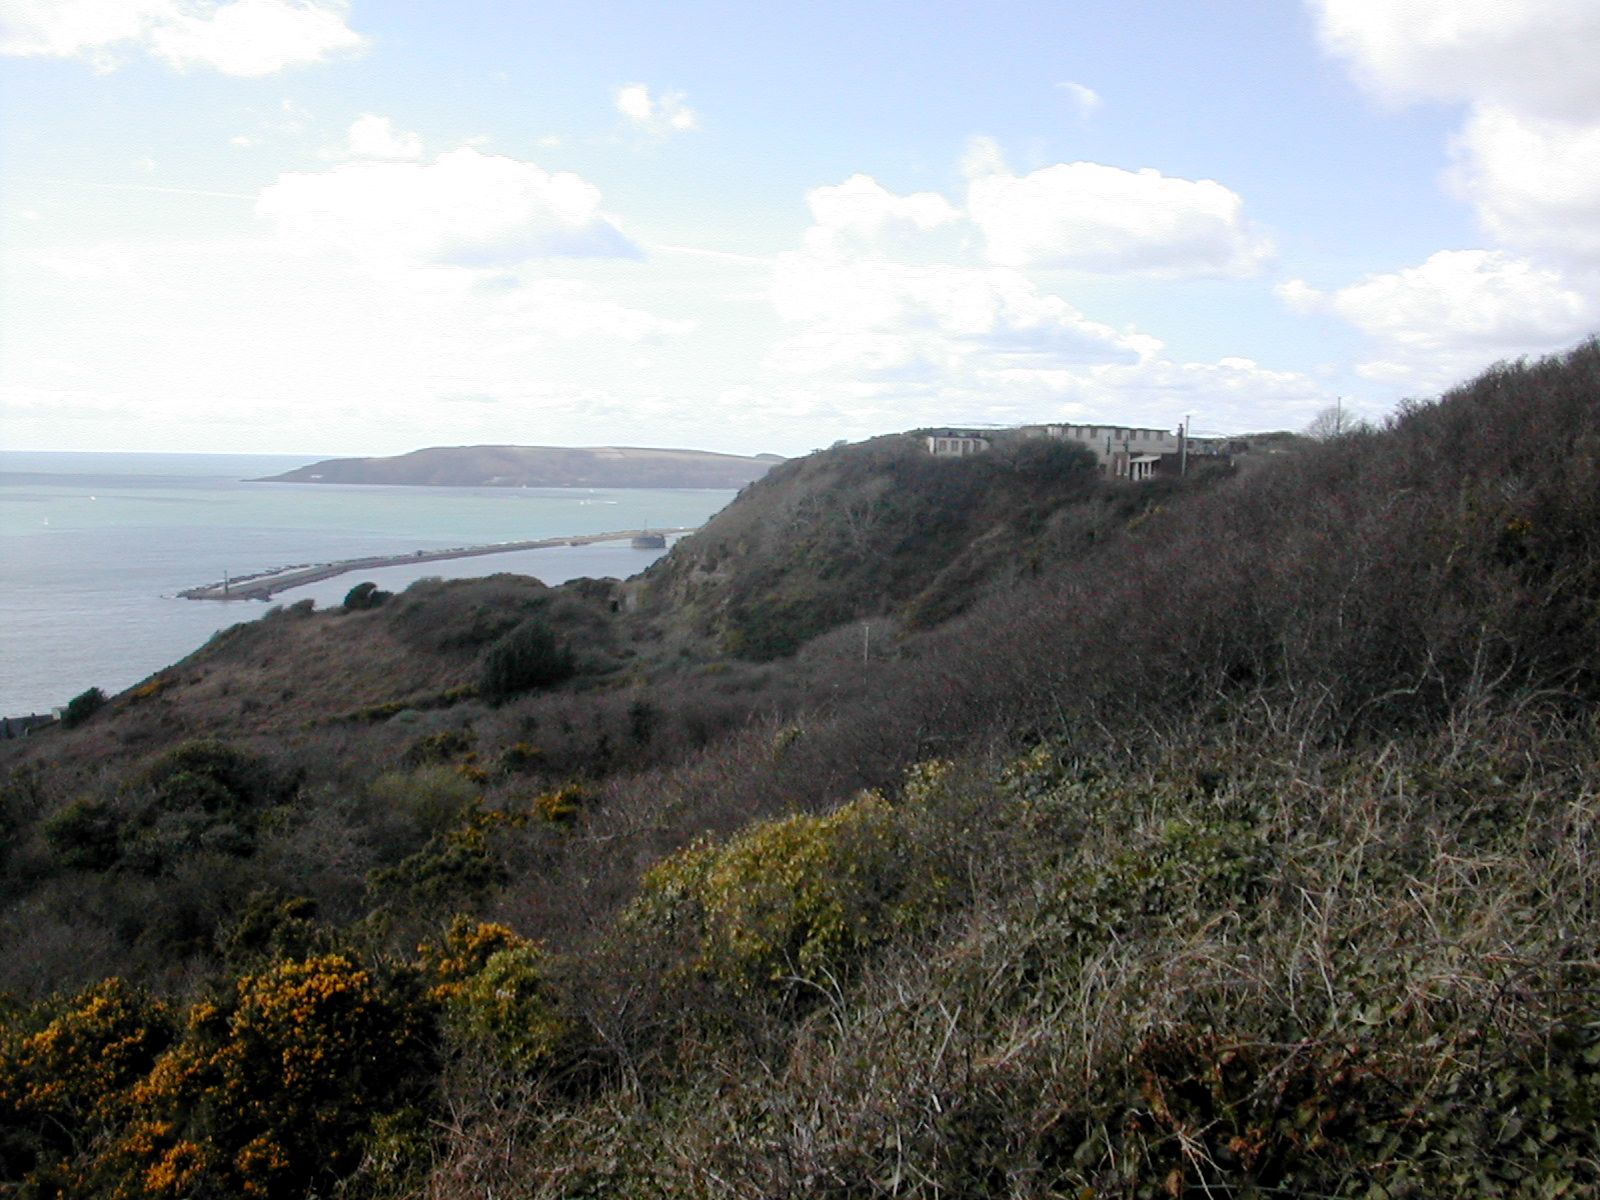
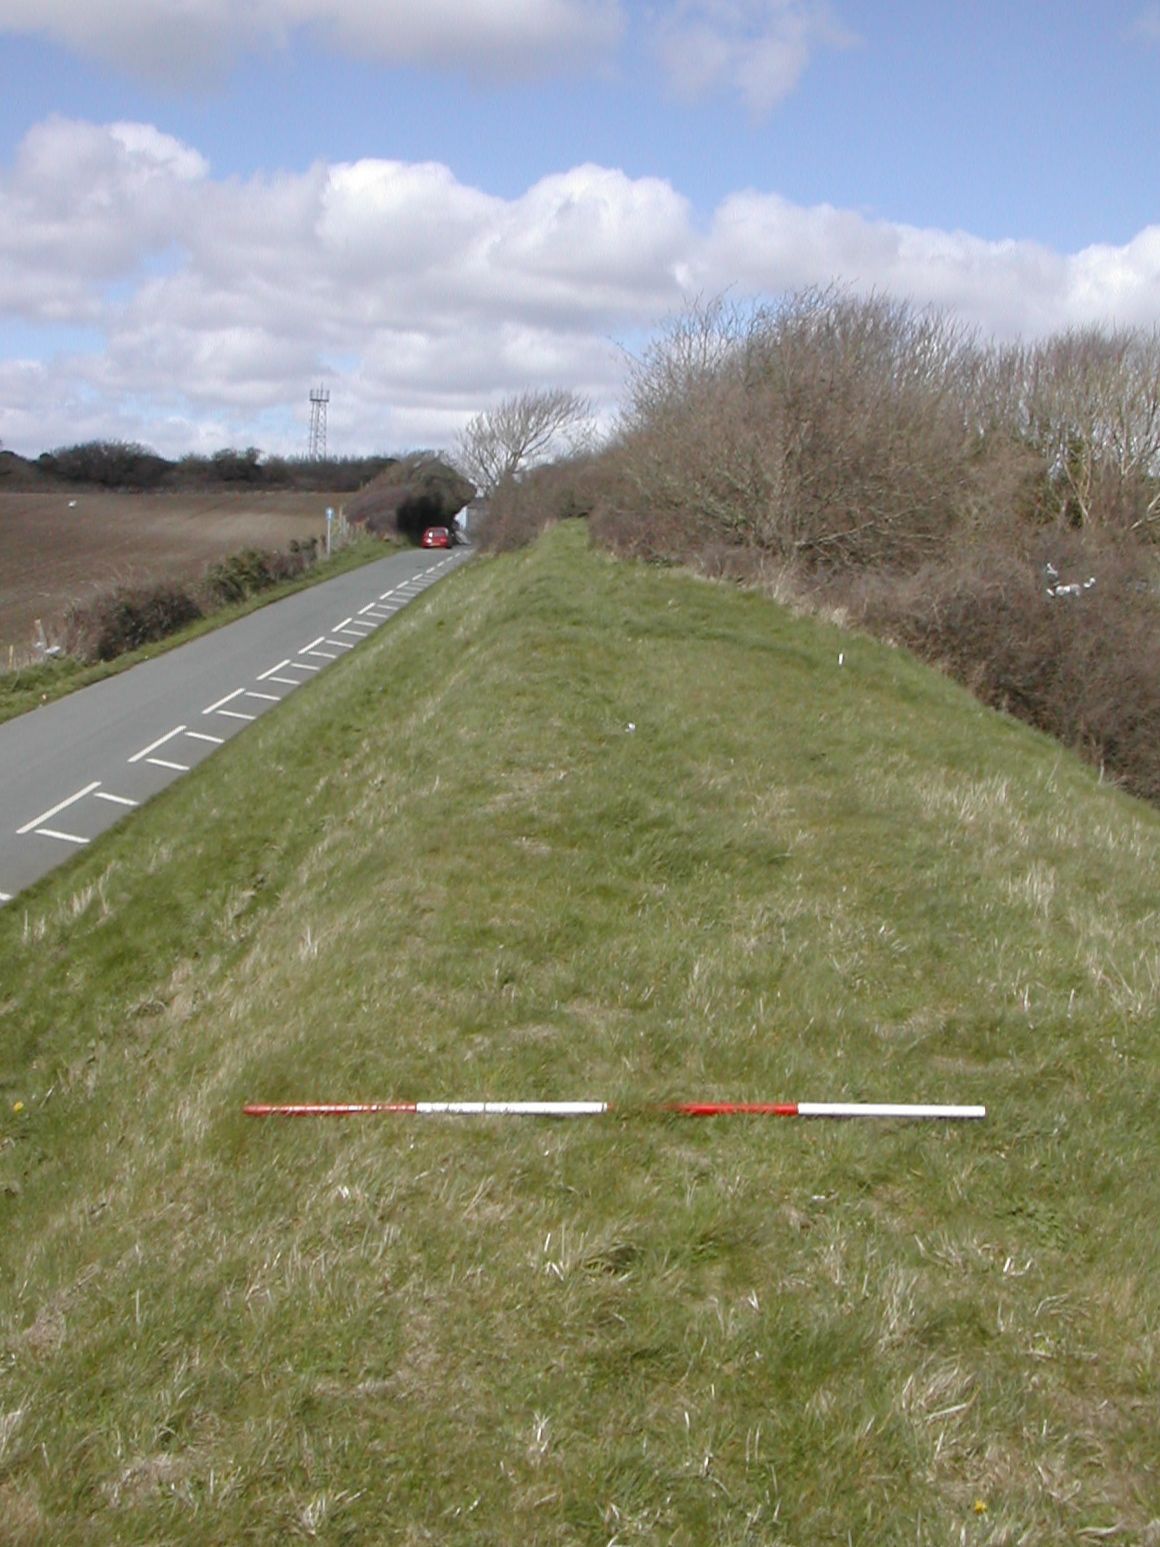
The military road and bank running south from Fort Staddon to Brownhill Battery, from NE, beginning of ditch on left
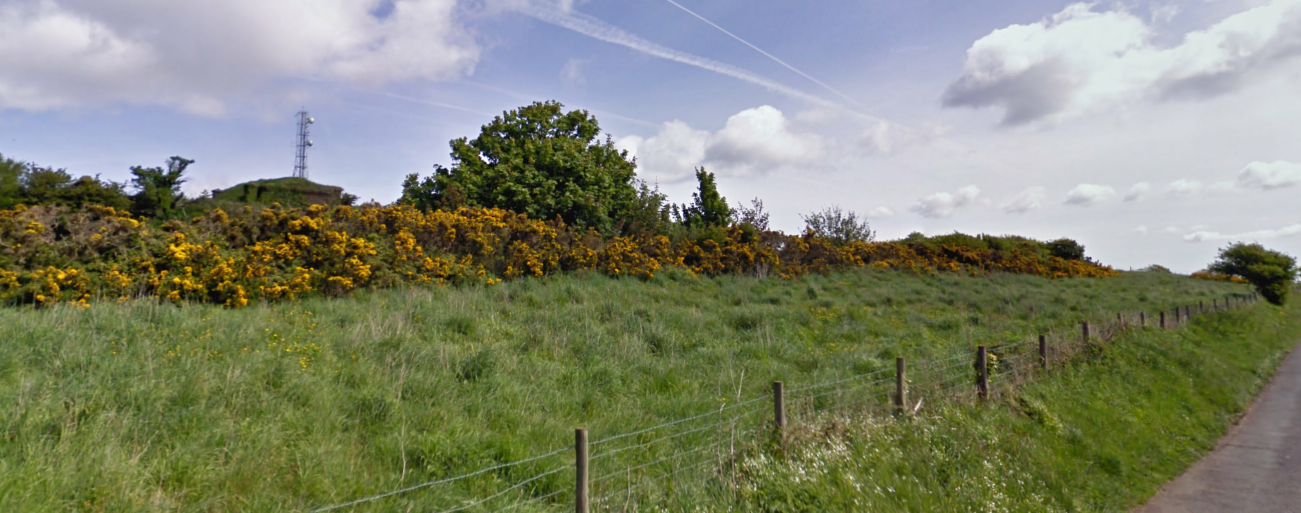
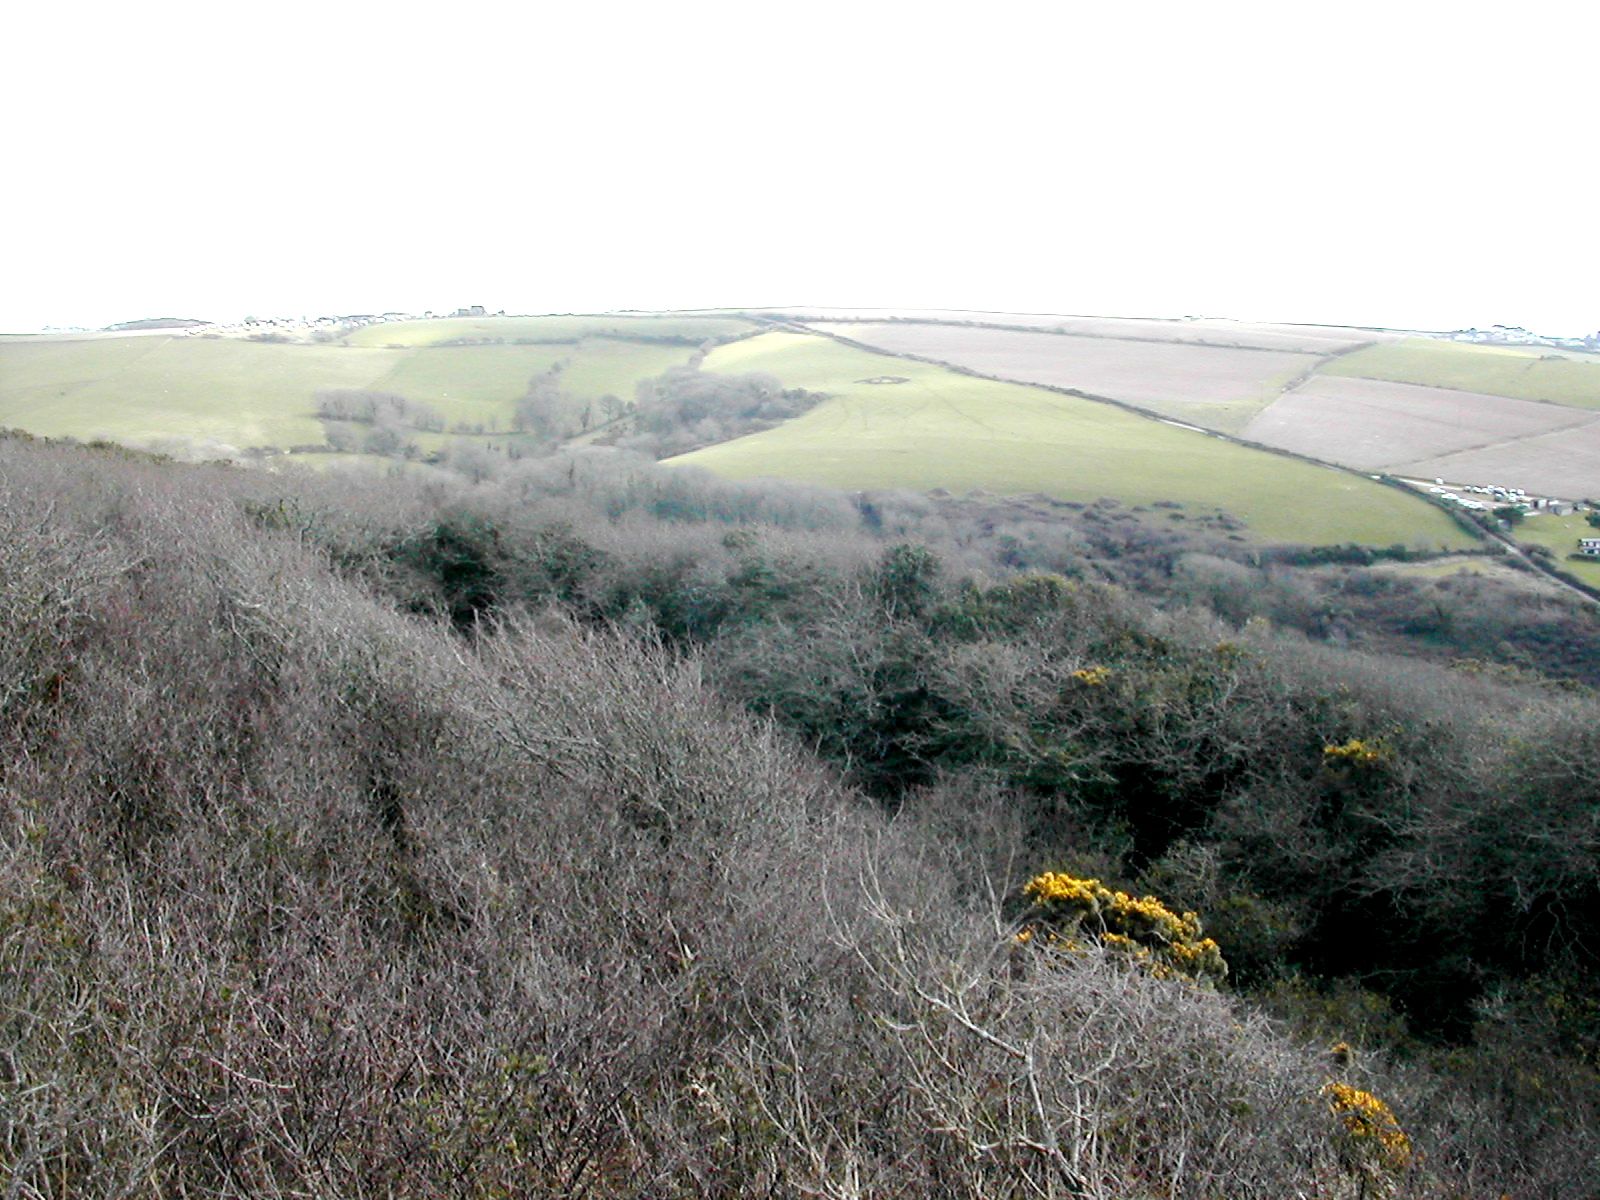
The military road and bank running south from Fort Staddon to Brownhill Battery ( on the horizon), looking S
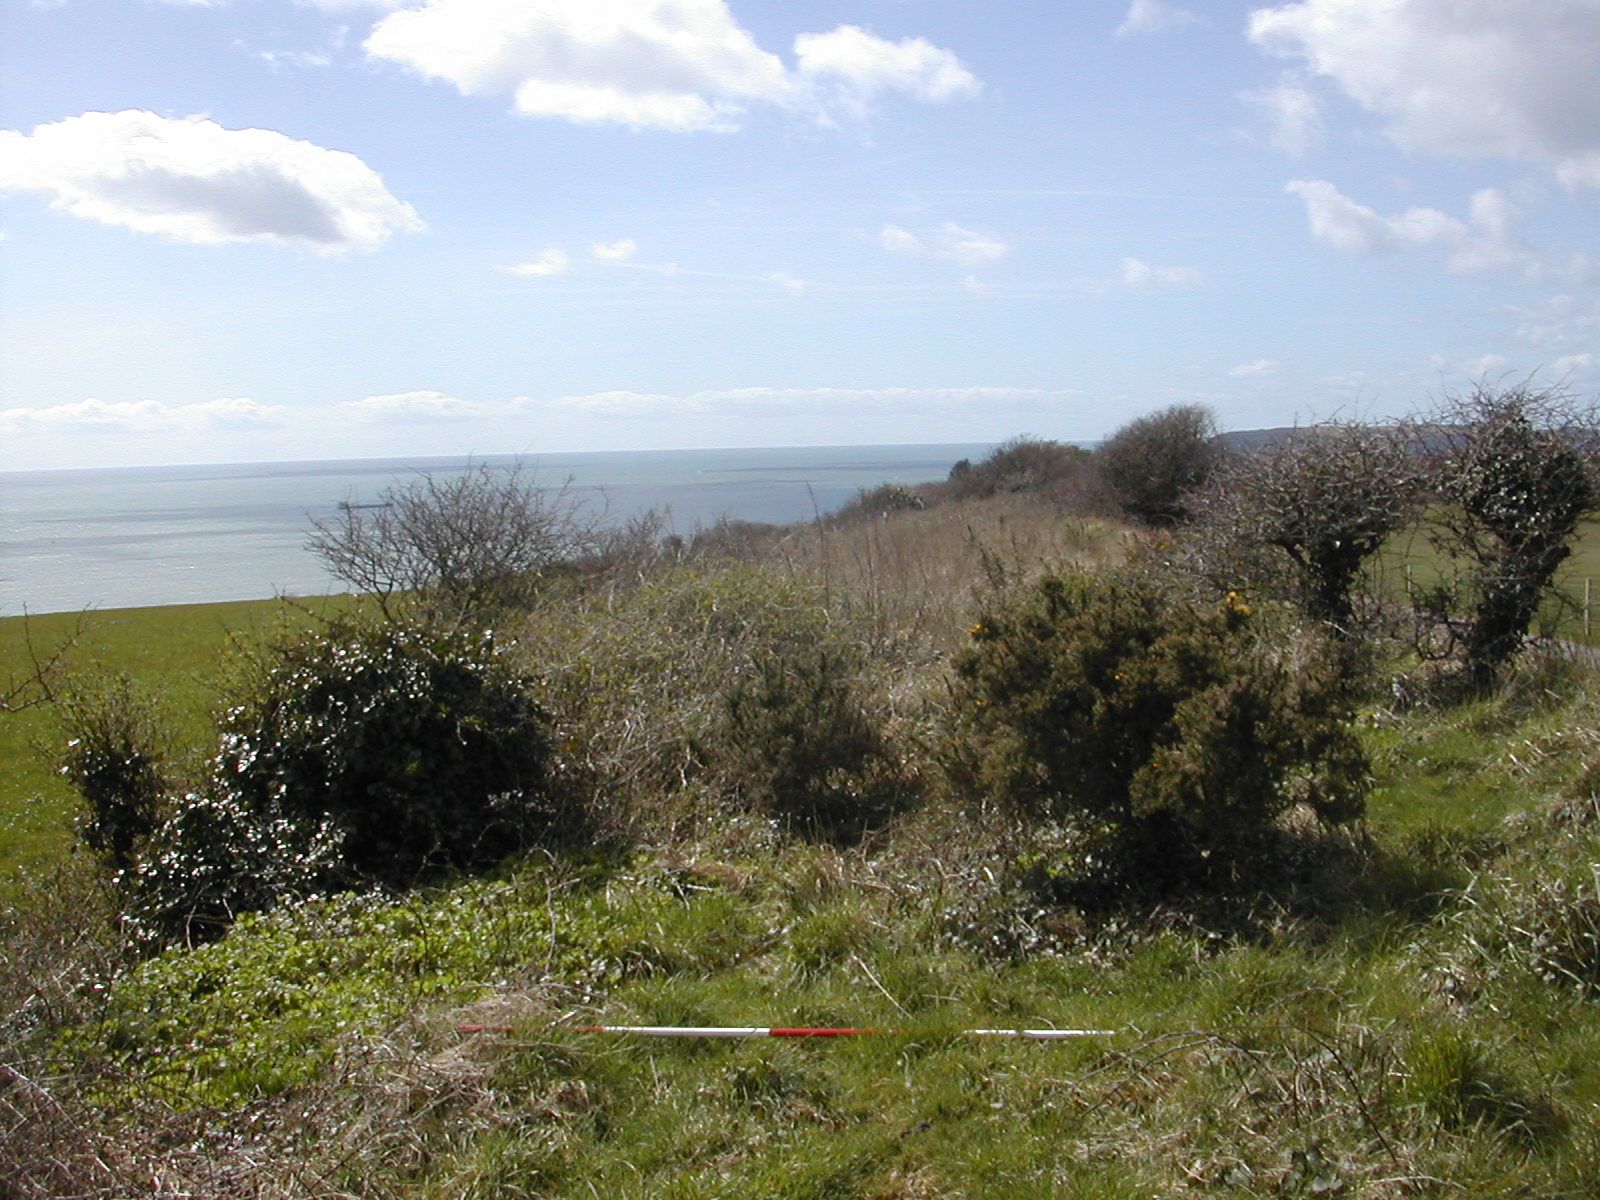
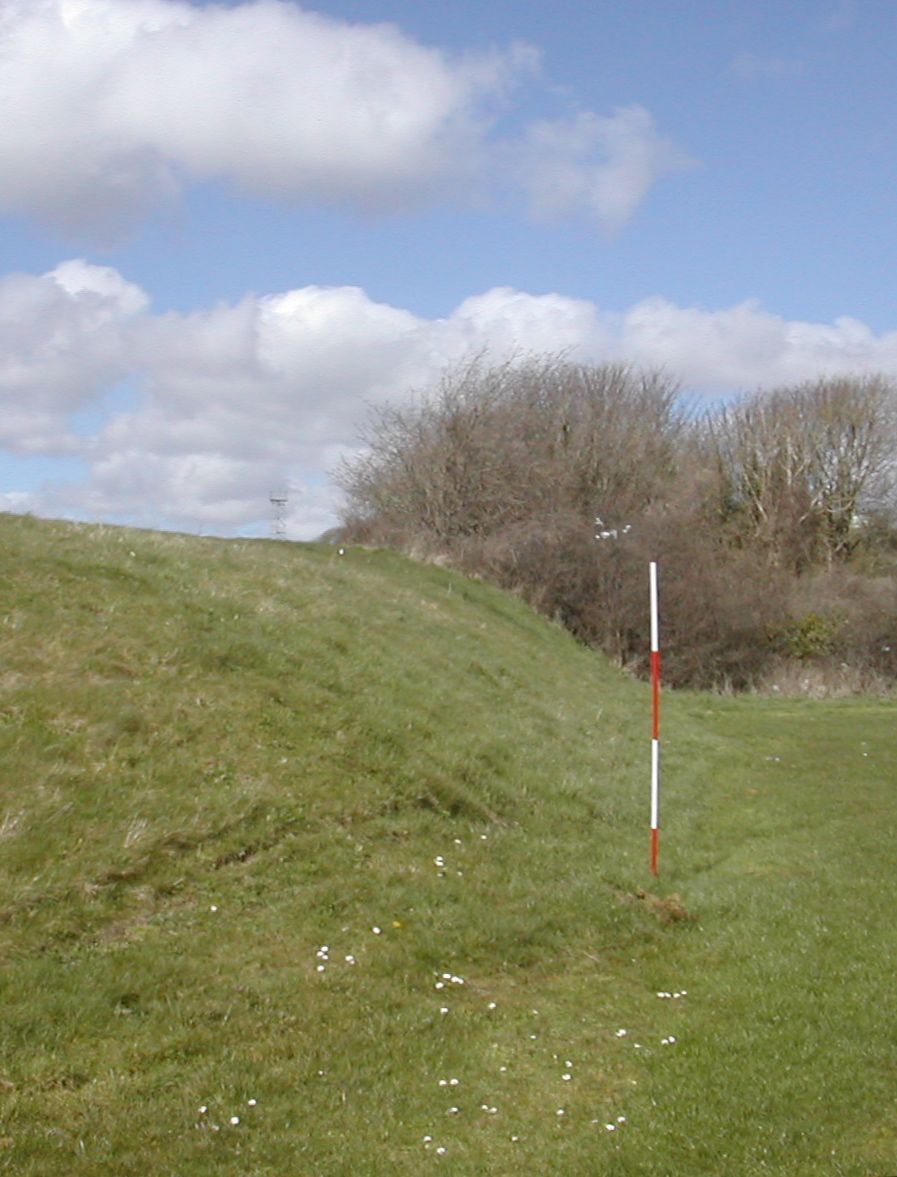
Defensive bank S of Fort Staddon looking NE
View from Fort Staddon across to city centre to N with rampart of unknown date in foreground and Fort Stamford just beyond
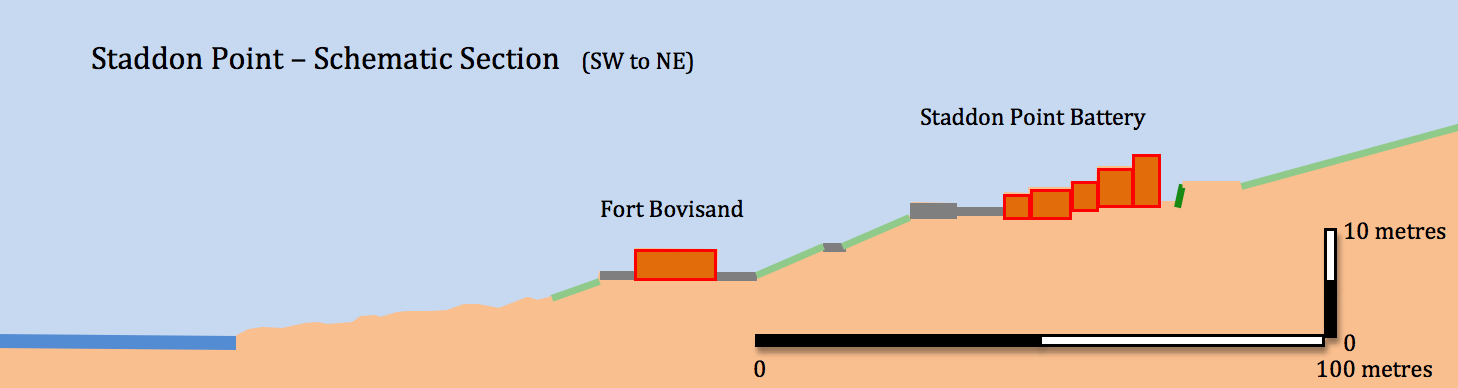
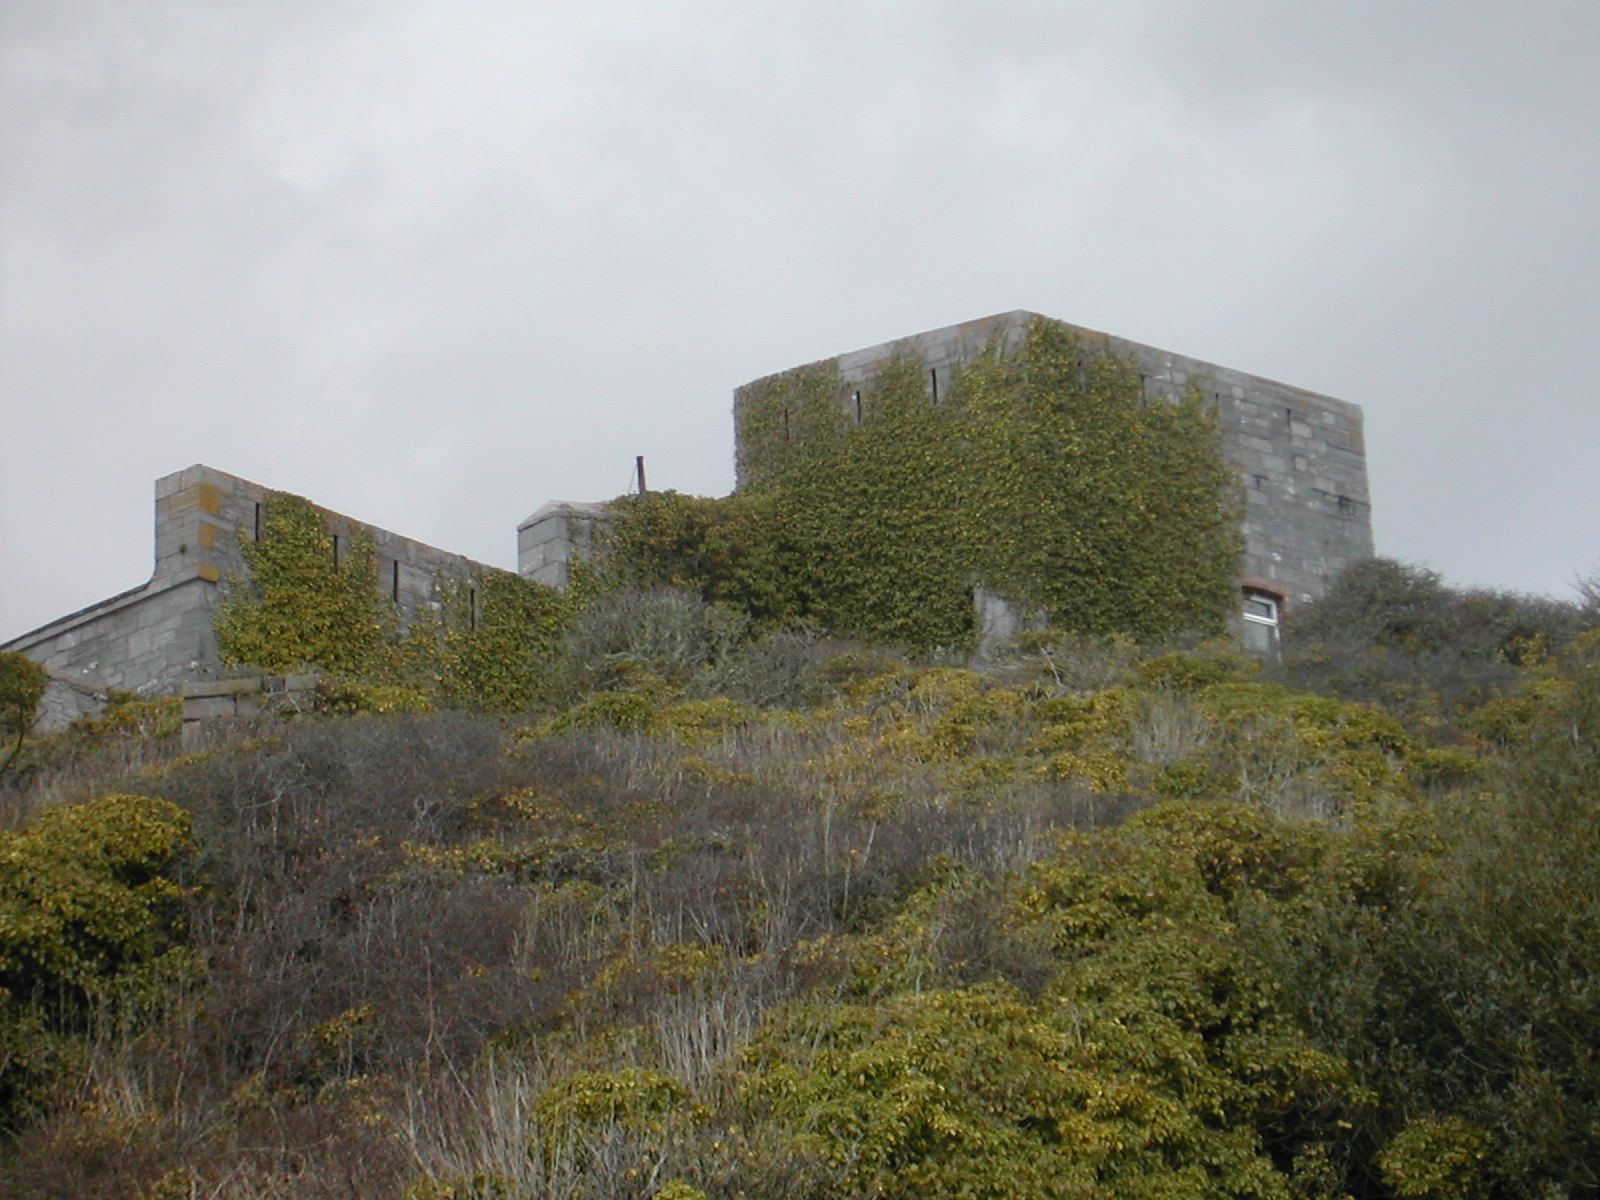
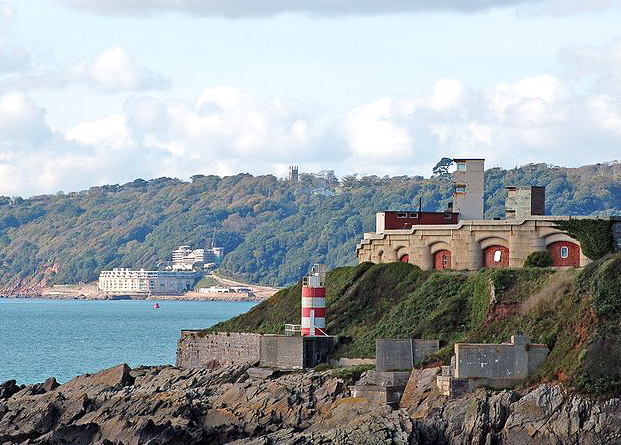
Staddon Point Battery SX488507
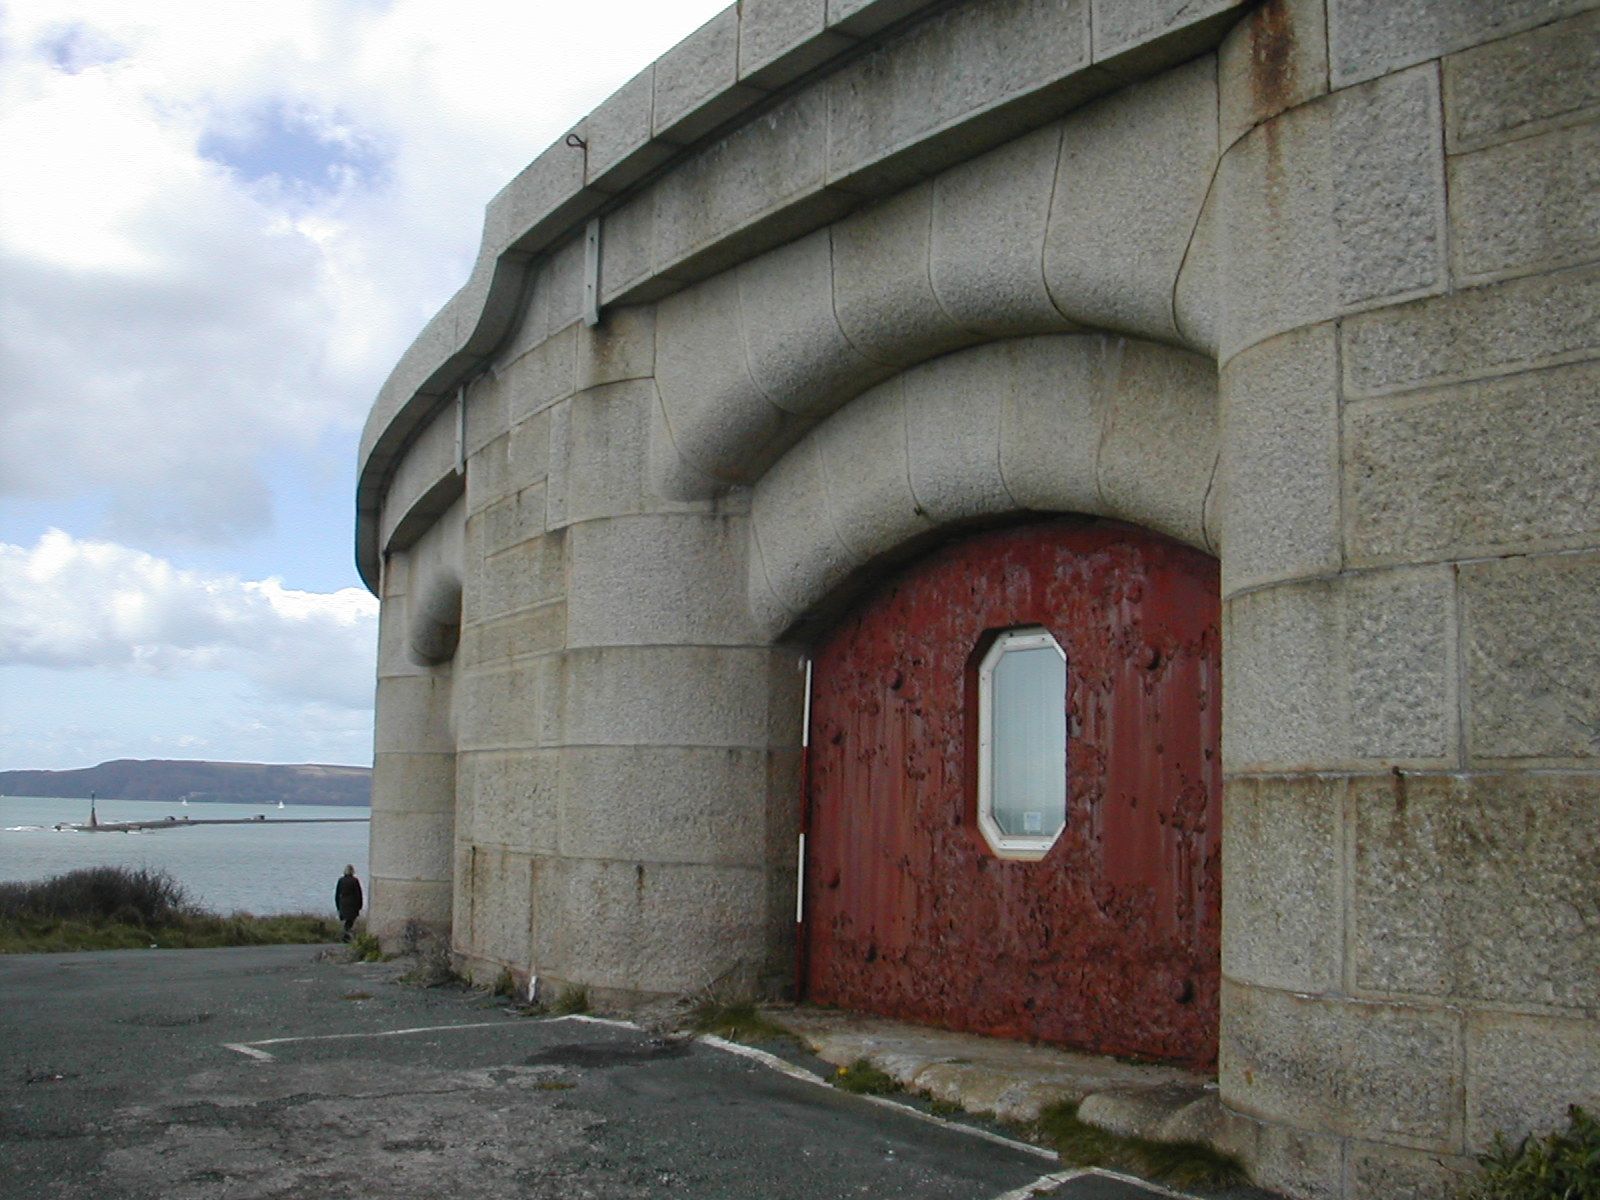
The
initial defence work built on this commanding position was built around
1770 and consisted of an open battery of ten twelve-pounders. In 1850
this was replaced by Fort Bovisand, a casemated work with a curved
front behind a
terrace and an embrasured rampart. The 1859 report suggested that the
battery was poorly sited given the demands of modern warfare and
suggested the construction of casemated works closer to water level. A
covered way was constructed to link the battery with new Fort Bovisand.
It was converted into barracks and also given two large flanking
caponiers, seen in early photographs but now demolished and work was
begun on a deep ditch to protect the whole complex. During World War II
four 12 pounder QF guns were installed on the terrace. In more
recent years the accommodation was used as a residential study
centre for schools but now appears derelict.
 |
 |
 |
| Staddon Point Battery from SE | Staddon Point Battery from NE | Staddon Point Battery, entrance from NE |
 |
 |
| Staddon Point Battery and Bovisand Fort from SW, early twentieth century | Staddon Point Battery and Bovisand Fort from SW, modern view |
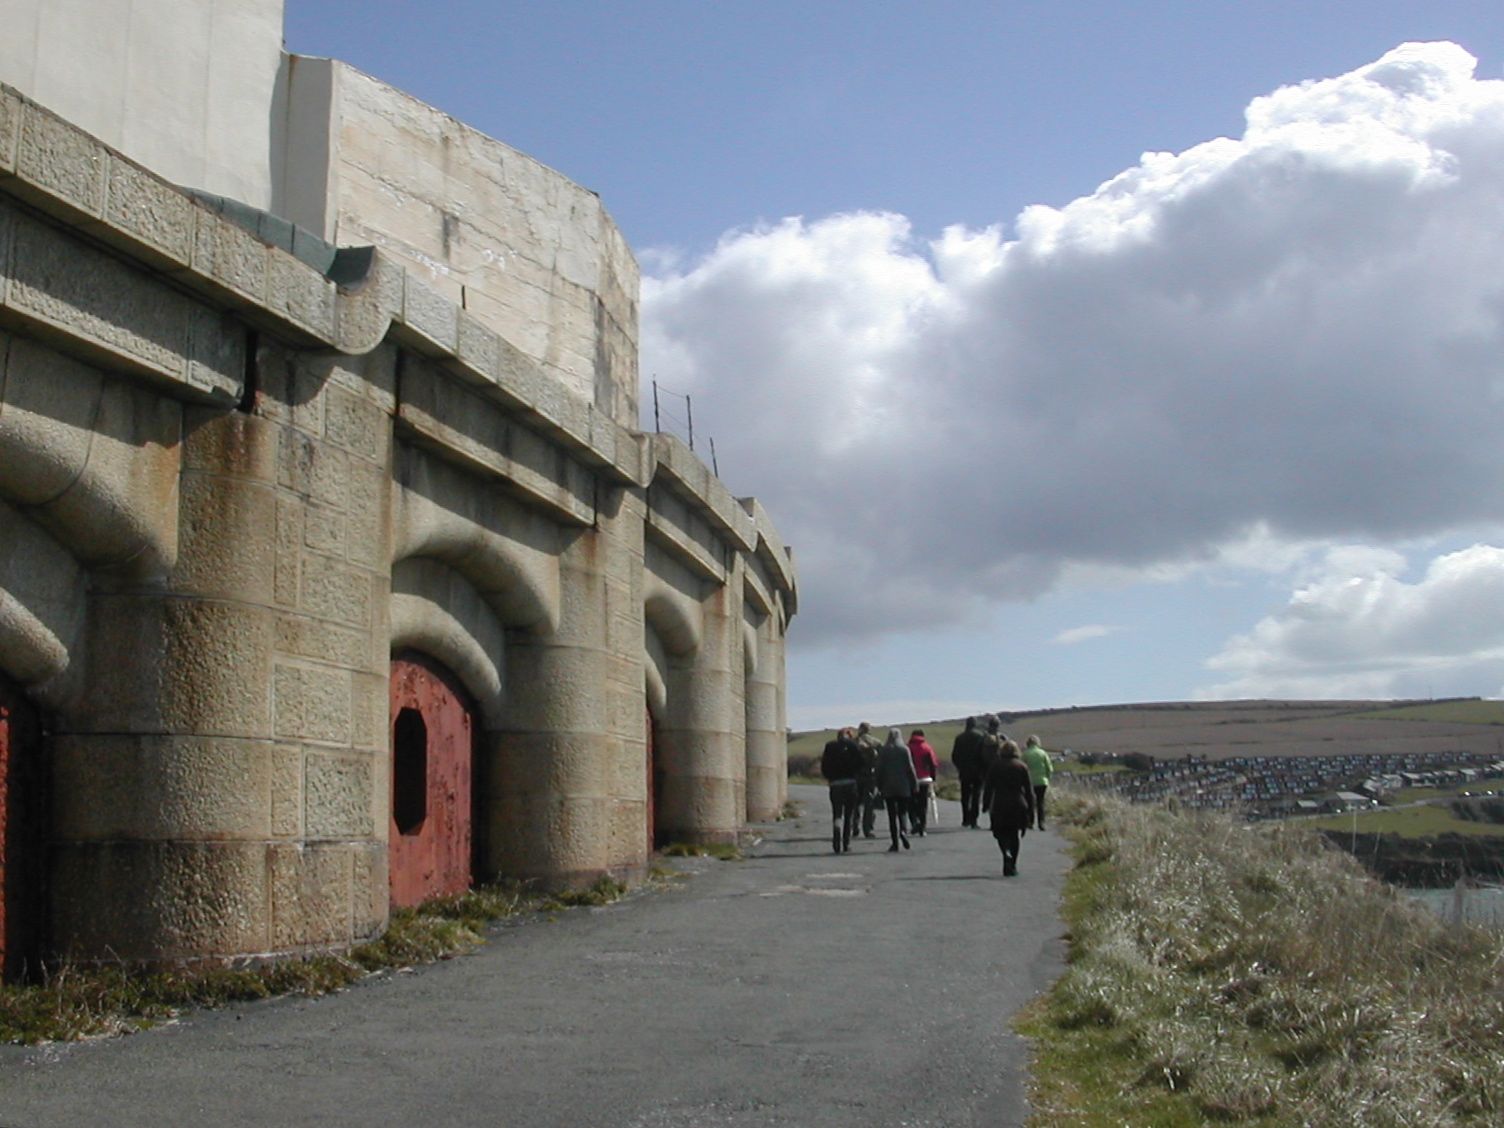
Fort Bovisand
SX487507
From the early nineteenth century the bay was used by warships moored in the sound for taking on water and a stone jetty and slip were constructed to facilitate this. Work started in 1861 on the main part of the fort consisting of 23 granite casemates but in 1864 the original plans for a two storey structure were abandoned on grounds of cost and the final plan implemented for a single tier of 24 heavier guns, specifically 9-inch Rifled Muzzle Loaders (RMLs). All of which cost just over 58,000 GBP not counting the cost of the iron shields for the embrasures. By 1880 the armament had been upgraded to 14 10-inch and nine 9-inch RML guns and subsequently in 1898 four 12-pounder quick-firing guns were installed. Early in the twentieth century most of the armament was removed. In 1942 the four 12-pounders were replaced by two twin 6-pounders for in shore defence and a Bofors 40mm anti-aircraft gun was added in 1943. By 1957 the fort was abandoned before being turned into a diving school in the early 1970s, a variety of diving relating businesses have operated from there but currently (2010) the fort appears semi-derelict and facing an uncertain future.
From the early nineteenth century the bay was used by warships moored in the sound for taking on water and a stone jetty and slip were constructed to facilitate this. Work started in 1861 on the main part of the fort consisting of 23 granite casemates but in 1864 the original plans for a two storey structure were abandoned on grounds of cost and the final plan implemented for a single tier of 24 heavier guns, specifically 9-inch Rifled Muzzle Loaders (RMLs). All of which cost just over 58,000 GBP not counting the cost of the iron shields for the embrasures. By 1880 the armament had been upgraded to 14 10-inch and nine 9-inch RML guns and subsequently in 1898 four 12-pounder quick-firing guns were installed. Early in the twentieth century most of the armament was removed. In 1942 the four 12-pounders were replaced by two twin 6-pounders for in shore defence and a Bofors 40mm anti-aircraft gun was added in 1943. By 1957 the fort was abandoned before being turned into a diving school in the early 1970s, a variety of diving relating businesses have operated from there but currently (2010) the fort appears semi-derelict and facing an uncertain future.
Some interior photographs from 2008 are posted on the UK UE Urbex Urban Exploration Forum site with more to be seen here from 2010. Palmerston Fort Society Log Page
 |
 |
 |
| Ditch and loopholed wall E of Bovisand looking N | Bovisand Fort with Picklecombe Fort in distance, looking N | Bovisand, detail of casemates looking N |
 |
 |
 |
| Detail of ditch and loopholed wall E of Bovisand looking N | Wall and steps up to Staddon Point Battery from S | Fort Bovisand frontage looking SE |
Fort Bovisand and Staddon Point Battery from E
Watch House Battery SX489509
This concrete battery with two emplacements for 6 inch BL guns was built on top of Staddon Point in 1895 on the site of a earlier pentagonal earthwork, the rock cut ditch making its way up the hill from Bovisand begins next to the east end of the fort where it is protected by a loopholed cross wall and a loop holed galler on the west face. At its lower end the ditch is around 6 metres deep and 10 metres wide but as it climbs the hill it broadens and deepens. At the point where it is crossed by a footbridge it is 8 metres deep and 12 metres wide and by the time it approaches the crest of the hill it is nearly 18 metres wide and up to 9 metres deep in places is around turns to the east through an oblique angle at this point there is a loop holed gallery on the north side of the ditch facing down along its length. After about 50 metres the northern scarp face of the ditch turns again to the north giving the effect of a demi-bastion built against the south east side of the battery. The area is fenced off and under military control.
There is a comprehensive account of the battery including many photographs, interviews with ex-servicemen and an account of the local flora on a 'Local Heritage Initiative' web site. Palmerston Fort Society Log Page
 |
 |
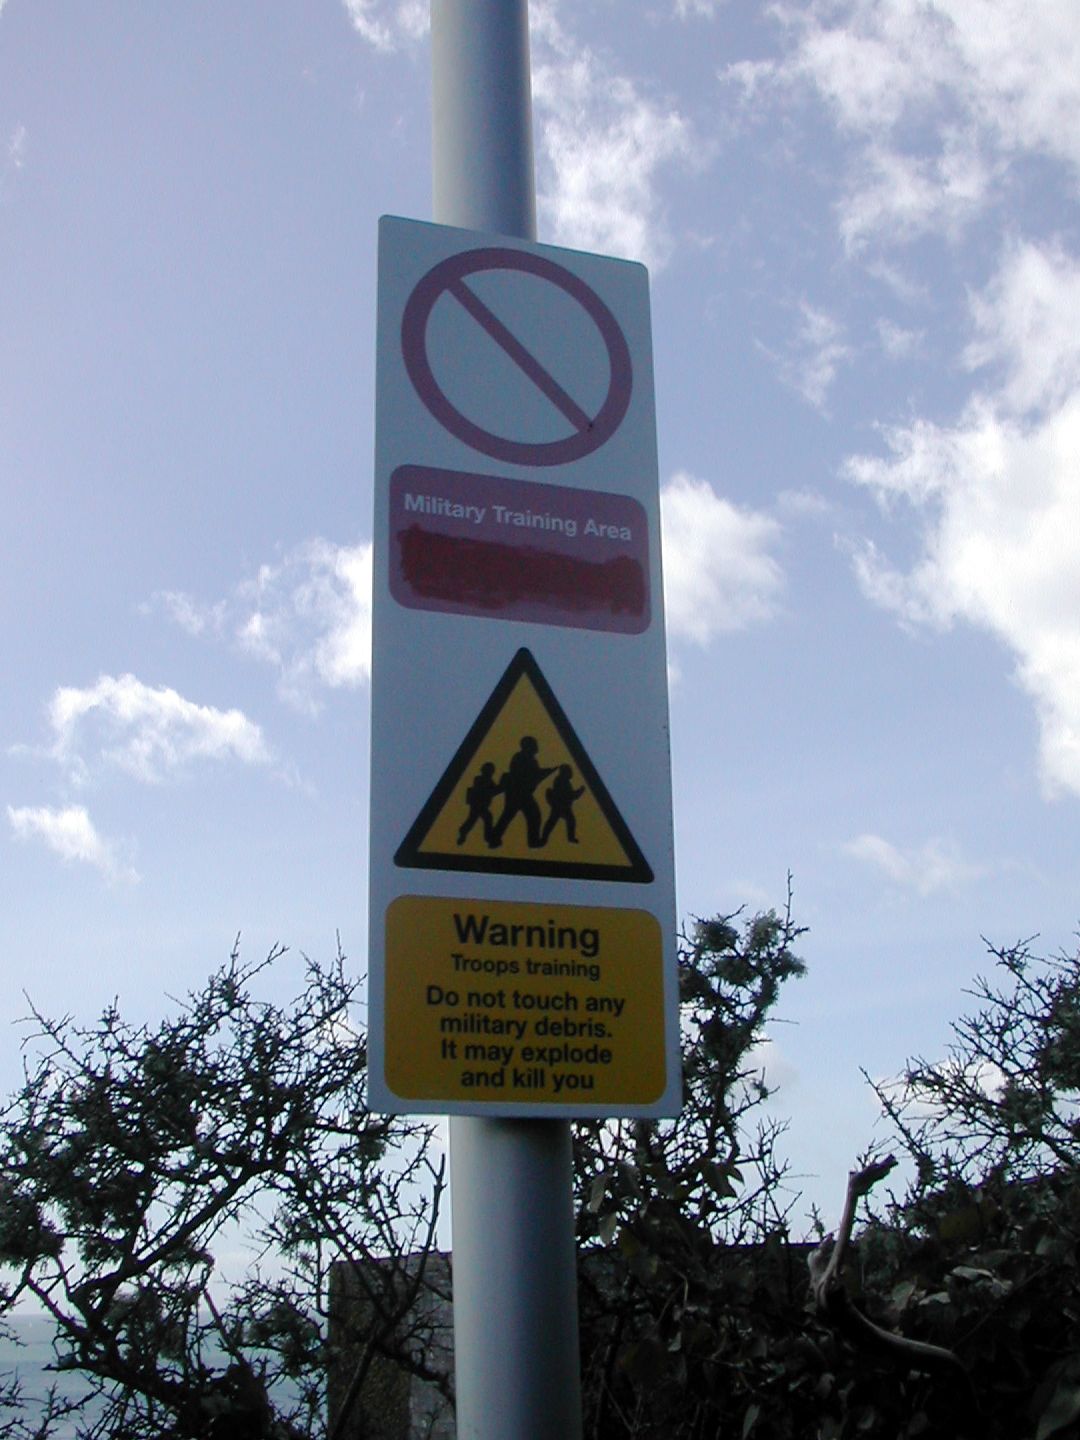 |
| Ditch and upper loopholed wall E of Bovisand, N end looking N | Watch House Battery from S | Sign on bridge adjacent to Staddon Point Battery |
Armament of Watch House Battery during World War II
Staddon Heights Battery SX488513
This lies around 300 metres north of Watch House Battery and was constructed in 1782 as a simple crescentic bank. It was abandoned by 1847. Today the area is fenced and wooded
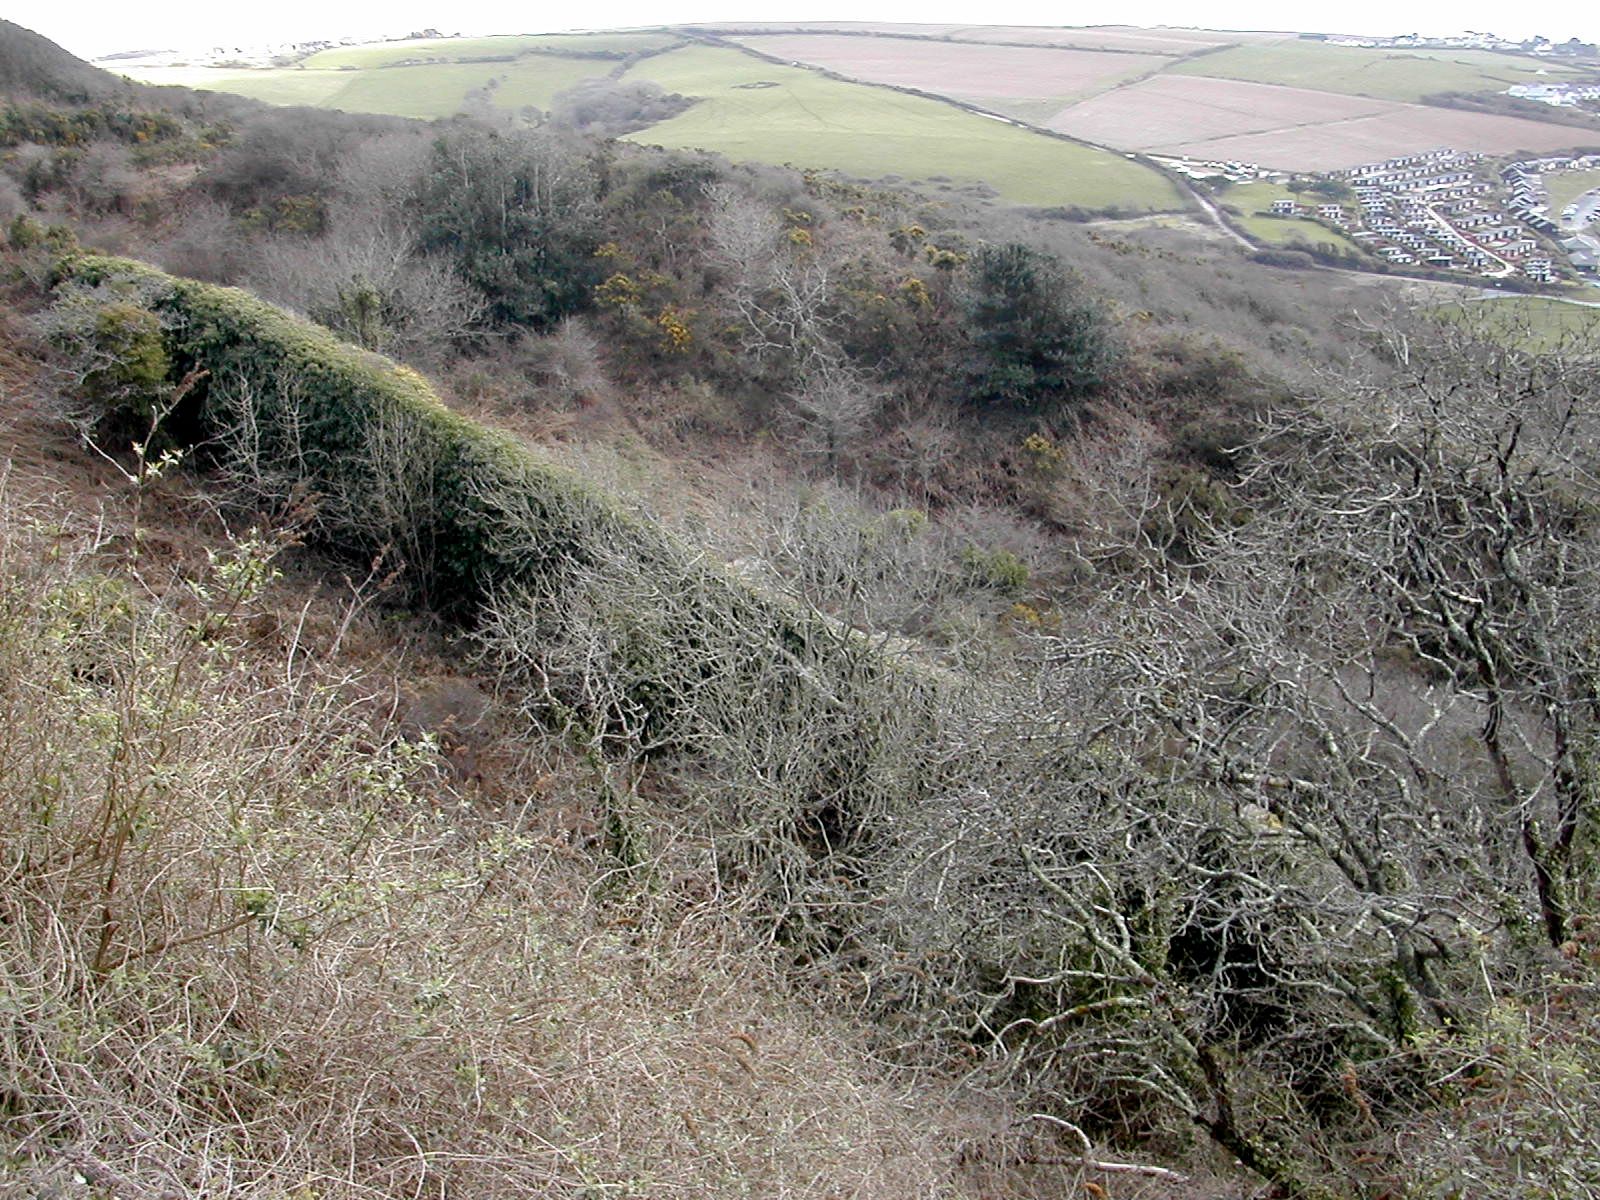
The next section of the line presents some problems of interpretation. The northern face of the ditch runs east for around 120 metres before cutting south and then south east to give the impression of a second large demi-bastion. This eastern section of ditch flanked by the two demi-bastions presents a number of curious features. The southern scarp of the ditch is by no means obvious and the ground south of the line seems oddly disturbed. Furthermore a massive wall occupies some of this central length with a large declivity behind it. these arrangements are largely as shown by the 1894 OS map. The wall itself resembles the massive length of stonewalling on the headland above which was erected in the nineteenth century as a screen for a military rifle range. The wall is heavily buttressed on its southern face which has a pronounced outward slope, the inner face appears on oblique aerial views as vertical. The exact function of this construction will remain a mystery until it can be examined first hand, heavy thorny undergrowth makes access difficult even during winter months. Beyond this section the story becomes significantly simpler: a single massive ditch runs along the top of the slope down to Bovisand Bay before, after around 500 metres, bending through a right angle to head north for a further 700 metres to the perimeter of Fort Staddon. For much of its length the ditch is shadowed by the modern road which curves down to Bovisand Bay. The eastern scarp has been lost but a near vertical rock face up to 8 metres high testifies to its size. Back at the eastern most of the 'demi- bastions' a flat topped bank some 15 metres wide heads in a direction somewhat south of north east for around 300 metres to the gorge of Brownhill Battery. Aerial photographs suggest by the profiling of this bank that it represents, towards its western end the location of Frobisher Battery, which was armed with one 12.5" RML in the 1890s, whilst at the same time providing cover for the military road linking Staddon Heights with Fort Staddon.
 |
 |
 |
| Wall between Watch House and Frobisher Batteries from NW | Watch House battery from Frobisher Battery looking W | Continuation of ditch to E of Frobisher battery from NW |
Brownhill Battery SX494511
Built around In 1875 as a simple open earthwork battery with a curving earth rampart backed by a loopholed wall and guardhouse with magazines 'tunneled' into the bank, it had an armament of eight 64 pounder RMLs on carriages stored at Fort Staddon but by 1893 these were replaced with six 8 inch RML howitzers, in 1903 two 40 pounder RMLs were added but the site was effectively disused after World War I. It says something about the way in which these forts hug the landscape that looking around in the early seventies Ian Hogg could find no trace of it! There is a detailed photographic record by a team from 'Derelict Places'. Today the site is open and easily accessible from the lane leading south from Fort Staddon adjacent to Staddon Heights golf course. The wall is in good condition but the interior is churned up the buildings falling down and the rampart overgrown.
 |
 |
 |
| Flat topped rampart E of Frobisher Battery looking W | Rampart E of Frobisher Battery, rear face looking W | Ditch S of Brownhill Battery looking S |
 |
 |
 |
| Brownhill
Battery, detail of loophole from W |
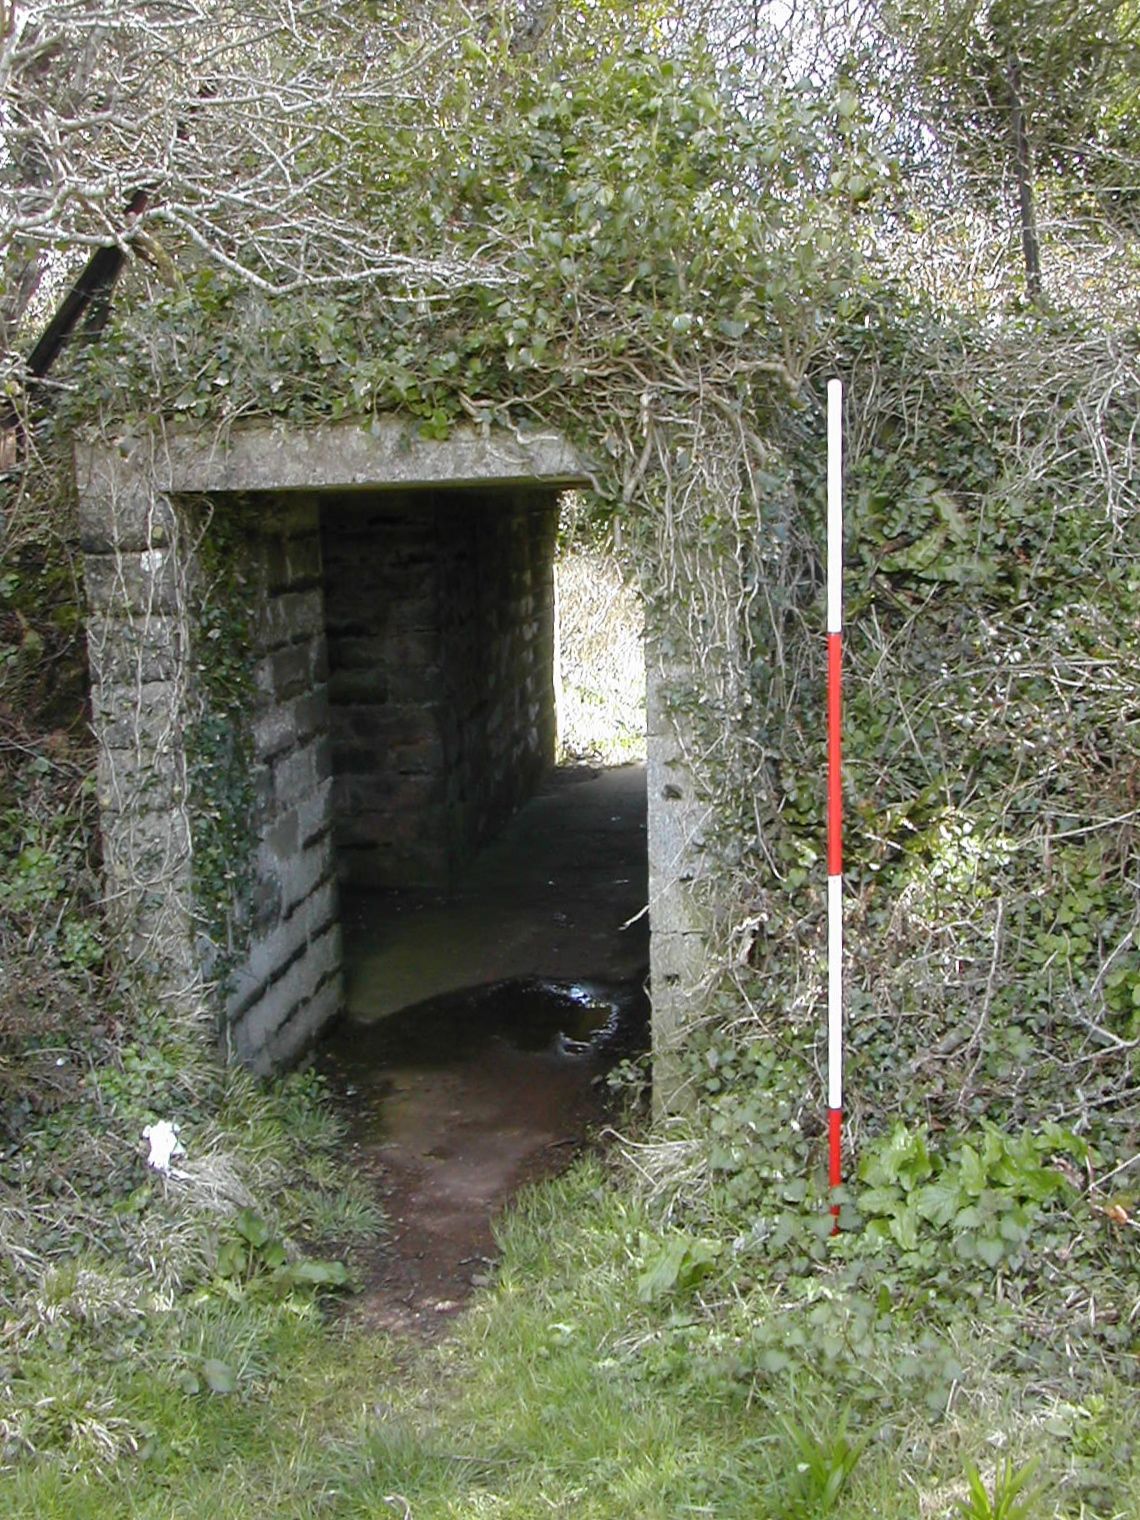
Brownhill Battery, magazine from N | Passage through bank N of Brownhill looking E |
 |
 |
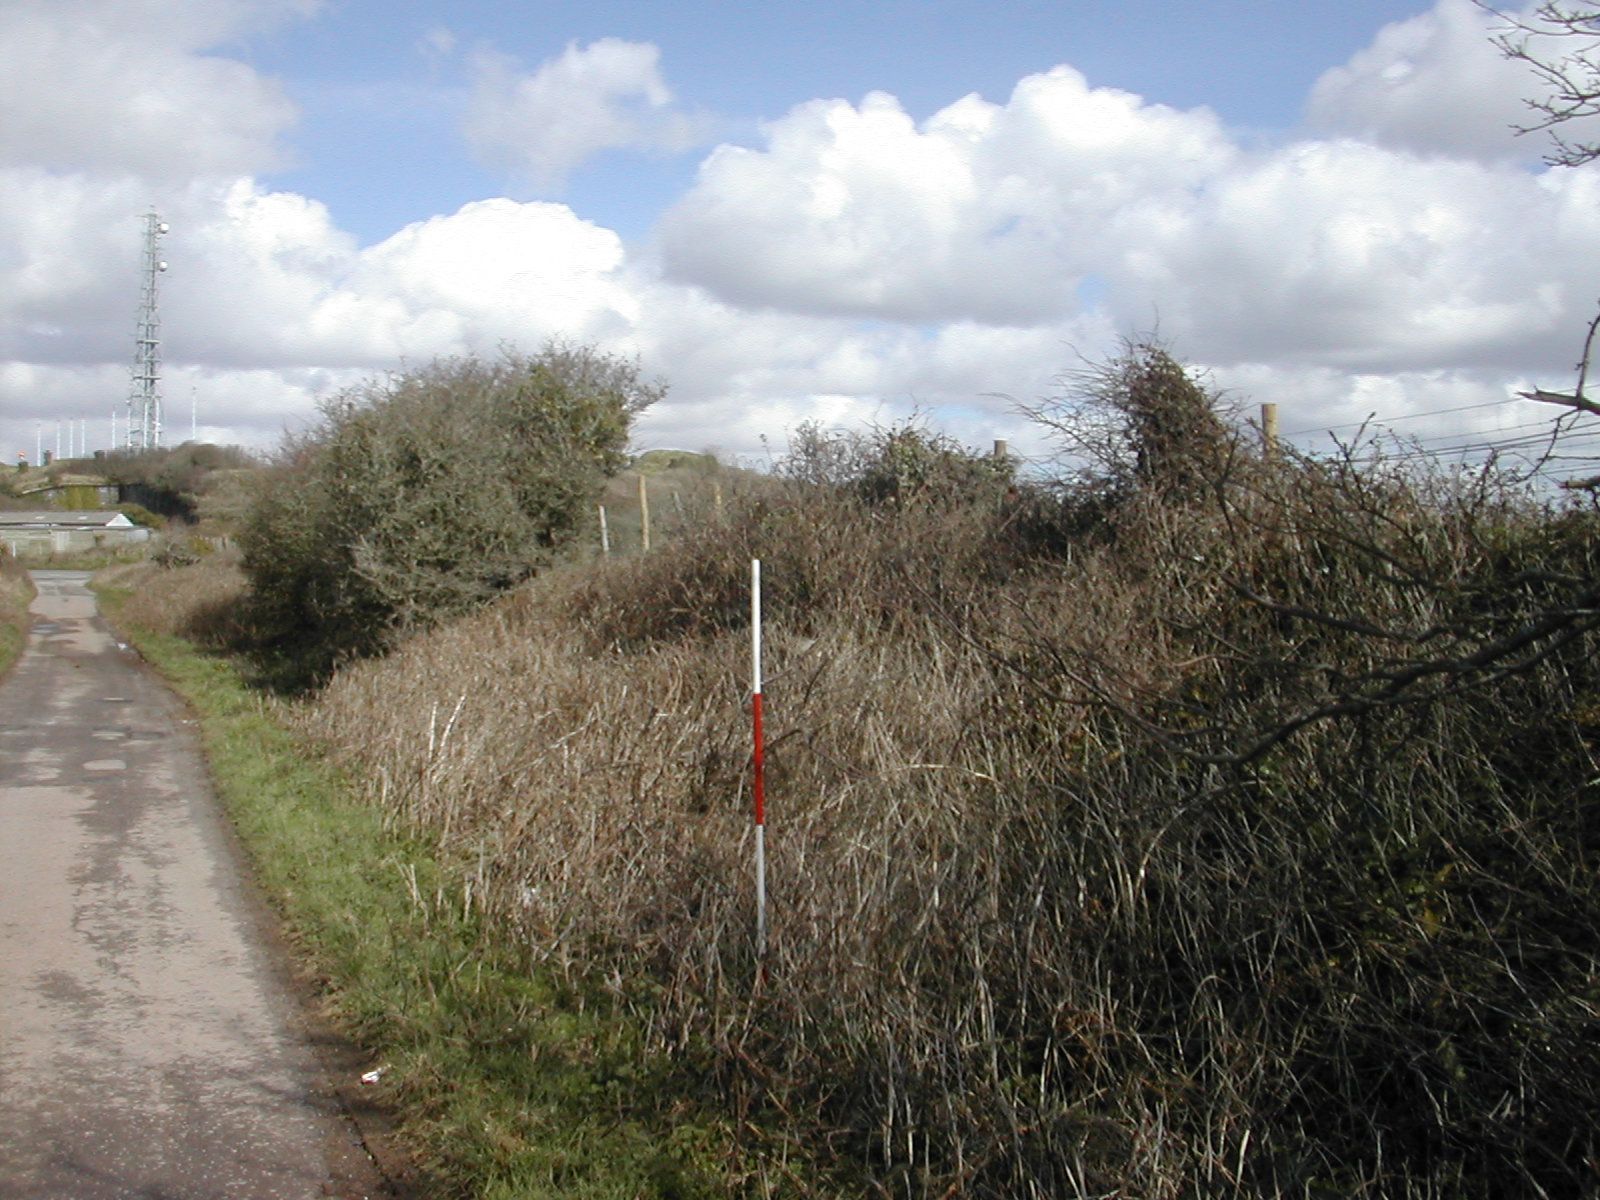 |
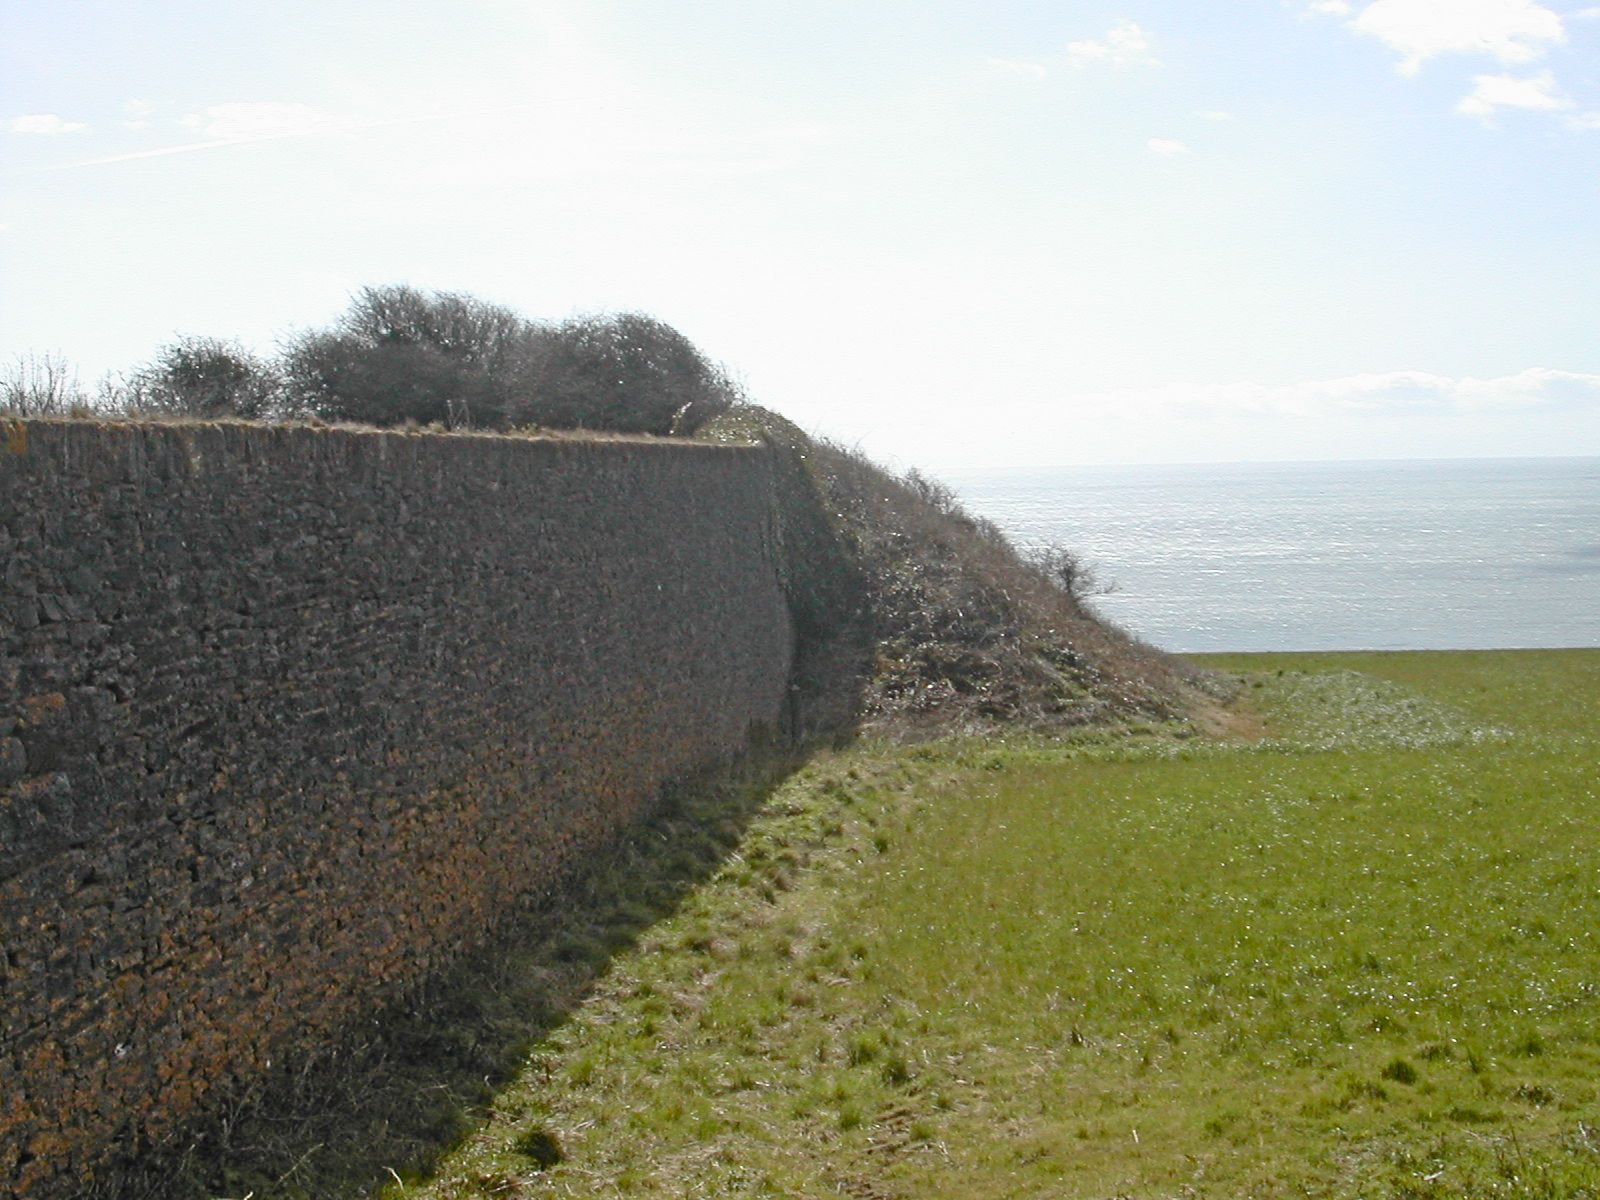
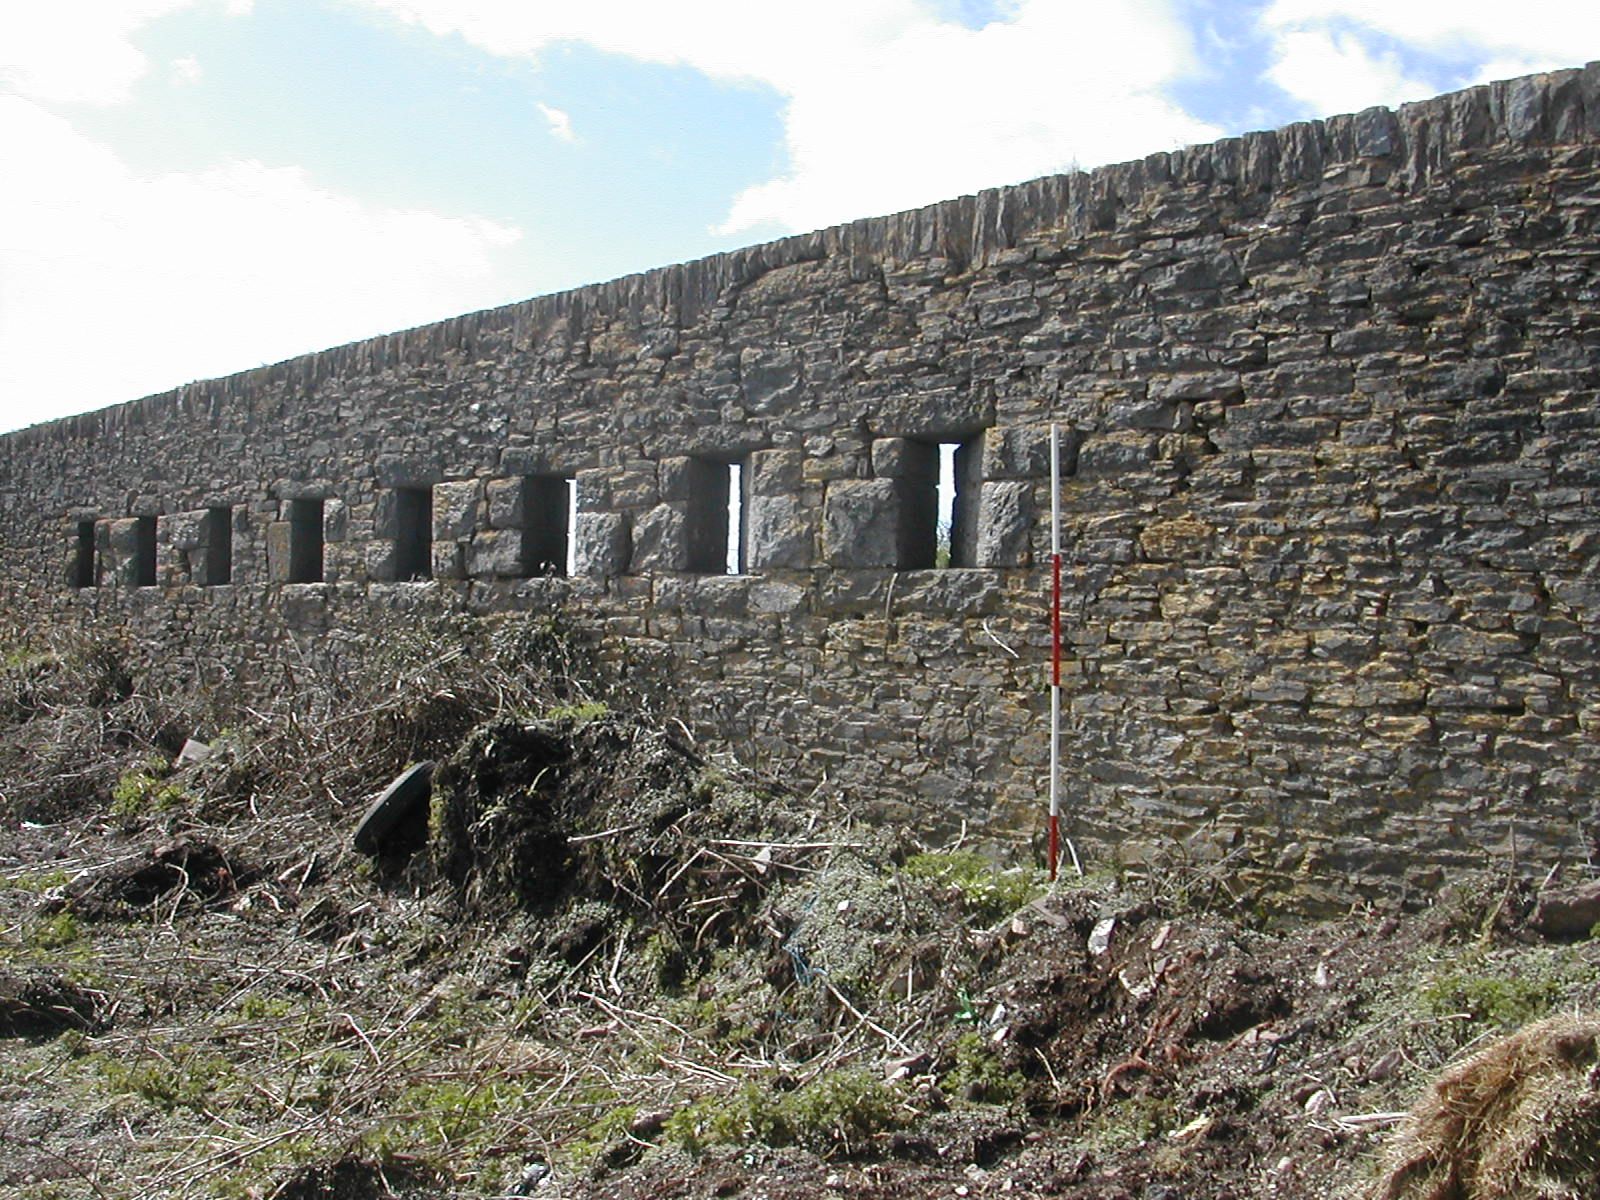
| Brownhill Battery, gorge wall and rampart looking S | Brownhill Battery, loopholes in gorge wall from interior looking SW | Military road and bank approaching Fort Staddon looking N |
The military road and bank running south from Fort Staddon to Brownhill Battery, from NE, beginning of ditch on left
The military road and bank running south from Fort Staddon to Brownhill Battery ( on the horizon), looking S
Defensive bank S of Fort Staddon looking NE
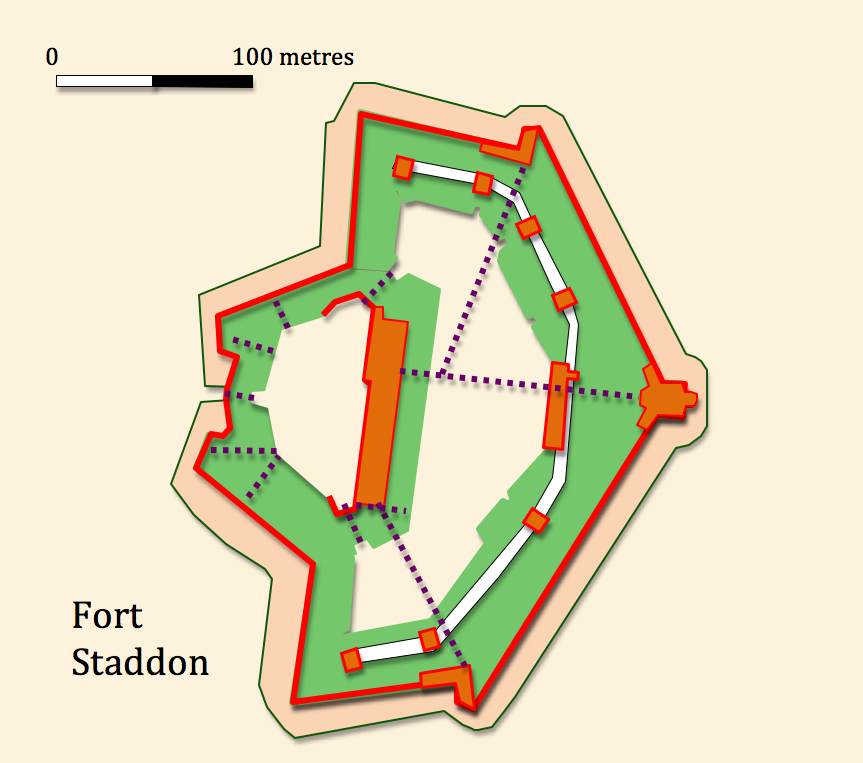
Fort Staddon SX496517
Constructed between 1861 and 1869 at a cost of just under 113,000 GBP Fort Staddon designed by Captain Edmund Du Cane occupies a similar position in the Staddon Line to Crownhill Fort in the Northern Line. It faces to the east where the defences can be approached from higher ground along the watershed between two streams flowing north and south but was also located so as to command the approaches to Plymouth from the sea. In occupying Staddon heights it denied any invader the opportunity to shell the city and dockyard from the south. The fort is essentially a pentagonal work with the salient angle protected by a double caponier directed towards the east. Where in lesser works the gorge is closed by a wall and guardhouse or gatehouse here the western wall and rampart is developed to create a westward projection which takes the form of a slightly curved curtain with central entry way flanked by two demi-bastions. An inner courtyard is dived off from the rest of the interior by a further earth rampart giving in effect a keep like enclosure which contains much of the accommodation. Originally designed for a garrison of 200 the fort was also planned to carry sixteen guns on the ramparts, six in haxo casemates and and six mortars in covered positions. In addition twelve more guns were to be installed in the keep, however, there is no evidence that the fort was ever armed in this way. It was defended by a deep ditch protected by two storey caponiers and galleries. The fort is currently used by the Navy for communications with masts sited on the parade. Much of the fort is empty but in excellent condition, there is no public access. We have already described the links with the southern portion of the line. A track way heads off in a straight line in a north easterly direction towards Fort Stamford. There are several other earthwork features in the vicinity of Fort Staddon but it is difficult without further study to identify those which relate to nineteenth century military use, those which date from the time of the two world wars and those which are associated with modern landscaping. Palmerston Fort Society Log Page
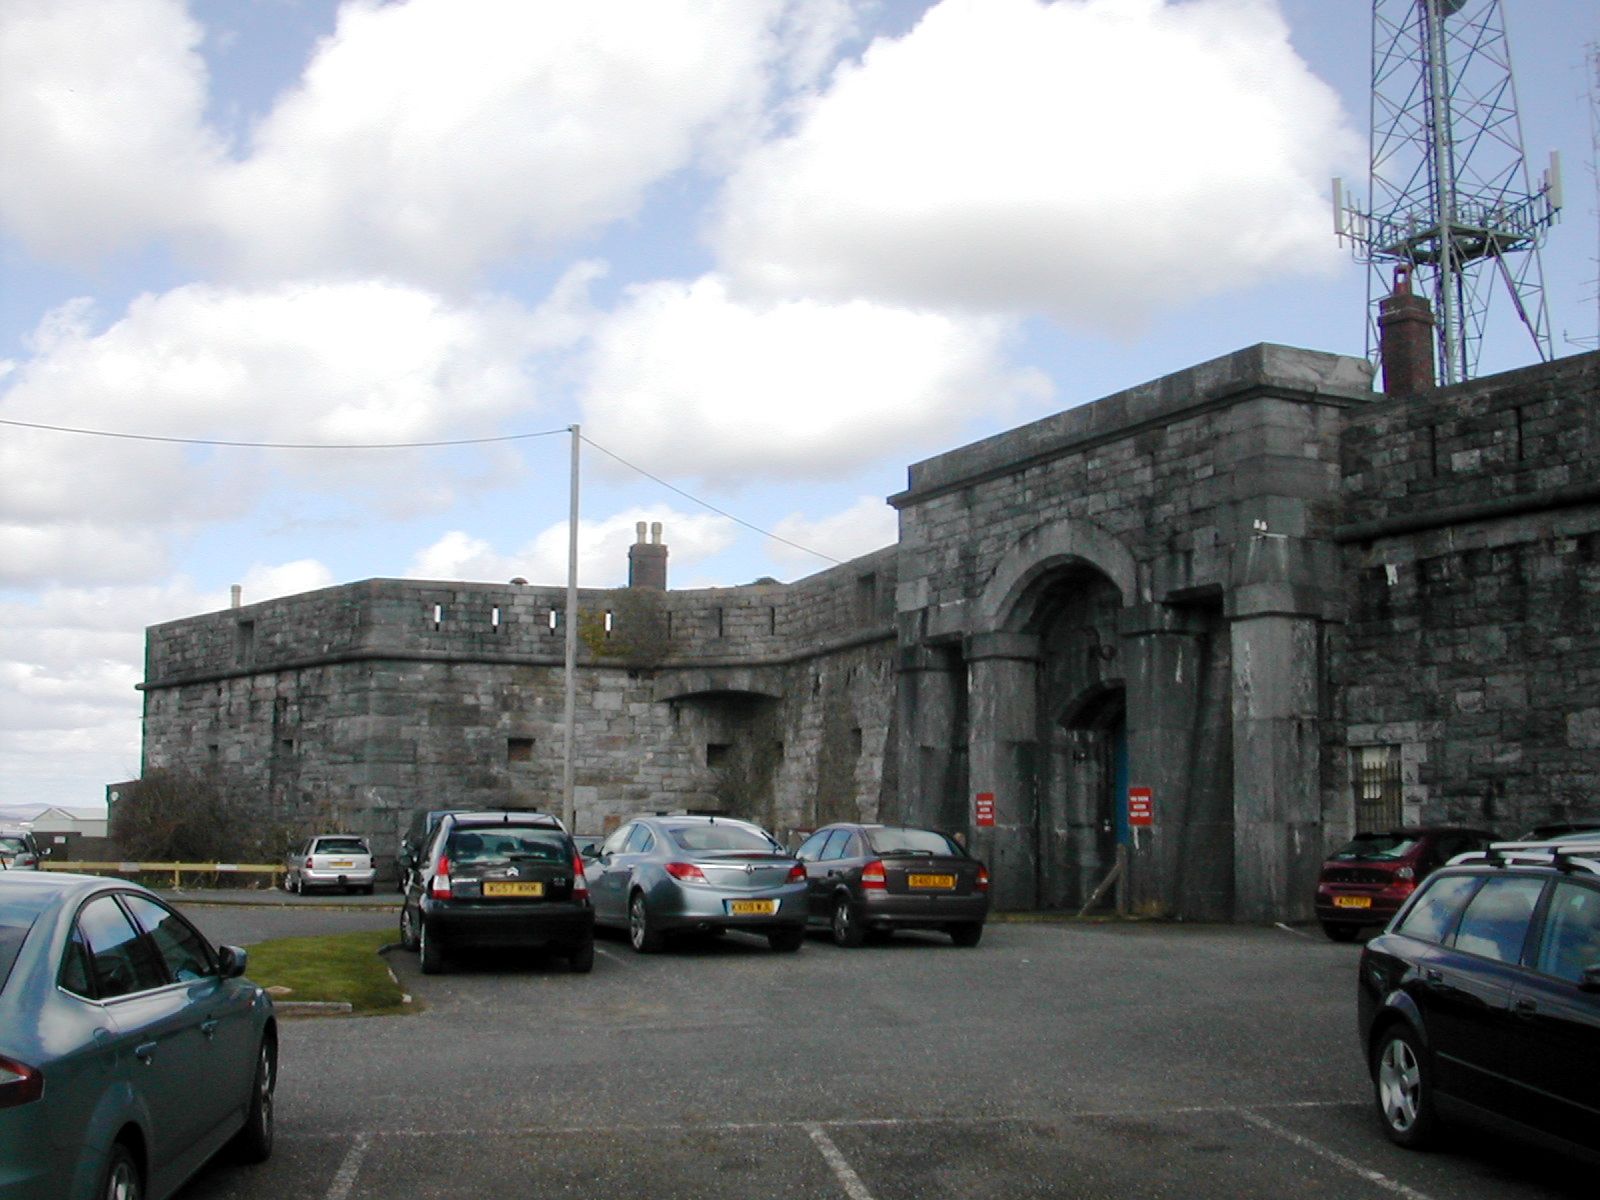
Fort Staddon from SW
Constructed between 1861 and 1869 at a cost of just under 113,000 GBP Fort Staddon designed by Captain Edmund Du Cane occupies a similar position in the Staddon Line to Crownhill Fort in the Northern Line. It faces to the east where the defences can be approached from higher ground along the watershed between two streams flowing north and south but was also located so as to command the approaches to Plymouth from the sea. In occupying Staddon heights it denied any invader the opportunity to shell the city and dockyard from the south. The fort is essentially a pentagonal work with the salient angle protected by a double caponier directed towards the east. Where in lesser works the gorge is closed by a wall and guardhouse or gatehouse here the western wall and rampart is developed to create a westward projection which takes the form of a slightly curved curtain with central entry way flanked by two demi-bastions. An inner courtyard is dived off from the rest of the interior by a further earth rampart giving in effect a keep like enclosure which contains much of the accommodation. Originally designed for a garrison of 200 the fort was also planned to carry sixteen guns on the ramparts, six in haxo casemates and and six mortars in covered positions. In addition twelve more guns were to be installed in the keep, however, there is no evidence that the fort was ever armed in this way. It was defended by a deep ditch protected by two storey caponiers and galleries. The fort is currently used by the Navy for communications with masts sited on the parade. Much of the fort is empty but in excellent condition, there is no public access. We have already described the links with the southern portion of the line. A track way heads off in a straight line in a north easterly direction towards Fort Stamford. There are several other earthwork features in the vicinity of Fort Staddon but it is difficult without further study to identify those which relate to nineteenth century military use, those which date from the time of the two world wars and those which are associated with modern landscaping. Palmerston Fort Society Log Page
 |
 |
 |
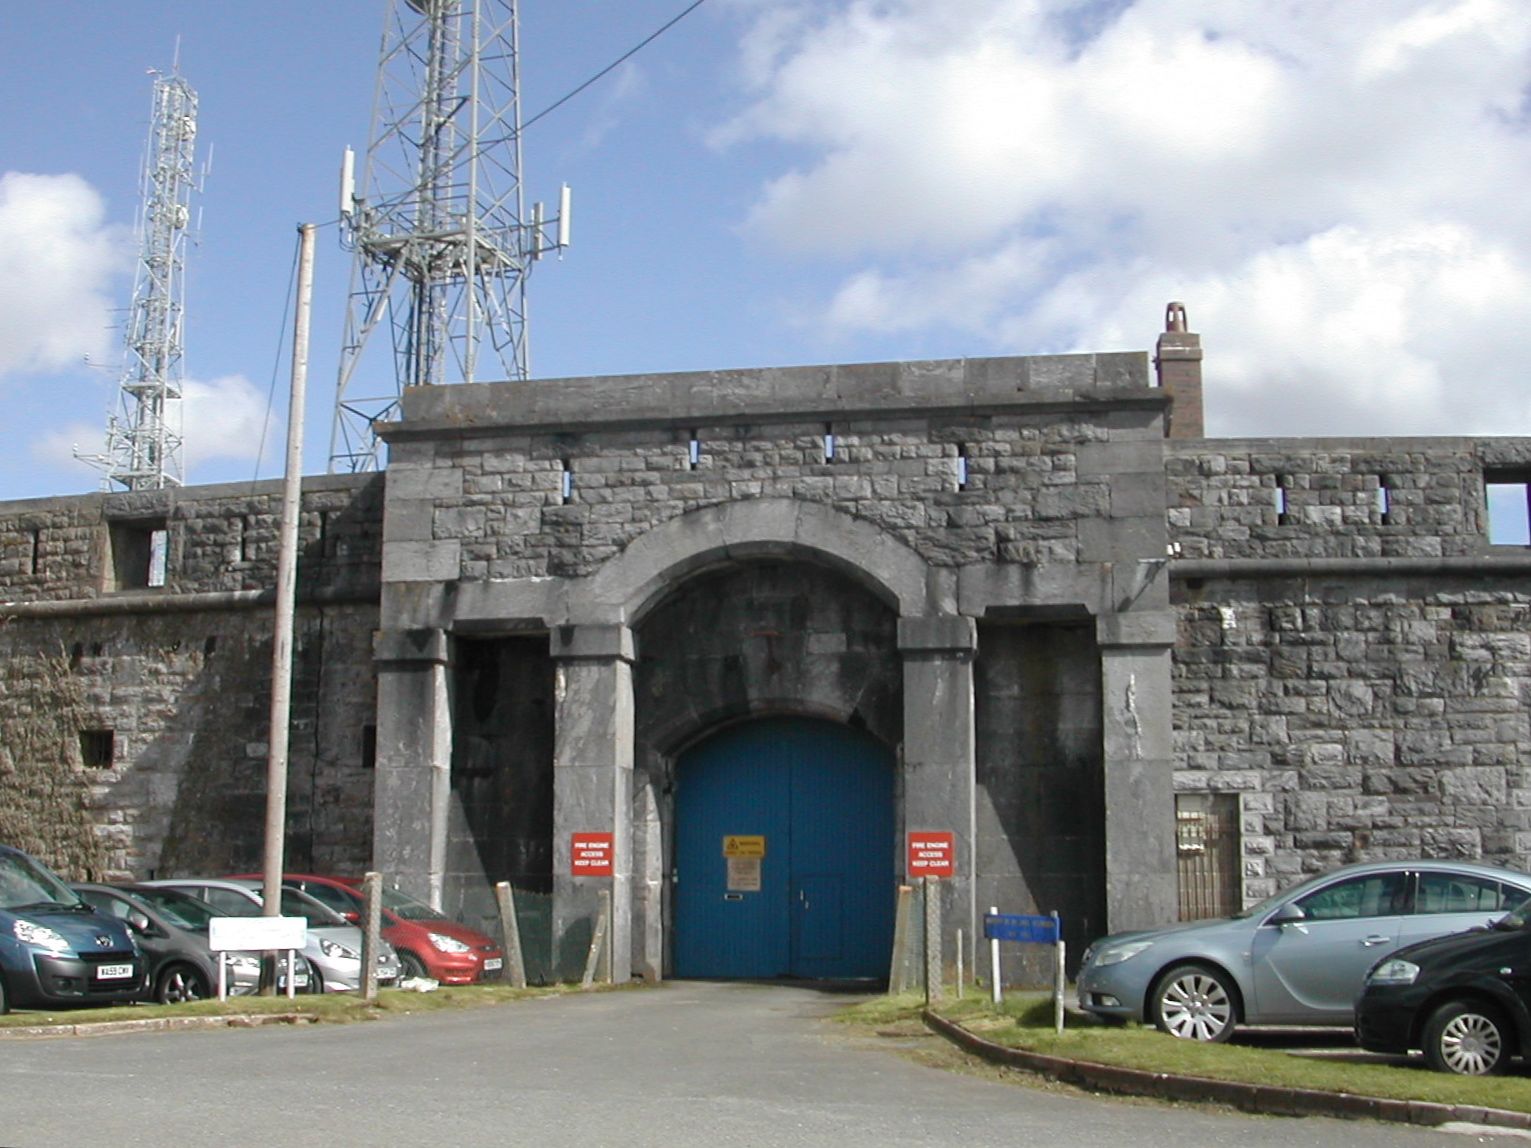
| Fort Staddon entrance and N demi-bastion from SW | Fort Staddon entrance from W | Fort Staddon detail of loopholes on demi-bastion S of gate from W |
 |
 |
 |
| Fort Staddon, S demi-bastion from S | Fort Staddon, SW re-entrant angle from W | Fort Staddon, NW re-entrant angle from W |
Fort Staddon from SW
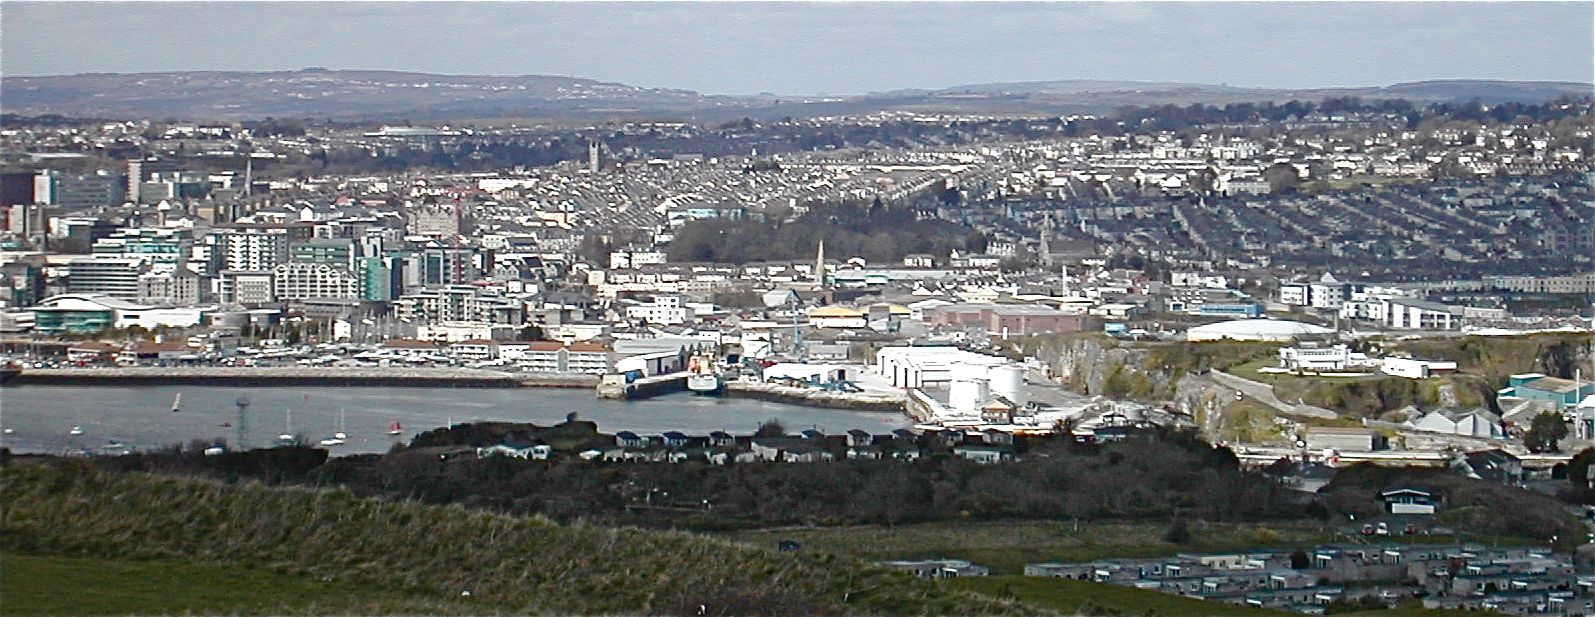
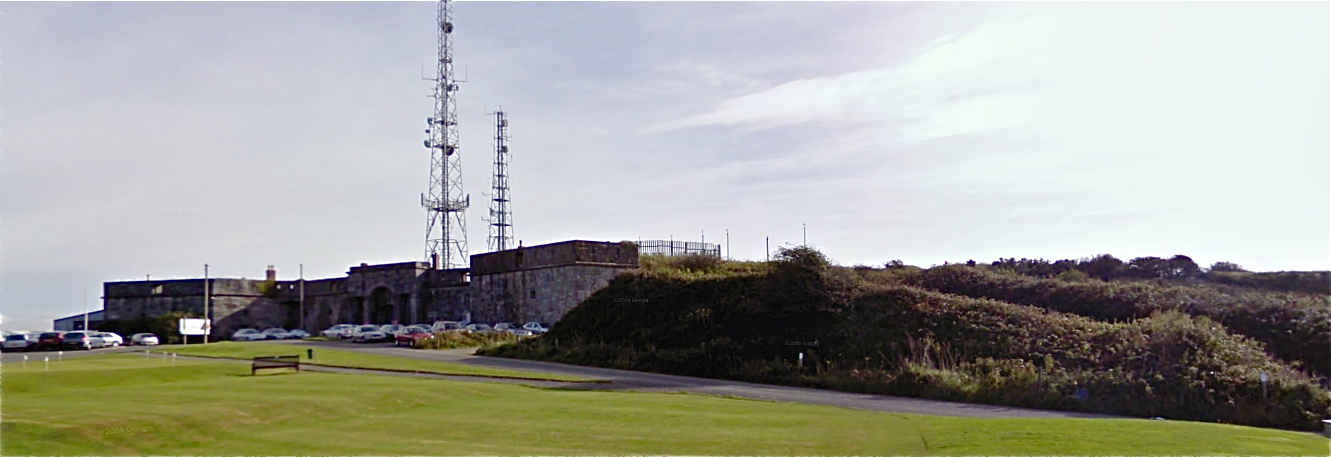
View from Fort Staddon across to city centre to N with rampart of unknown date in foreground and Fort Stamford just beyond
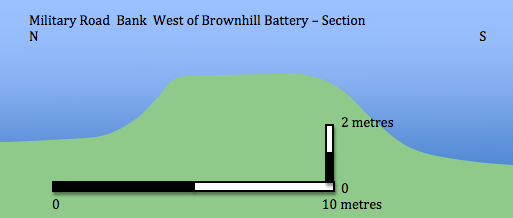
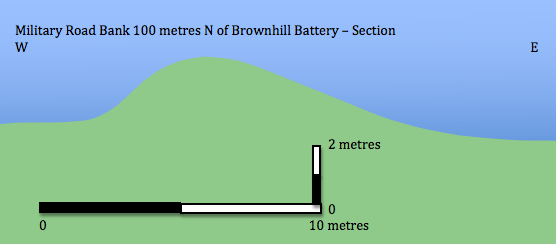
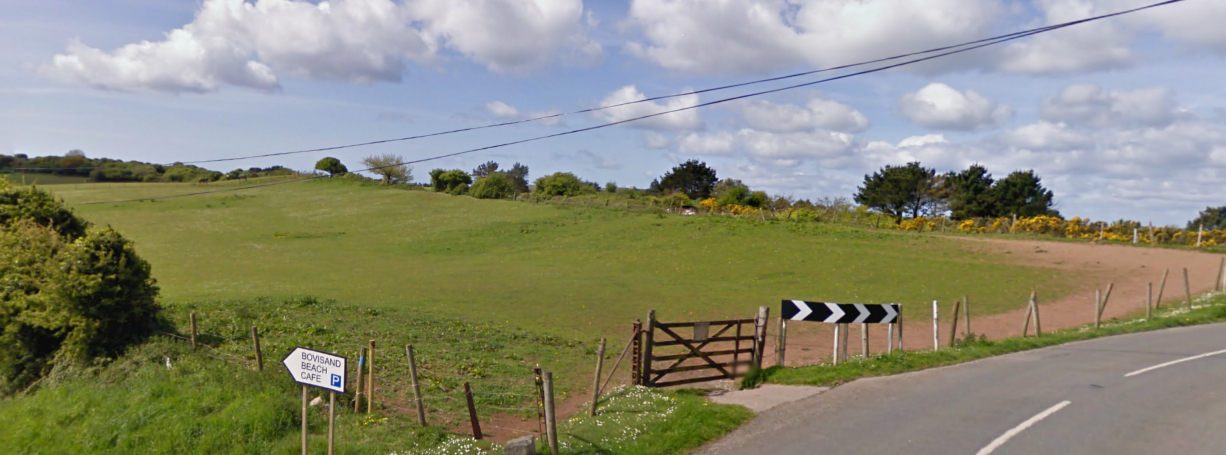
The
line of the military road north of Fort Staddon is not immediately
obvious. The track that takes a direct line to the north west comes up
against the steep scarp slope above the modern roadway and appropriate
means of access to the lower level
of
the road appears to be lacking. It may be therefore that heavy goods
travelled along the
current road which takes a sinuous line from the fort down towards
Jennycliff Bay whist foot traffic took the more direct route. Here a
patch of open ground, currently home to a car
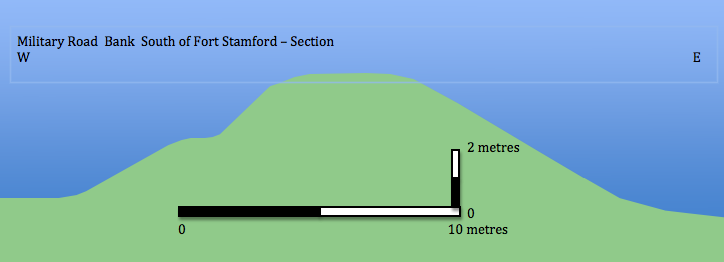
park and cafe is backed by a large bank up to 6 metres high. At first
glance this appears to be the result of leveling work for the car
park and the adjacent sports fields but as it appears on maps from at
least 1907 it may be part of the defensive scheme to deny easy passage
to those landing in the bay below or equally to further protect the
military route from attack from the east. From here the military road
takes a
direct line to Fort Stamford which lies some 200 metres further north.
The bank here lies on the eastern side of the road and is particularly
well preserved and accessible featuring a fire step along its western
edge.
 |
 |
 |
| W side
and fire step |
Military road and defensive bank running N to Fort Stamford | E side |
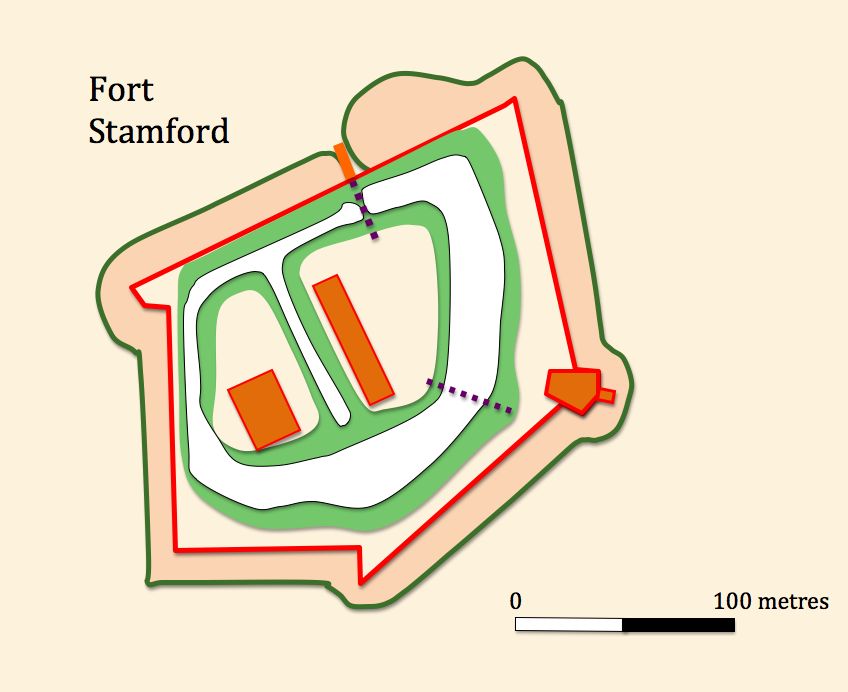
Fort Stamford
SX493527
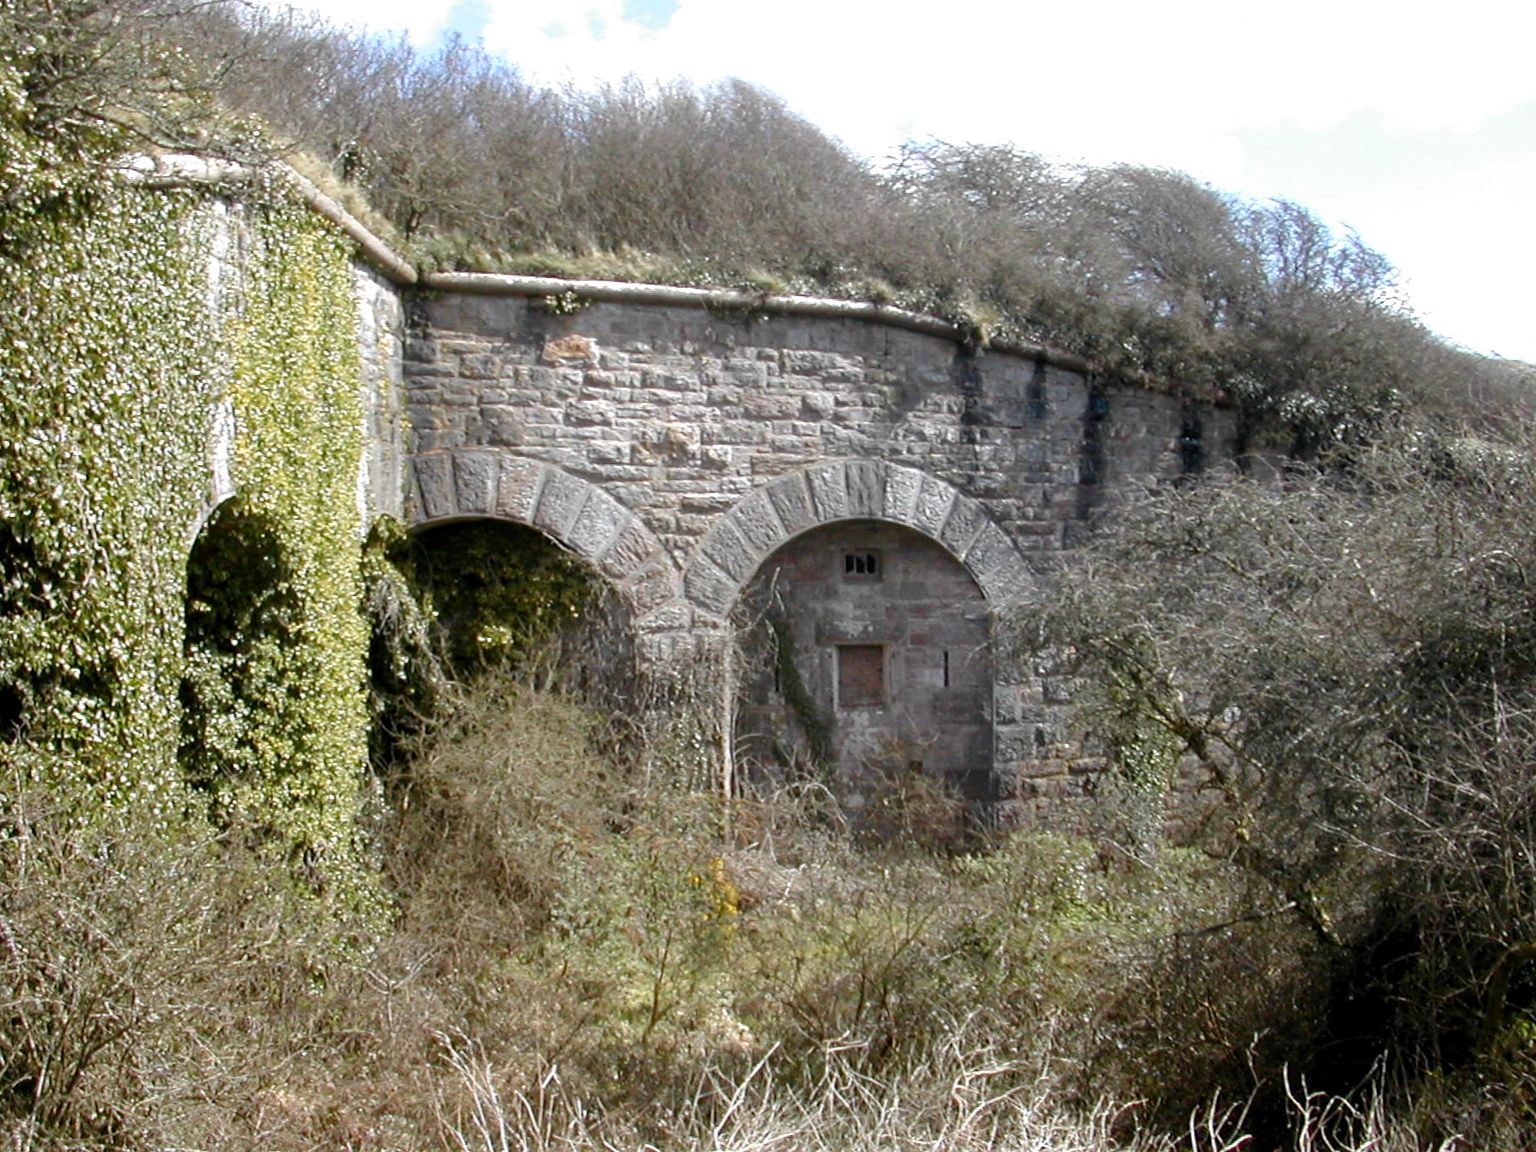
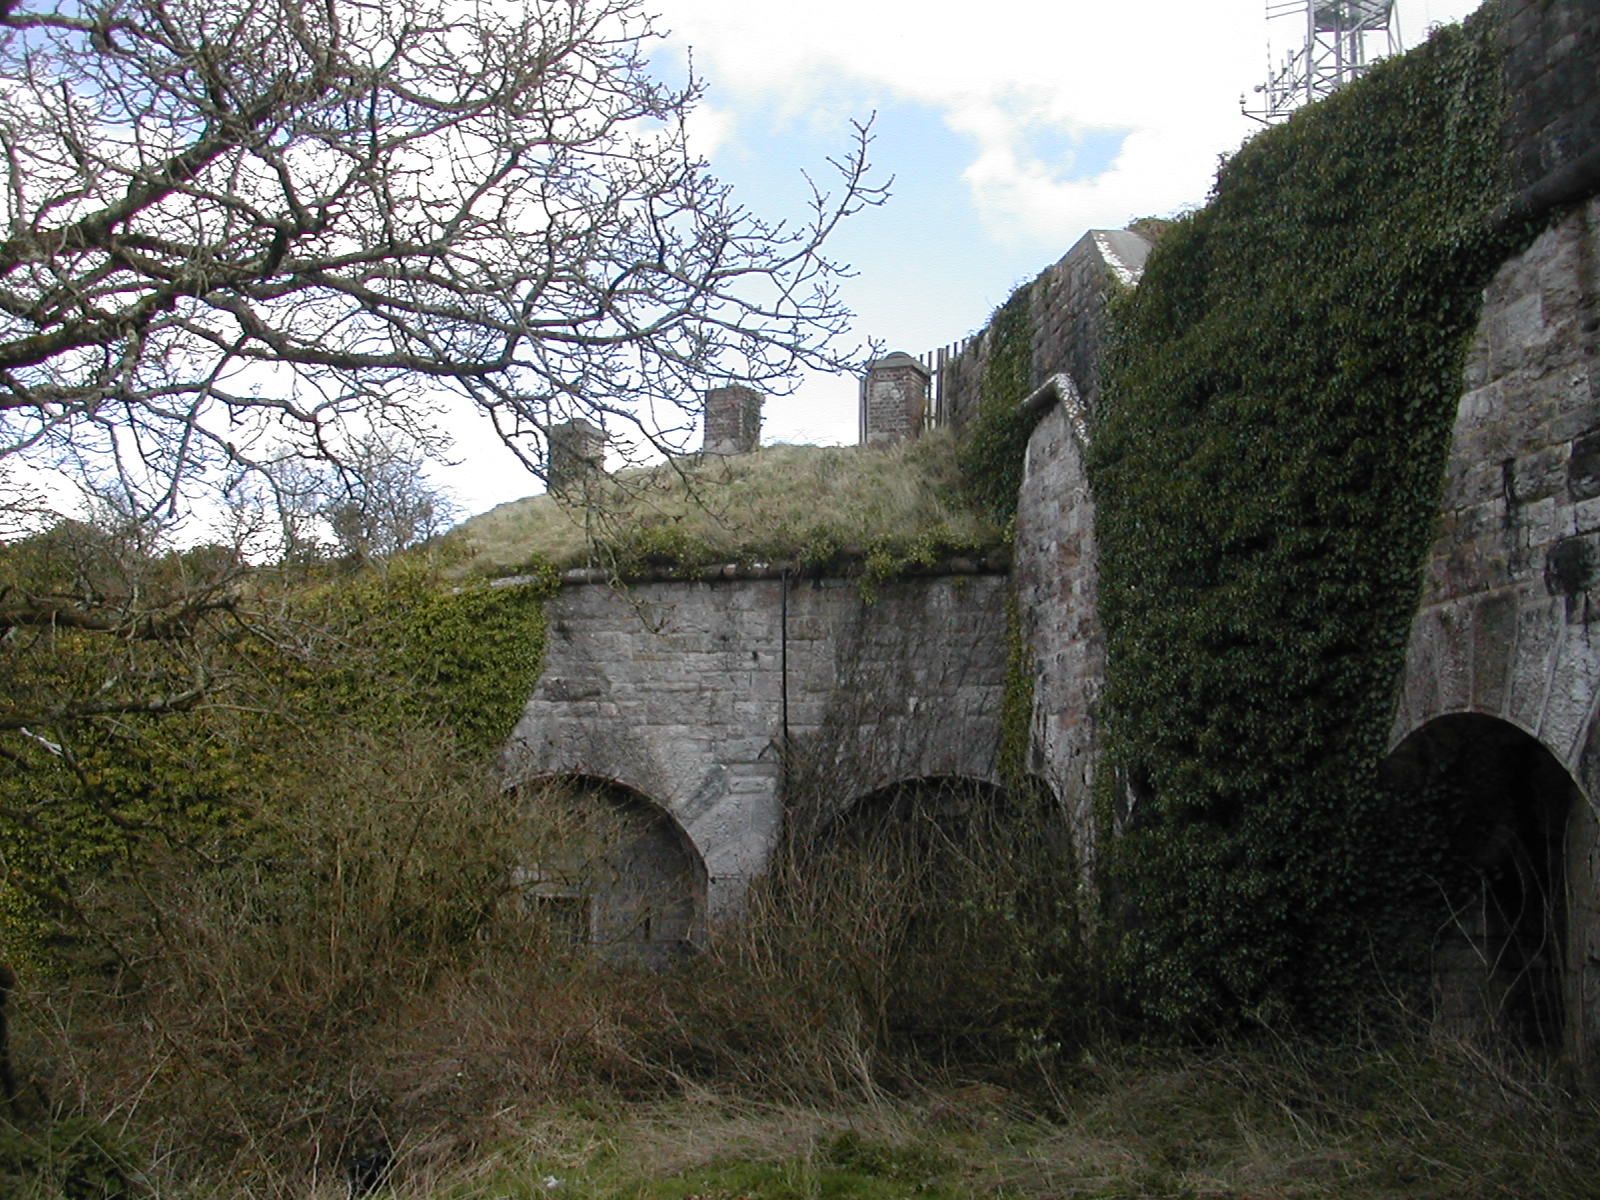
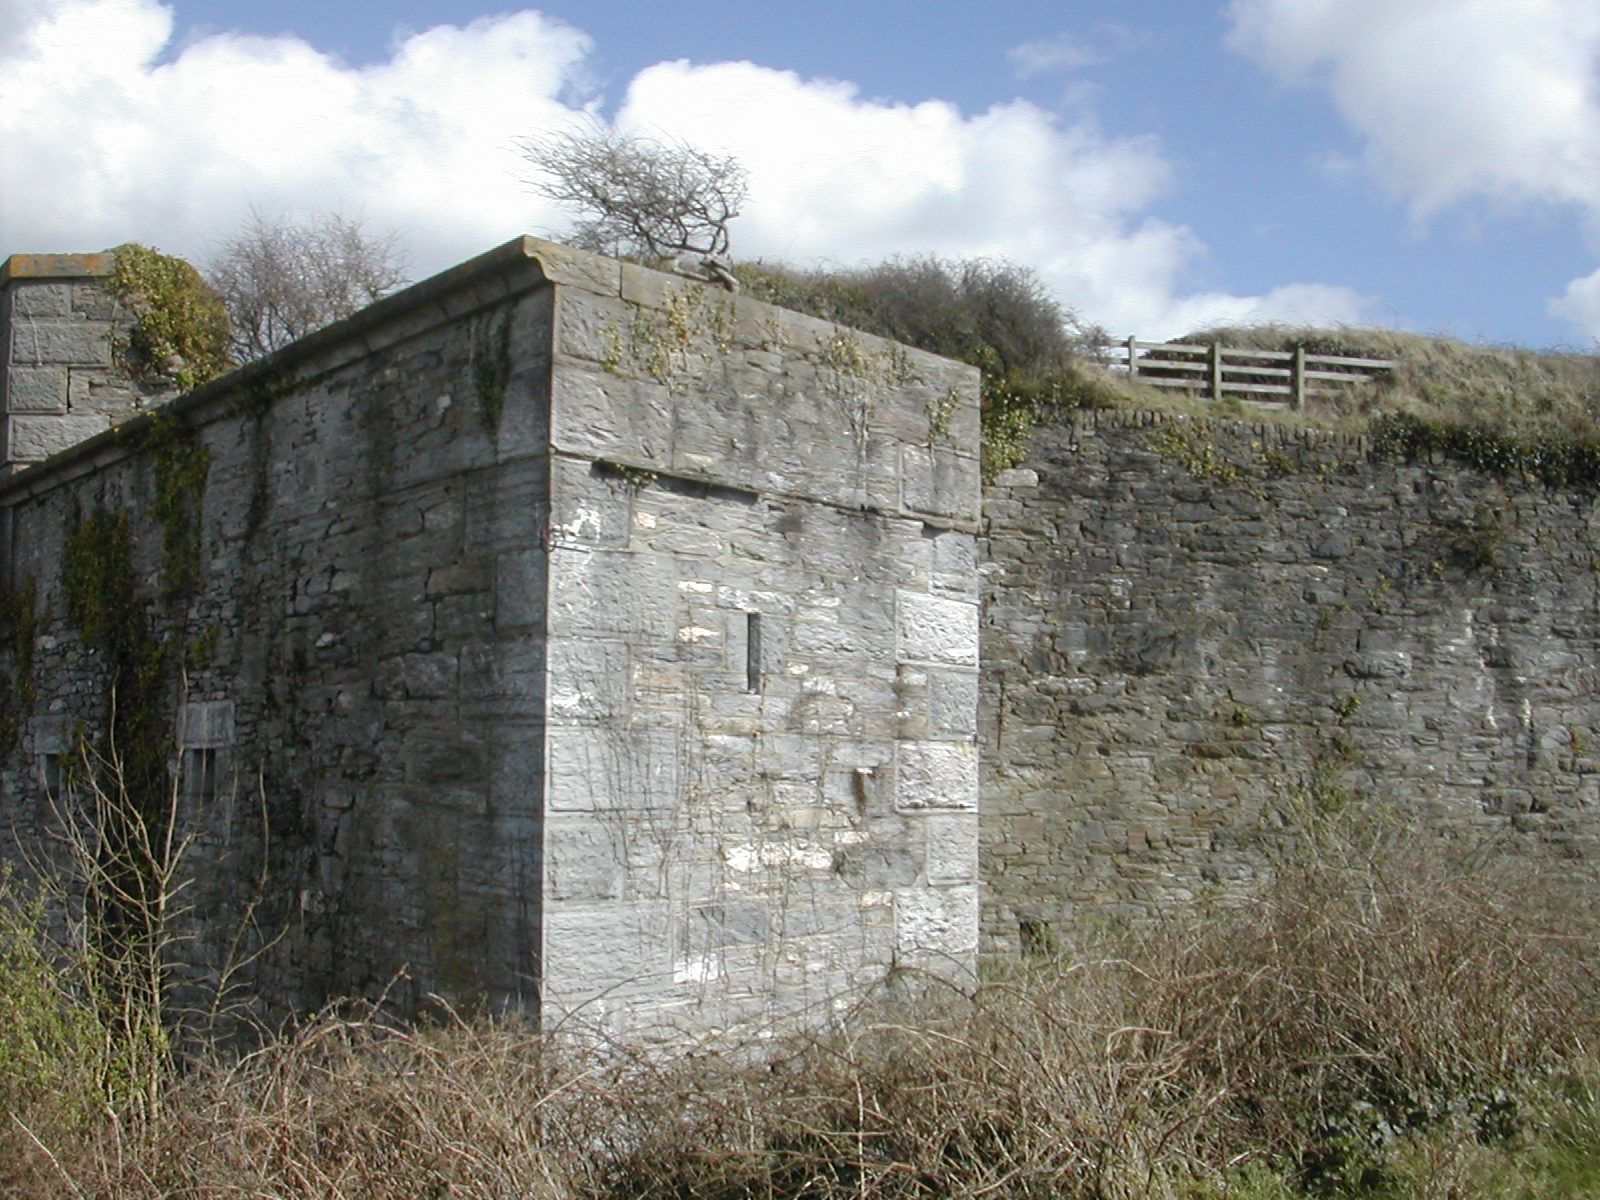
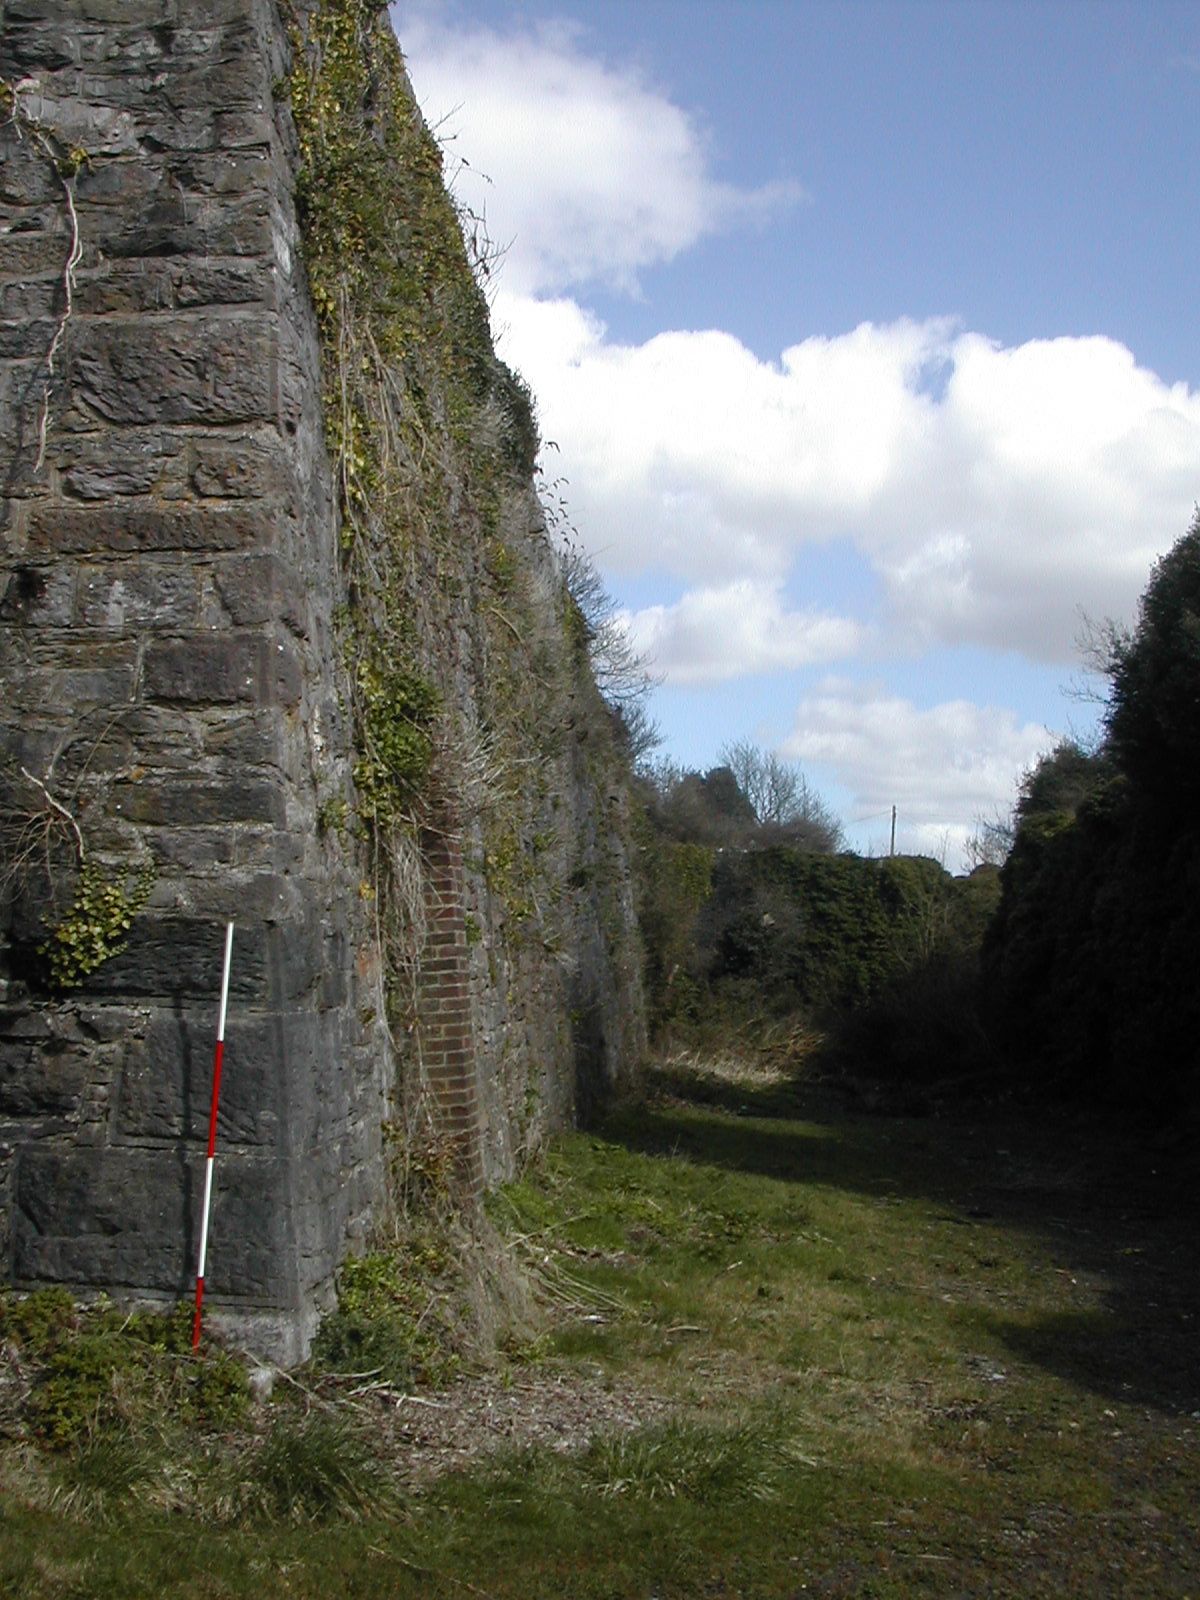
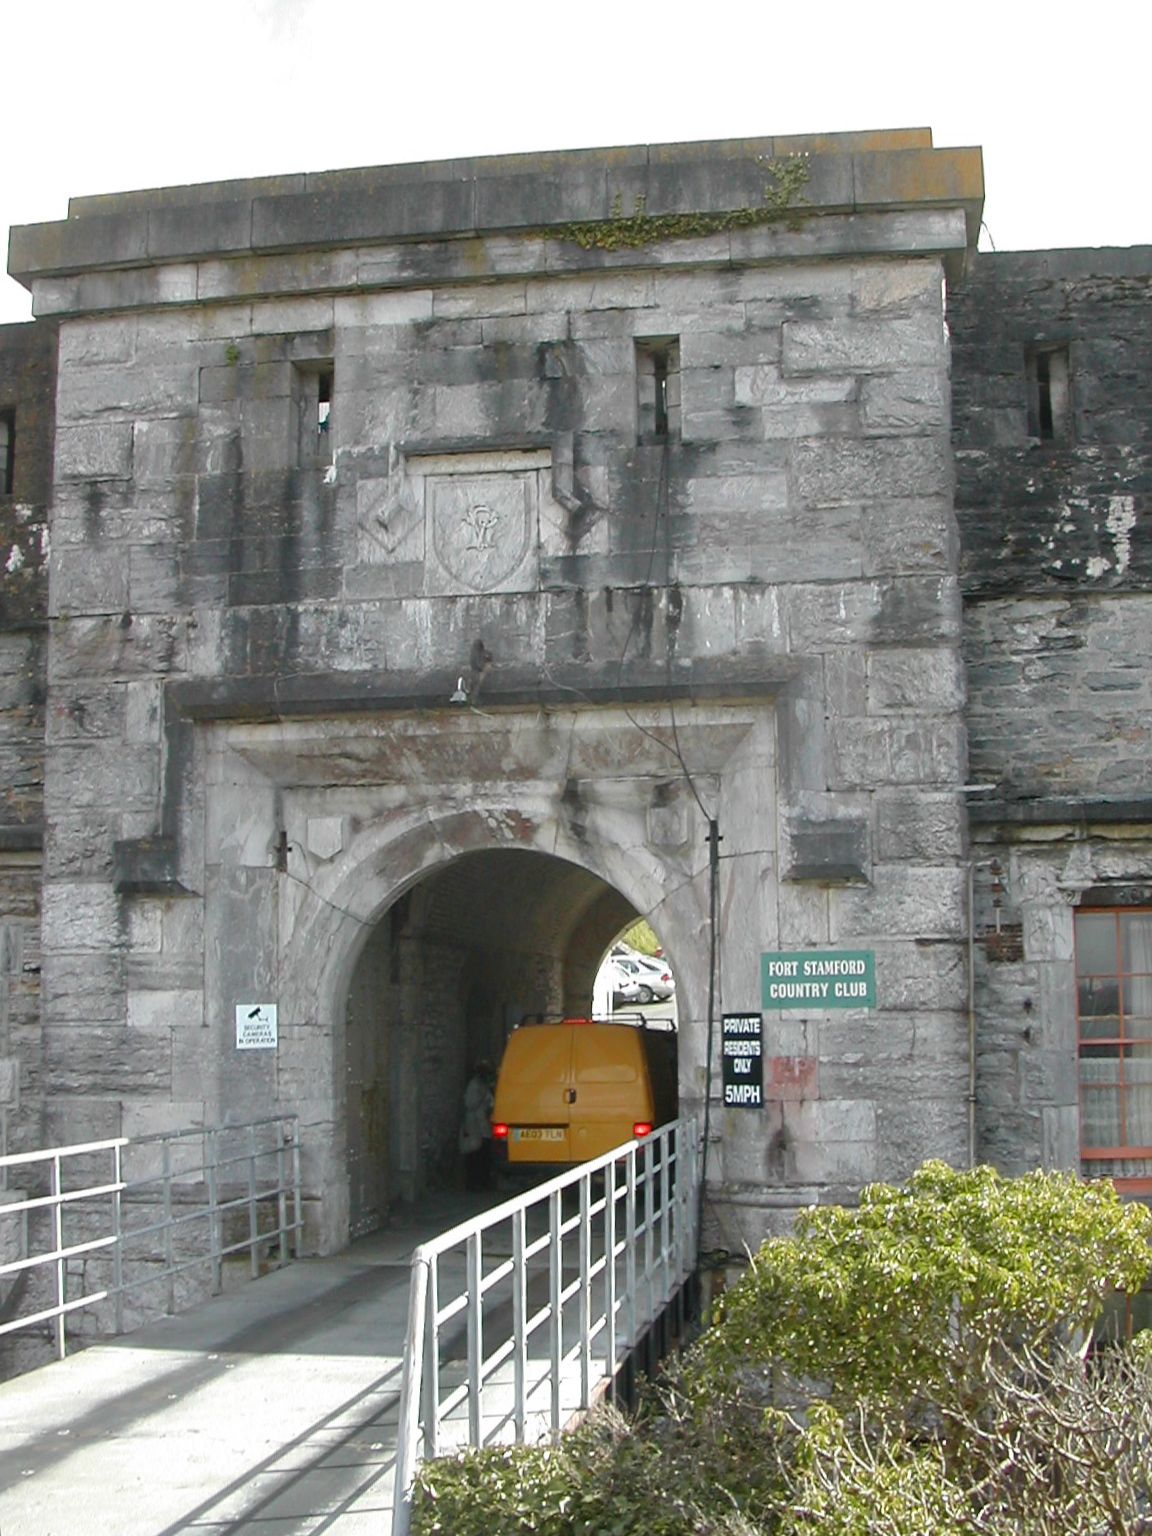
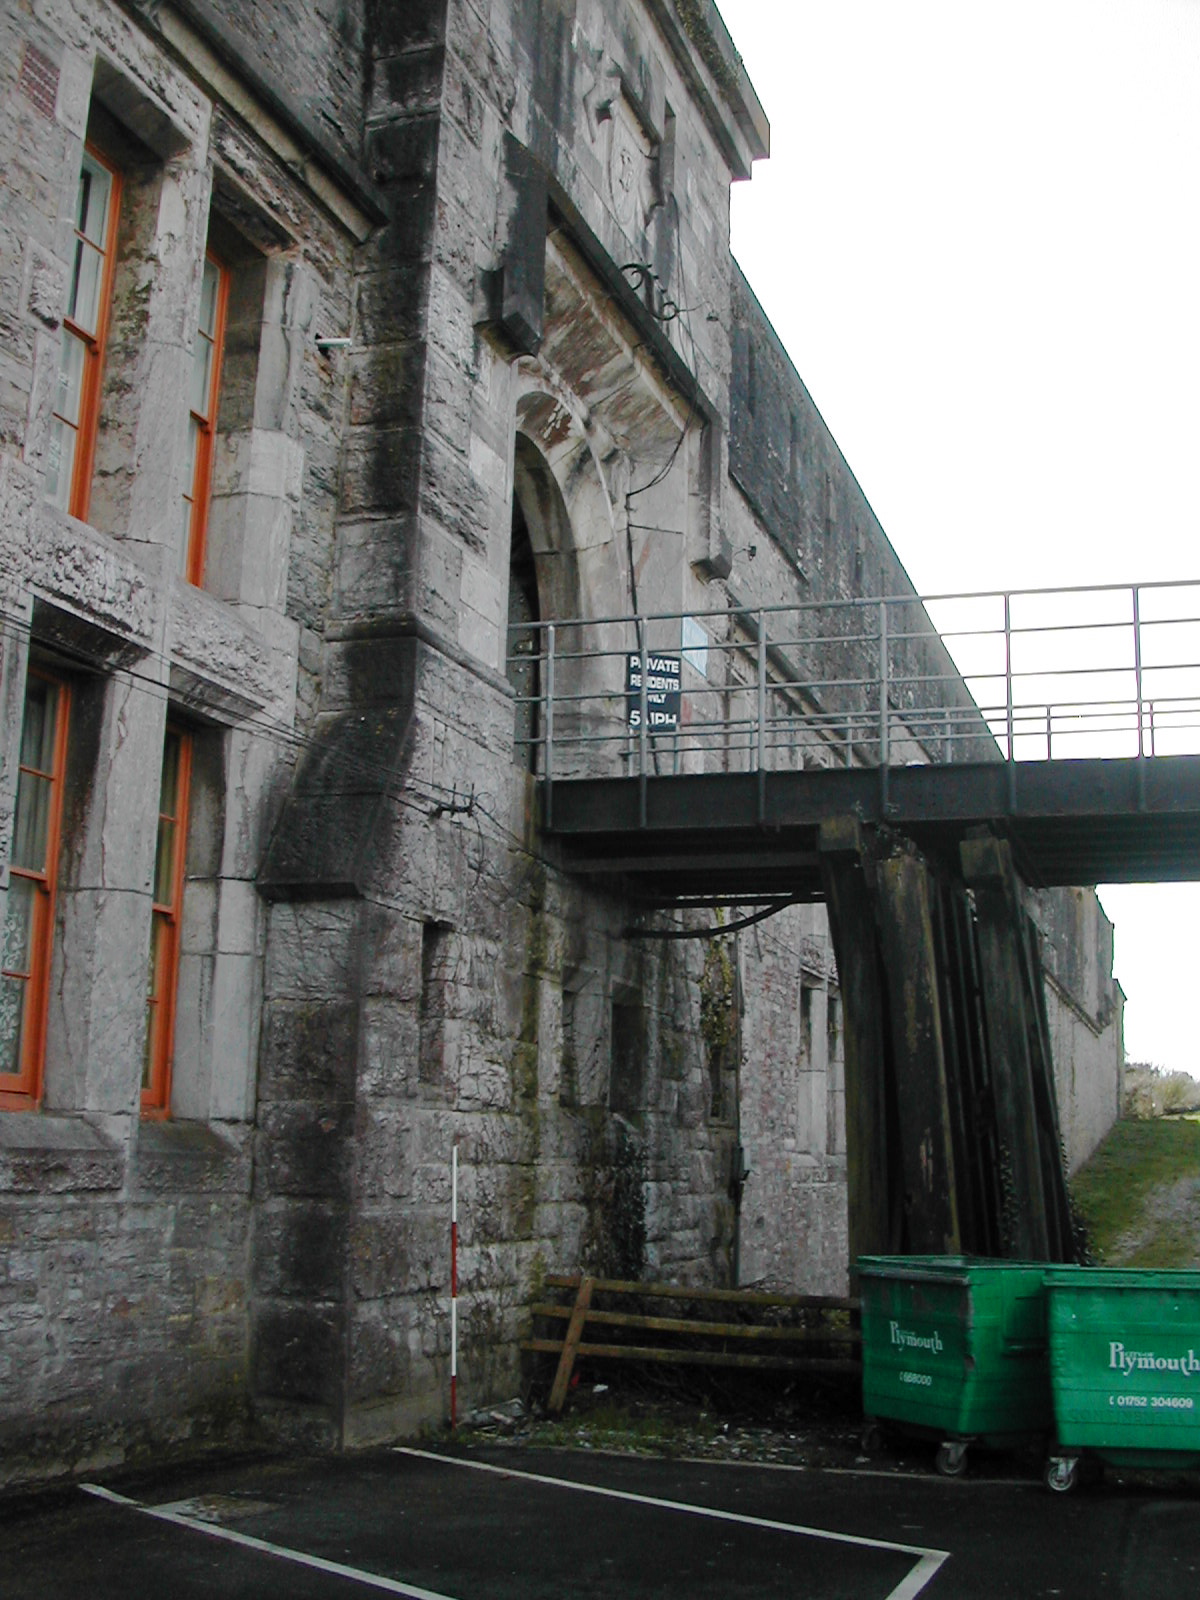
Lying to the north of Fort Staddon, further downslope and considerably nearer to both the Sound and Cattewater Fort Stamford consists of a pentagonal walled enclosure with extensions to the curtain to flank the ditch along the western and south western faces. There is a double caponier on the eastern most angle. This is backed all round by a massive earth rampart into which the relevant accommodation has been 'burrowed'. The terreplein is further divided north - south by a rampart which housed the magazines for the fort. Pevsner and Cherry writing in the 'Buildings of England volume for Devon (1989) are enthusiastic about the fort's architectural pretensions: "It is an extraordinary design with a frontage like a giant's Tudor manor house, with a massive four-centred archway and four openings grouped together as if to form huge mullioned and transomed windows." Today the fort is badged as a 'country club' and is home to a range of chalet style accommodation. A leisure centre is neatly inserted into the eastern ditch. One assumes that some kind of linear work ran from the fort's eastern side down to the water's edge but modern construction has removed all trace if such a thing existed in the first place.
Lying to the north of Fort Staddon, further downslope and considerably nearer to both the Sound and Cattewater Fort Stamford consists of a pentagonal walled enclosure with extensions to the curtain to flank the ditch along the western and south western faces. There is a double caponier on the eastern most angle. This is backed all round by a massive earth rampart into which the relevant accommodation has been 'burrowed'. The terreplein is further divided north - south by a rampart which housed the magazines for the fort. Pevsner and Cherry writing in the 'Buildings of England volume for Devon (1989) are enthusiastic about the fort's architectural pretensions: "It is an extraordinary design with a frontage like a giant's Tudor manor house, with a massive four-centred archway and four openings grouped together as if to form huge mullioned and transomed windows." Today the fort is badged as a 'country club' and is home to a range of chalet style accommodation. A leisure centre is neatly inserted into the eastern ditch. One assumes that some kind of linear work ran from the fort's eastern side down to the water's edge but modern construction has removed all trace if such a thing existed in the first place.
 |
 |
 |
| Fort Stamford, N face looking E | Fort Stamford, NW corner from NW | Fort Stamford, W face looking N |
 |
 |
 |
| Fort
Stamford, S face looking E |
Fort Stamford, entrance from N | Fort Stamford, entrance and bridge from N |
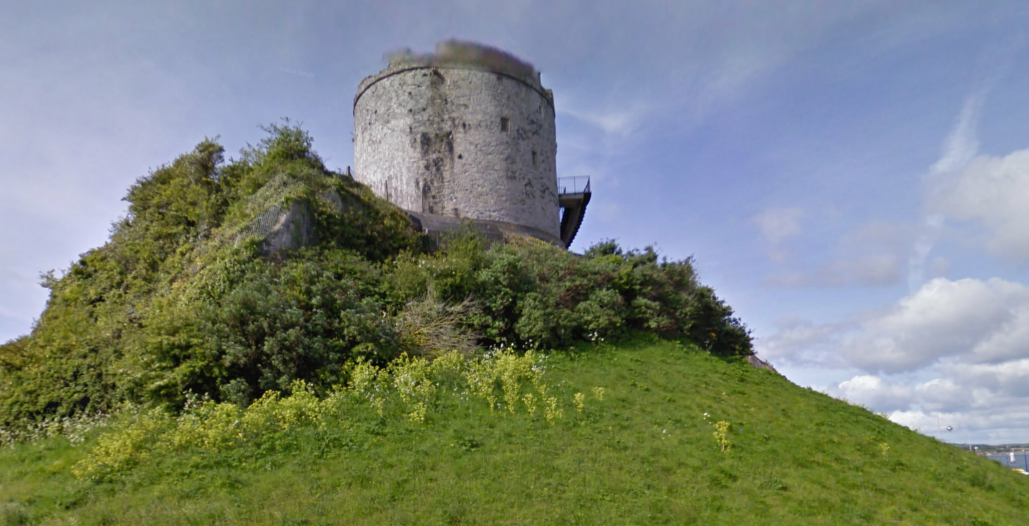
| Mount Batten Tower SX486532 The nineteenth century works superseded earlier defences including Mount Batten Tower which stands on a rocky outcrop overlooking Plymouth Sound to the west and the Cattewater anchorage to the east. Interestingly excavations by Barry Cunliffe in the nineteen eighties revealed a extensive history of occupation based on imported goods dating back to the Bronze age and peaking in the Iron Age. A map of the fortifications from the late sixteenth century showed a 'new bulwark' and 3 artillery pieces. The existing three storey artillery tower was probably erected between 1645-60. It stands 9 metres high and is around 14 metres in diameter with walls roughly 1 metre thick. The parapet has embrasures for ten guns. A slight bank and ditch on the south western side of the headland may represent a Civil War earthwork from the siege of Plymouth during which there was considerable action around the point as the map of 1643 illustrates. The headland is also home to a number of World War installations including two Light Anti-Aircraft gun emplacements and searchlight batteries. The tower is owned by Plymouth City Council and is opened only occasionally. | 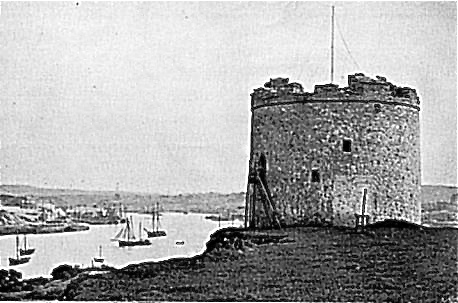 |
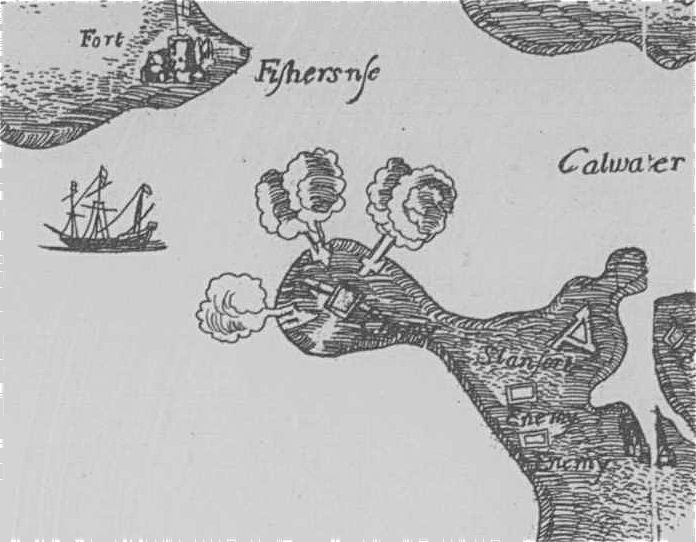
Mount
Batten, Map of the Civil War Siege 1643
Tower from the E

Mount Batten Tower and rock viewed from Citadel to the north, Fort Staddon on the skyline
CLICK HERE FOR A QUICKTIME VIDEO TOUR OF THE STADDON LINE
Stephen
Wass April 2010